

Making Pie Dough By Hand takes just a few steps, but they are all easy. For this recipe, the dough comes together quickly, tastes great, and can be used for any recipe that needs a pie crust. No need to use a store-bought crust anymore!

Want to save this recipe?
Enter your email & I’ll send it to your inbox. Plus, get great new recipes from me every week!
This page may contain affiliate links, please see my full disclosure for policy details. I earn commissions if you shop through the links on this page
I’m one of those strange people who likes the end bits of food. The heels of the bread loaf. The crust of the pizza. Those two end cinnamon rolls that have almost no filling and the crust of the pie.
Don’t get me wrong, the pie filling is important. But for me, the filling is just the precursor to the buttery, flaky goodness of the crust. Luckily getting that buttery, flaky crust is a lot easier than it looks.
Today’s recipe is how to make a flaky pie crust without using a food processor, this is the old-fashioned way.
Don’t forget to pin for later when you have that urge to bake a pie.
Ingredients for a double crust pie recipe
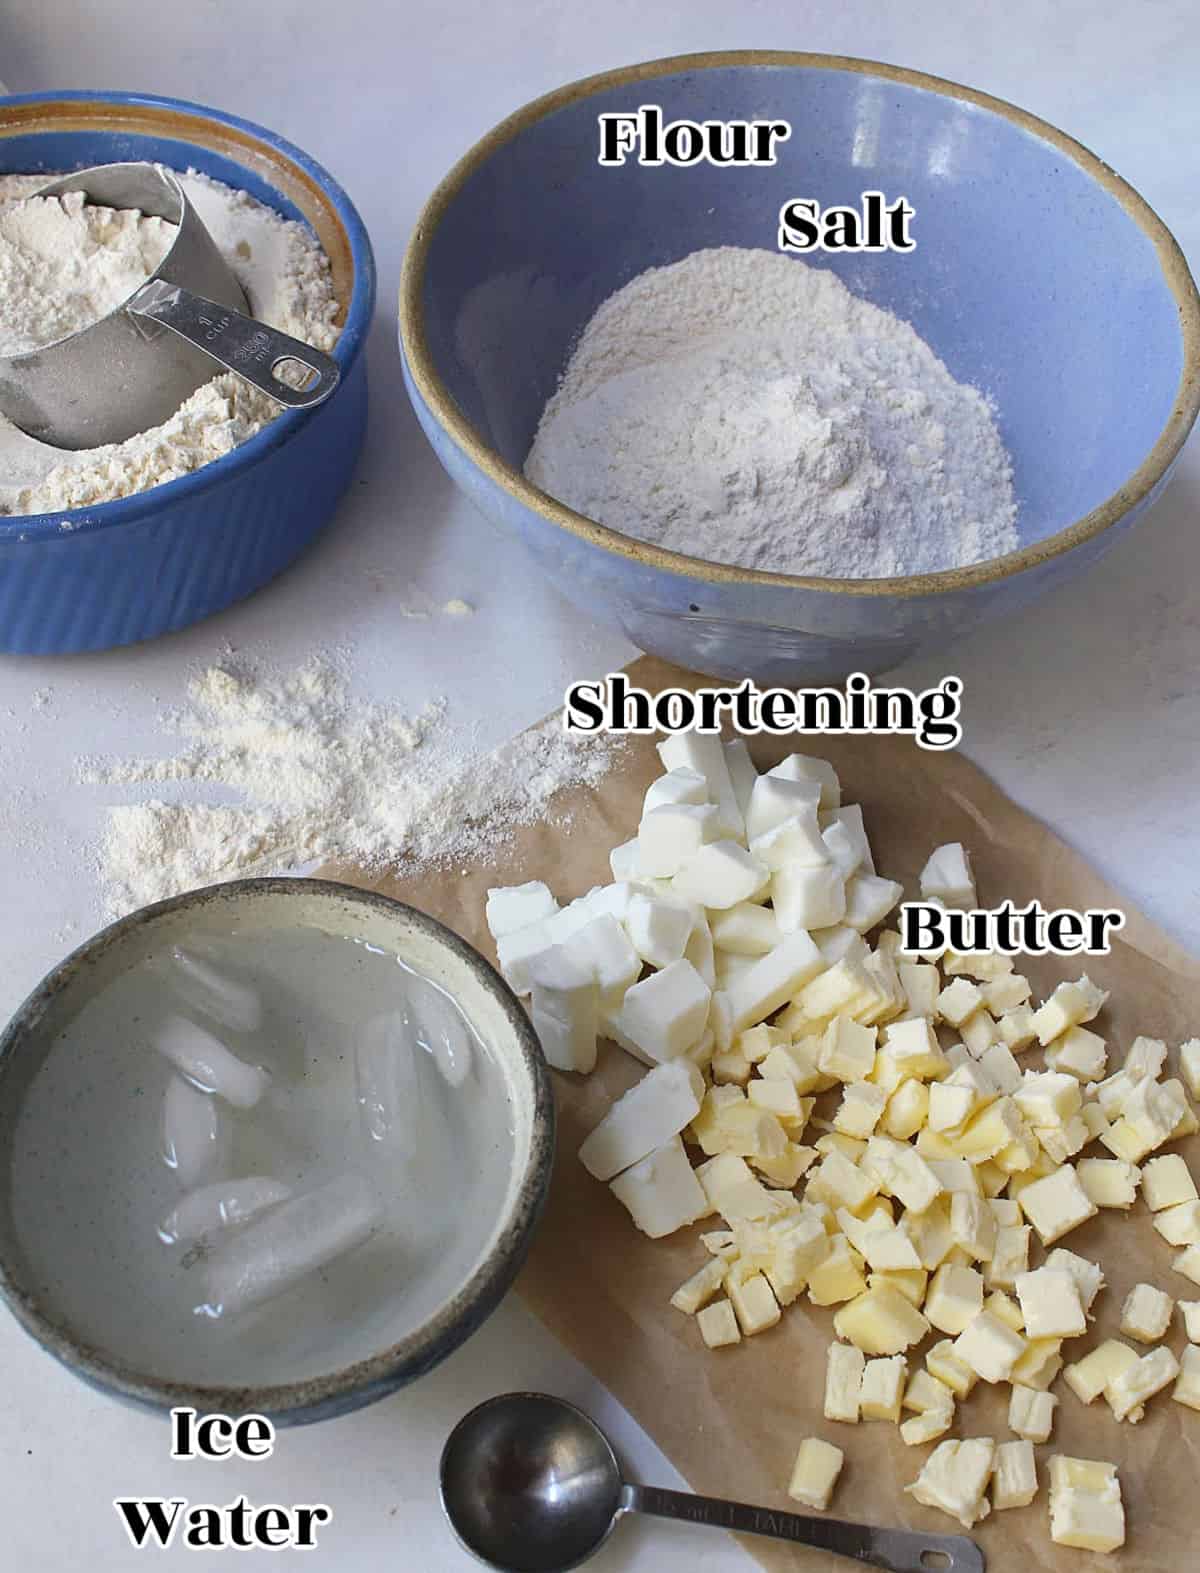
- All-purpose flour
- Salt
- Water
- Fat…which leads us to…
Butter vs Shortening in pie crusts: The debate
- Butter makes your crust taste good (be sure to use unsalted)
- Shortening (like Crisco) makes your crust flaky
- Use half butter and half shortening to get the best of both worlds!
- Need a vegan crust? You can use all vegan butter or shortening in place of the butter. The butter-flavored shortening is a great vegan alternative. Coconut oil tends to melt quickly so this isn’t the best option.
- If you’re wondering which one is best, my guide on butter vs. shortening in pie crusts breaks down the differences and when to use each.
How to make pie dough for a flaky crust
The first step is mixing the flour and salt together in a large bowl.
Mixing: Tips and Tricks
Once you’ve mixed the flour and salt together, it’s time to cut in the fat. Add the cold butter and shortening and chop them down into marble-sized pieces. There are a few ways to do this.
- A pastry cutter
- Two knives – hold one in each hand, cross them, and then pull them away from each other
- Forgo a mixing bowl and throw all the ingredients into your food processor. Pulse the mixture a few times. Some people say this overworks the dough, some say this is the only way.
Adding the water
Use only as much water as you need to bring the dough together. “Shaggy” is the word people often use to describe it. It should just stick together when you roll it out. This recipe takes about 6-7 tablespoons of ice water, but you may need to adjust the water. Sometimes I need to add an extra tablespoon and sometimes 6 tablespoons is just enough.

What do you do after you are done mixing the dough?
- On a lightly floured board, gather all the dough and divide it into two round disks.
- Wrap each round in plastic wrap and place in the refrigerator for 30 minutes. Pie dough can last in the fridge for up to three days.
- At this point, you can freeze this pie dough. Wrap the dough in plastic wrap, make sure it is totally covered, then tightly wrap the dough in aluminum foil. I actually then place the wrapped dough in a plastic bag and store it in the freezer for up to three months.

Keep things cold – why is this important?
- Chilling the dough after mixing allows the gluten in the dough to relax so it is easier to roll and will not shrink as much.
- Since there is water in the dough, chilling allows the water to be absorbed more.
- The butter and shortening in the dough will have a chance to rechill.
- If you are blind baking the crust, re-chill for another 10 minutes before baking.
When you bake your crust, the little pockets of fat in the pastry melt away. You should be able to see pieces of butter or shortening marbled into the crust when you put it into the oven. This creates the flakiness we’re looking for.
To get the perfect crust, do not let the butter melt
Your crust will still taste good but will be closer to a shortbread consistency.
- Keep the butter in the fridge until you are ready to cut it in. I leave mine in the freezer.
- Freeze your shortening. I actually store the entire can in the freezer, but you can also just freeze the portion you need for 15 minutes or so before you start your crust.
- Add a couple of ice cubes to your water before you measure it out
- Don’t overwork the dough when rolling it out, especially on a hot day.
- Put the dough in the fridge or freezer for a few minutes before it goes into the oven.
Now you’ve got the basics! Don’t worry if it sounds complicated. Pie crusts are very forgiving. Got impatient and added too much water? Let your butter melt a little too much? Overworked the dough? No worries! Add some delicious filling and no one will notice.
How to roll the chilled dough
Chilled dough is too cold to roll immediately, so just place the dough on a lightly floured surface and let sit for about 10 minutes so the dough will soften enough to roll.
I prefer using a pastry cloth for rolling all my dough. After I roll the dough just scrape the cloth with a bench scraper to clean it up then roll the cloth up, put it in a plastic bag, and store it in the freezer.

Flour the rolling pin and roll the dough into a round, it helps to make several small turns of the dough as you are rolling. The dough circle should be 2-3 inches larger than your pie plate. Just sit your pie plate on top of the dough to see if it has been rolled big enough to fit in the plate.

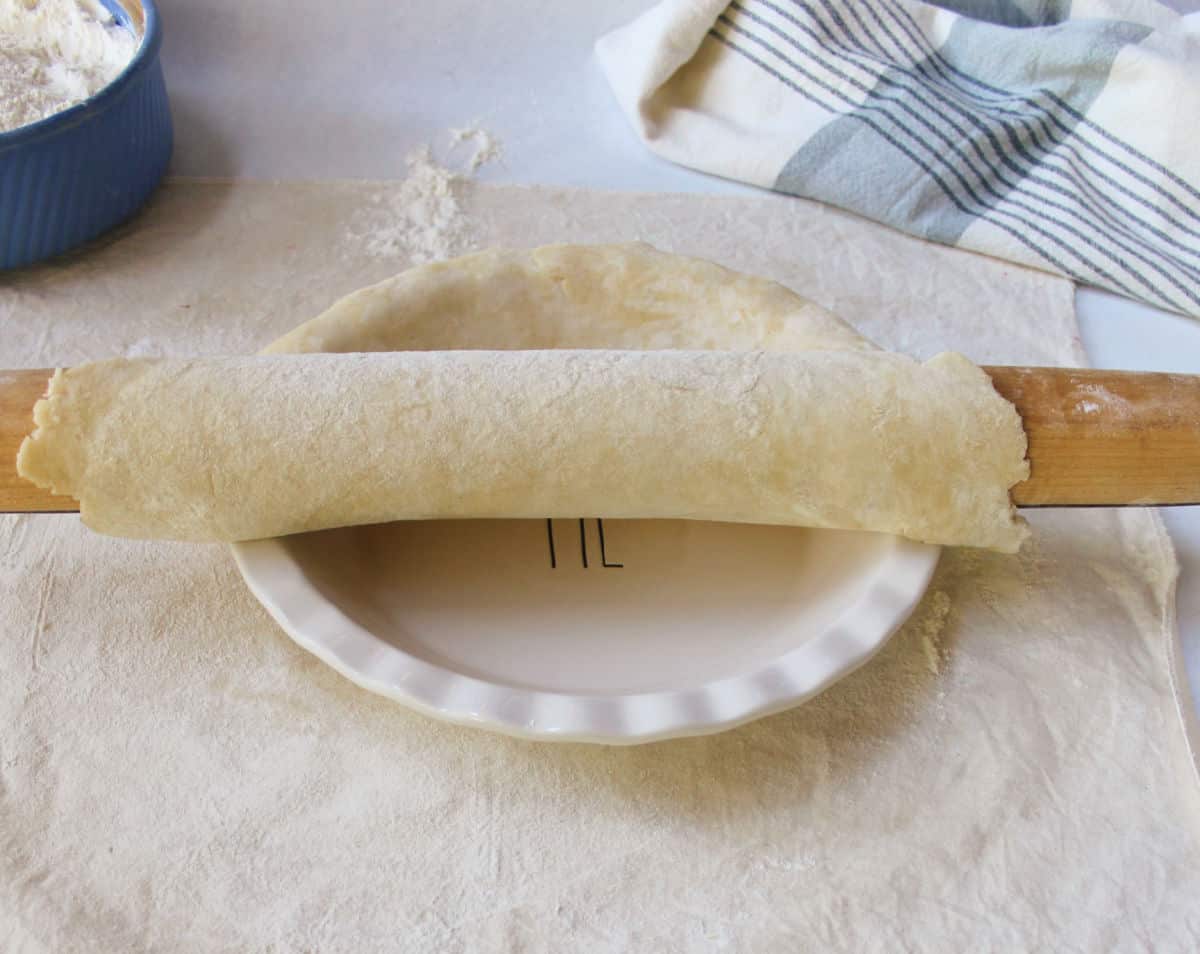
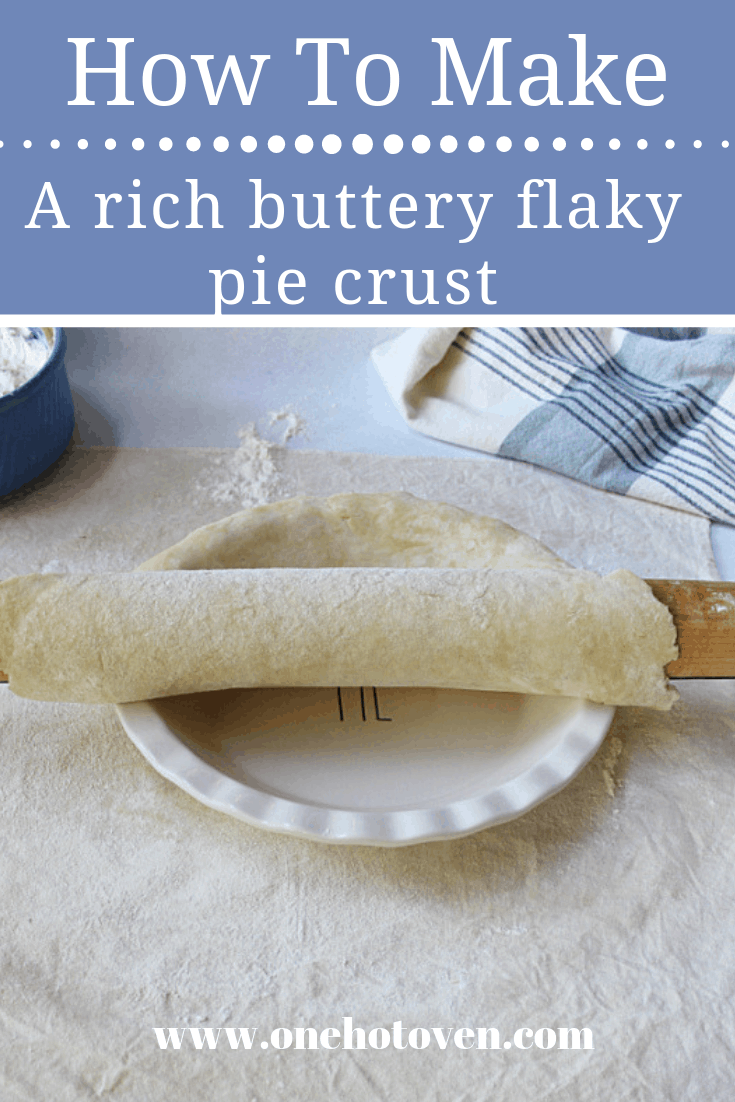
Roll the dough around the rolling pin to transfer it to the pie plate.

Place the rolling pin over the pie plate, then unroll the dough into the pie plate.
After the pie dough is in the dish, lightly press the dough into the sides.

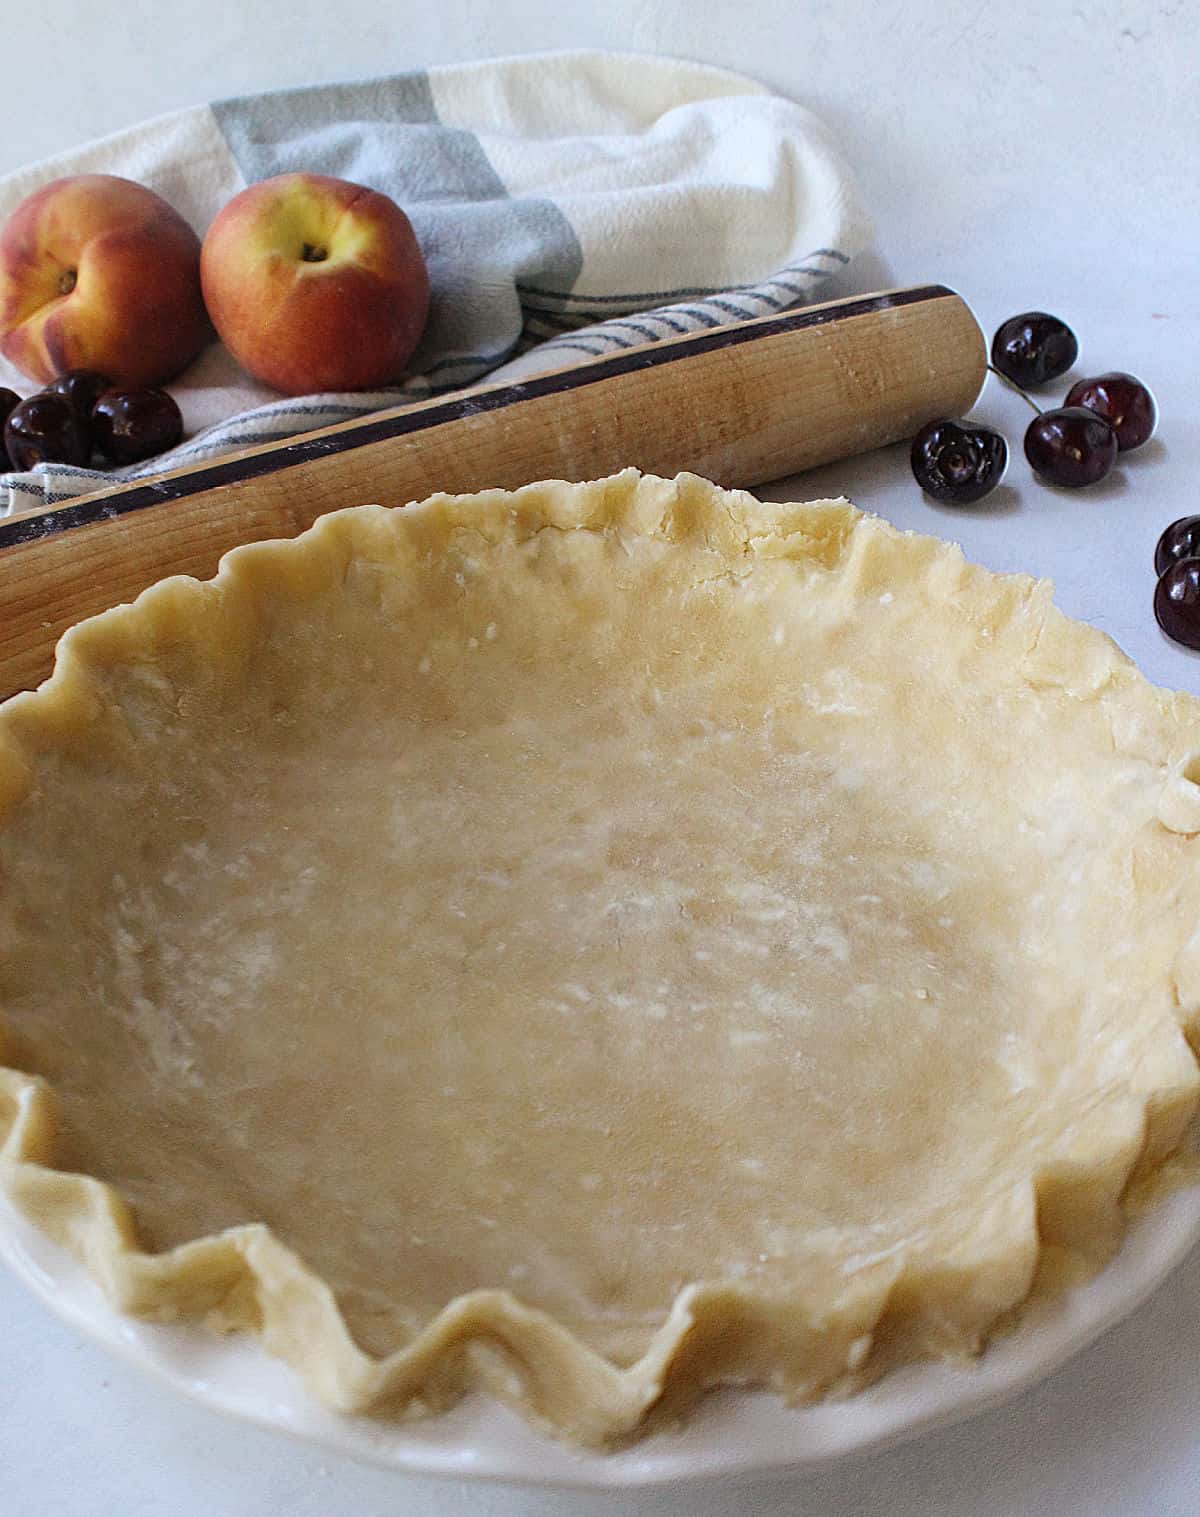
Finish the dough off by cutting the excess dough from the edges, leaving 1/2″. Roll the 1/2″ of the excess dough on the rim of the pie plate then crimp the edges.
Pie crust edges can be tricky, for this edge just make a quick ruffled edge by pressing my index finger down on the inside of the edge of the dough while using my finger and thumb on the other hand to pinch the outside edge of the dough.

This crust is ready for your filling. You don’t have to use this pie dough in a pie pan, the dough is perfect for tarts, galettes, and hand pies.
Now that you have your unbaked pie crust ready you have the option of blind baking the dough for cream pies or other pies that need a prebaked crust. Here are the instructions for How to Blind Bake a Pie Crust which is used for this Butterscotch Pie Topped With Meringue. For fruit or custard pies add your filling and bake as directed like this Pecan Bourbon Pie.
I am sure if you make pie dough, you will have scrapes, don’t throw these away because there are leftover pie dough recipes like these Pie Crust Tarts that will put those scrapes to good use.
Variations
Once you’ve got the recipe down, try mixing it up.
- I like to add cinnamon to crusts for my apple and peach pies.
- You can replace the water with Greek yogurt.
- Sub out some or all of the flour with almond flour for a textured, nutty crust.
- For a chocolate crust, replace two tablespoons of flour with cocoa powder (the cocoa powder will melt a little, though, so this works better on cooler days).
- British recipes often replace the water with a beaten egg for a richer crust.
This recipe can also scale up or down. As is, it makes enough for one double-crust pie and a couple of jelly tarts. I halve it for a single pie crust dough, perfect for custard pies that don’t need a top crust. Or I’ll double it if I know I’ll be making several pies in the next month. Just portion it out and stick it in the freezer, where it will keep for up to a month.
Pie dough questions
Either you added too much flour, or you didn’t add enough water. If your dough does not hold together before you roll it, add additional water 1 tablespoon at a time until the dough comes together.
You want the pie dough to be moist but not so moist it becomes sticky and you can’t roll it out even on a floured surface. You can add just a bit of extra flour, but too much flour will result in a tougher crust.
1. Always add the water in 1 tablespoon at a time until the dough comes together. You may not need all the water the recipe calls for.
2. Make sure your dough is very well chilled. If the butter/shortening melts, it can make the dough sticky.
3. Try rolling the dough between pieces of parchment paper; this way, the dough can’t stick to the rolling pin.
More pie recipes to bake
- Have leftover pie dough? Make these Pie Tarts filled with Jelly. These are a family favorite treat.
- Have you ever made a galette? This Apple-Cranberry Galette is a free-form pie that is quick and easy to make. No pie plate is required.
- How about more pie crusts like this Graham Cracker Crust or a Simple Tart Dough?
- And if you have ever had to Prebake A Pie Crust you can get the instructions with this recipe.
More delicious recipes

Subscribe here for more great recipes, and follow One Hot Oven for more tasty sweet and savory recipes! Pinterest | Instagram | Facebook

How To Make A Flaky Pie Crust
Equipment


Ingredients
- 2 ½ cups AP flour
- 1 teaspoon salt
- ½ cup unsalted butter cold
- ½ cup cold vegetable shortening
- 6-7 tablespoon ice water
Instructions
- Mix your flour and salt in a large mixing bowl.
- Using knives or a pastry cutter, cut the butter and shortening into the flour mixture. The butter and shortening should be about the size of a fingernail, or slightly smaller.
- Add water a couple of tablespoons at a time and mix with a fork. The dough should start to come together in a shaggy ball. The dough should be wet enough to hold together without cracking.
- Divide your dough into two disks and wrap in plastic wrap. Store in the refrigerator for one hour before use.
- The dough can keep in the refrigerator for up to 3 days and the freezer for up to 1 month.
Baking Instructions for Blind Baking
- If you need to prebake the pie crust please see the full set of instructions for Blind Baking Pie Crusts. It is important that the dough be weighted down while baking and then docked.
- The oven temperature is 375° 'F and the weighted pie crust is baked for 20 minutes, then the weights are removed and the crust is docked, then bake the crust for 15 minutes until golden brown
Baking Instructions for Pies
- Please refer to your pie recipe for the correct temperature for baking. It is usually between 375° F and 425° F.
Notes
As an Amazon Associate I earn from qualifying purchases.
Nutrition
First published: July 30, 2019; last updated: August 23, 2022, for better readability.
Thank you for stopping by the One Hot Oven blog. Please leave a comment to say hello or tell me what you are baking; I always love hearing from fellow bakers. Have any questions or want to chat about the recipe? Please visit my About page for information, and I’ll be happy to help!
About Jere’
From learning to cook on a farm in Indiana to culinary school in California, my passion for food is never-ending. Turning on my oven to bake something for friends and family is my happy place, and I am glad to be here at One Hot Oven sharing sweet and savory family-friendly recipes for your cooking and baking inspiration.


Pie crust is so intimidating for me but your step-by-step instructions made it so easy!! I’m excited to make some pie this Thanksgiving. Thanks so much!
I have been looking for a good flaky pie crust recipe, and this one is perfect! Thank you!
Thanks for letting me know. This is such a simple recipe that always comes out perfect.