
Are you a cream pie lover, like lemon meringue or chocolate cream maybe? These pies are a favorite to make but the one really important thing you need to make a cream pie is a baked pie crust. Most cream pie fillings are poured into a baked pie crust and that is what today’s blog post is about. There is a name for prebaking a pie crust and this post is all about How To Blind Bake Pie Crusts.

Want to save this recipe?
Enter your email & I’ll send it to your inbox. Plus, get great new recipes from me every week!
This page may contain affiliate links, please see my full disclosure for policy details. I earn commissions if you shop through the links on this page
Today I am sharing the good, bad, and ugly truths around making this crust.
Blind baking is a very old technique for baking a pie crust without any filling
The technique for blind baking or some call it pre-baking, is not hard but there are several steps to take for success so you can make a pie crust without shrinking.
Why blind bake crusts
- If you are making a no-bake pie, such as a cream, custard, or pudding pie, you need a pre-baked pie crust.
- For some pies, it is necessary to partially bake the pie crust before adding the filling. You will use this technique, but just bake the crust for less time.
The goal is to create that perfect golden-brown crust that holds its shape
- Pick a pie plate that has a lip around the edges so the pie crust has something to adhere to
- I prefer using half butter and half shortening in the crust. The butter adds great flavor, and the shortening helps the crust keep its shape.
- Chill the pie crust before baking.
- Because the fat melts in the dough as it bakes and creates steam in the dough that will cause the dough to shrink and bubble up during baking so use some type of pie weight such as rice, beans, lentils, sugar, or pie weights to weigh down the pie crust.
- Dock the pie crust halfway through the baking to let steam escape
What happens if you don’t weigh down the pie dough during baking? I can almost guarantee that the pie crust will bake into some odd-shaped, puffed up, or a weird-looking crust.
This pie crust just went in the oven without chilling and without weights. It’s just not pretty, the sides collapsed and the crust shrunk and bubbled up on the bottom.

This crust was chilled and it looks a bit better, but since the crust was not weighted down or docked it bubbled up. You could still use this but when you go to cut your pie, all those bubbles in the crust will collapse from the weight of the filling and your pie slice will be one big ugly mess.
Now that you have seen what not to do let’s look at the right way to blind-bake a pie crust. Don’t let these steps intimidate you. They are all easy.
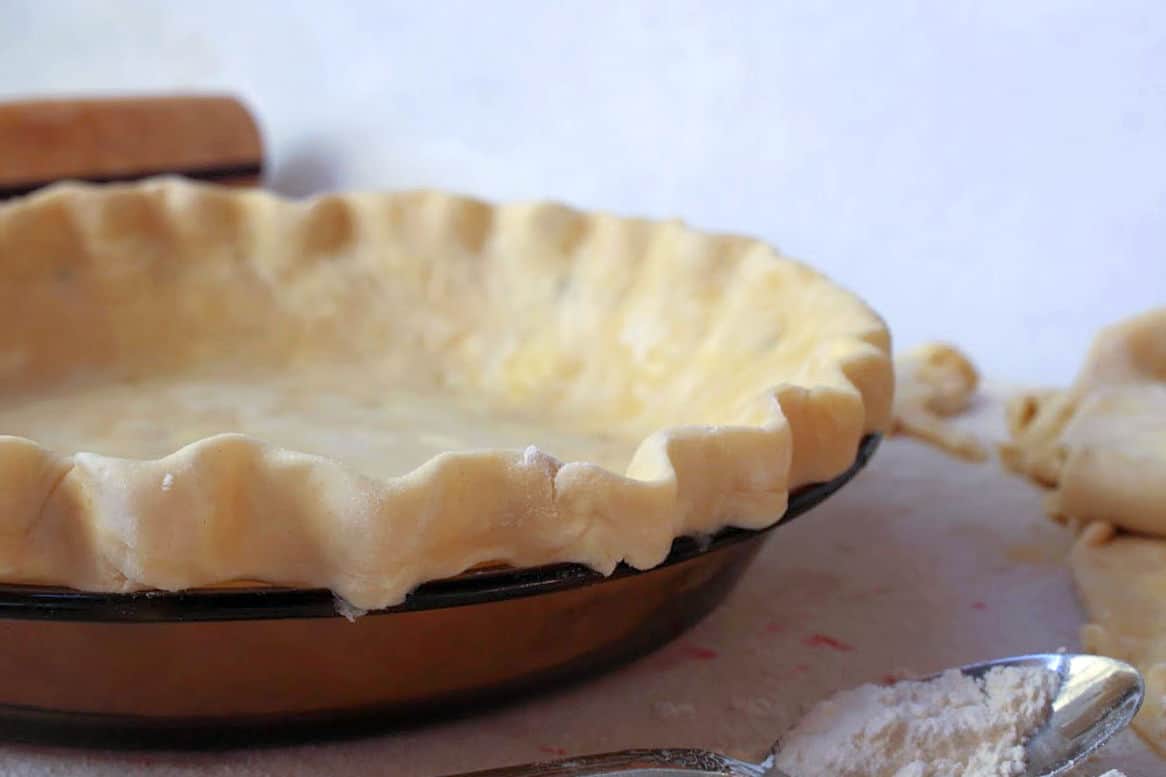
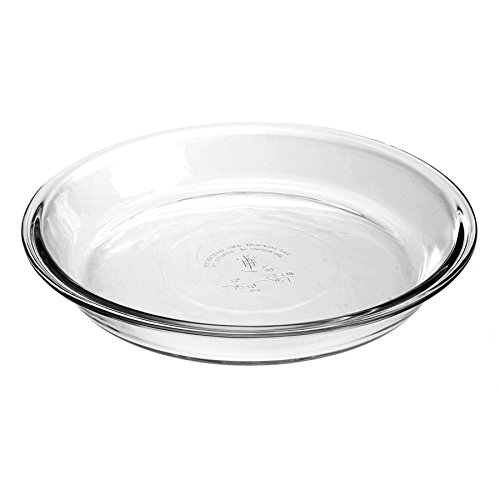
The pie plate: for cream pies, you usually do not use a deep-dish pie plate. I use the basic cream pie plate that is 1.25″ high. Just make sure your dough recipe is the right size for the plate. The pie plate should have a nice edge on it so when you crimp the pie dough it adheres to that edge.
The dough: For most of my pies, I use half butter and half shortening for two reasons: I like the taste, texture, and flakiness of the dough. For blind baking, this dough holds its shape better than an all-butter dough since the shortening doesn’t melt as fast as butter. This is not to say you can’t use an all-butter dough; it’s your preference.
Chilling the dough: This is a must. After you put the dough into the pie plate, just pop it into the fridge for a half-hour. Your dough will be happy, and so will you, when you pull it out of the oven and it’s held its pie shape.
Pie weights: Weighing down the pie crust while it bakes keeps the crust from bubbling up and falling over. My preference is rice but you can use beaded pie weights, beans, lentils, or even sugar. Line the pie crust with parchment paper then fill the cavity with your desired weights. Don’t throw the rice away, you can actually cook it or store for another pie.
My thoughts on using beaded pie weights – I prefer to use rice or sugar. Beaded pie weights are expensive, and you will see in this post that I like to fill the whole pie crust with weight, and if you use the beaded pie weights, that will take several of them.
Docking the crust – To release the stem that is under the pie crust, you need to dock the crust by taking a fork and poking the half-baked crust with the tines. Do this all over the bottom and the side. You will dock the crust mid-way through baking and after removing the weights.
How to blind bake a pie crust
Step 1. The chilled pie dough is crimped on the edge of the pie plate.
Step 2. Place the parchment paper in the pie shell all the way to the top of the crust

Step 3. Fill the pie shell with rice, or your desired weight. I fill the shell almost full and into the crimped edges of the crust.

Step 4. Bake for 20 minutes at 375 degrees F. After that time, remove the rice and parchment. Here is the partially baked pie shell after the rice is removed.

Step 5. Next, dock the partially baked pie shell on the sides and bottom with a fork.

Step 6. Return the crust to the oven and bake for 15 to 20 minutes until golden brown.
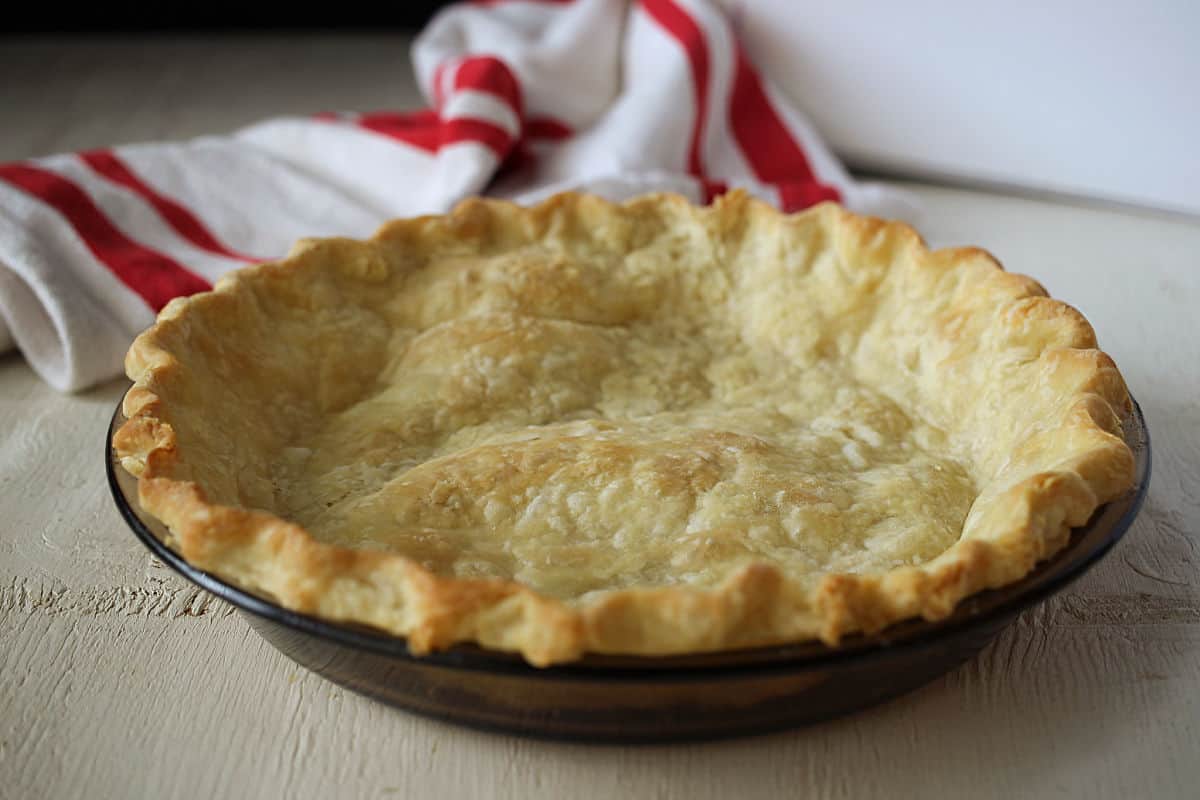
Here is the blind-baked pie shell…all done.
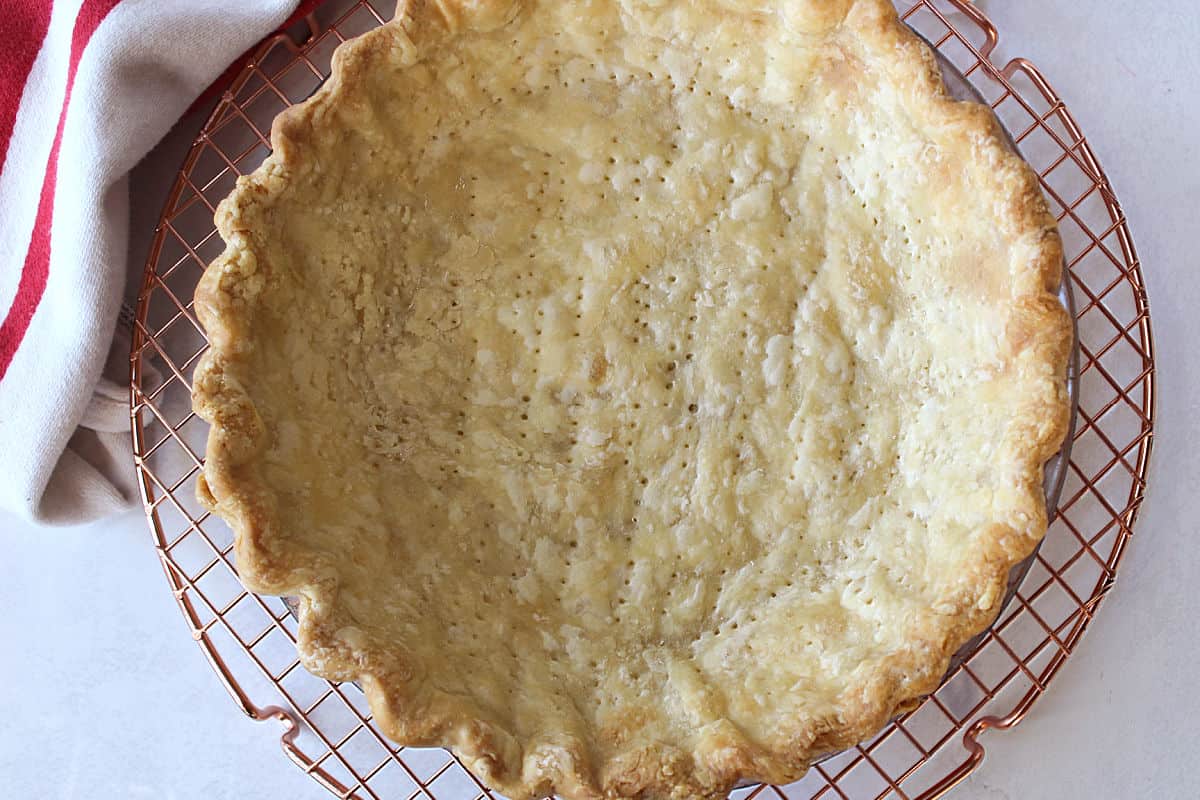
This is how your baked pie shell should look after chilling, weighing, and docking. The crust held its shape with no bubbles. It is flaky and nicely browned, perfect for a luscious cream filling.
I just made Grandma’s Butterscotch Meringue Pie and used this pie shell. It came out perfect.
Here’s my favorite recipe that is easier to make than a pie: try this Apple Galette with Cranberries. It’s quick and easy and very adaptable to so many other fruits.
One important tool when making pie dough is the rolling pin. I love, using a French wooden rolling pin. The tapered ends give you more control when rolling dough. And, don’t forget your pie plate.
Don’t forget to Pin for later
If pies are your thing, here are more One Hot Oven Pie and Tart Recipes
- This rich Shortcrust Dough Recipe is perfect for making all kinds of tarts, from creamy and sweet to savory.
- Homemade Graham Cracker Pie Crust is simple and tasty with just a few ingredients.
- Try this chocolate shortcrust dough for a change.
More Pie Dough Recipes

Subscribe here for more great recipes, and follow One Hot Oven for more tasty sweet and savory recipes! Pinterest | Instagram | Facebook

Single Flaky Pie Crust with Blind Baking Instructions


Ingredients
Single Crust Pie Dough
- 1 1/2 cups AP flour
- 1/2 tsp. salt
- 1/4 cup butter cold and cubed
- 1/4 cup solid shortening cold
- 4-5 tablespoons ice water
Pie weights
- rice, dried beans, lentils or sugar enough to fill the pie shell
Instructions
- Combine the flour and salt in a bowl.
- Cut in the cold, cubed butter and the cold shortening using a pastry cutter or two knives until the mixture resembles coarse crumbs.
- Add one tablespoon of water at a time mixing with a fork until the dough is moistened and comes together. You do not want a wet sticky dough or a dry dough.
- Form the dough into a ball, wrap in plastic and chill for 30 minutes before rolling.
- Roll the dough on a floured surface into a 12″ circle to fit your pie plate.
- Chill the dough for 30 minutes before baking.
Weighting the pie dough
- Cut a piece of parchment paper to fit inside the pie dough that is in the pie plate. Let the edges of the parchment hang over the edge of the pie plate. You can cut the excess later.
- Fill the shell of the pie dough with rice or dried beans all the way to the top of the crust even into the crimpled edges as long as the parchment paper is covering the dough. Doing this will keep your crust from getting misshapen and bubble up during baking.
- Bake the crust for 20 minutes in a 375° F oven. This will partially bake the crust.
- Remove the pie plate from the oven and carefully scoop out the rice, then gently pull out the parchment paper. You can keep the rice and reuse it.
- Using a fork, start poking the fork tines into the pie dough all around the bottom and the sides. This is called docking and it will allow the steam from baking escape so the pie browns.
- Return the pie plate to the oven and bake for 15 – 20 minutes, until the crust is nice and golden brown.
- Your pie crust is now ready for a delicious filling
Notes
As an Amazon Associate I earn from qualifying purchases.
Nutrition
Follow One Hot Oven
Like what you see? Make sure you are following One Hot Oven for more tasty sweet and savory recipes!
Pinterest | Instagram | Facebook | Twitter |
Thank you for stopping by the One Hot Oven blog. Please leave a comment to say Hello or just let me know what you are baking these days, I always love hearing from fellow bakers.
Have any questions or just want to chat about the recipe? Contact me here, and I’ll be happy to help!
About Jere’
From learning to cook on a farm in Indiana to culinary school in California, my passion for food is never-ending. Turning on my oven to bake something for friends and family is my happy place, and I am glad to be here at One Hot Oven sharing both sweet and savory recipes with all my baking friends.


It worked! Loved your very patient walk-through of this process–never find it all in one place when Im doing a recipe. Btw, if you happen to have a jar of coins, dishwasher cleaned, you can use them as weights–did that one day ‘when all else failed’ and now I use them all the time! (encourages saving too – lol!) Thanks so much-happy summer. barb.
Glad this post helped, and what a great idea to use coins as weights. Thanks for that great tip!
Wow The crust turned out so beautiful! Thank you for all the tips. Can’t wait to make my banana cream filling.
Wow The crust turned out so beautiful! Thank you for all the tips. Can’t wait to make my banana cream filling.
omigosh these tips are sooo helpful! Hopefully next time I blind bake a crust it goes better now lol
Glad the tips were helpful.
Great tips, they were super helpful and I wouldn’t have been able to make it correctly without
Hope these tips help.
Lots of great helpful tips here. I think I am going to make a chocolate pie at the weekend.
Hope it comes out perfect.
Lovely and tasty crust recipe. Surely a must try this Easter. Thanks for the info.
Your tips are very much appreciated! Thank you! That is one good looking pie crust 🙂
Thanks so much. Glad you liked the tips.
Great tutorial on blind baking. The crust looks perfect.