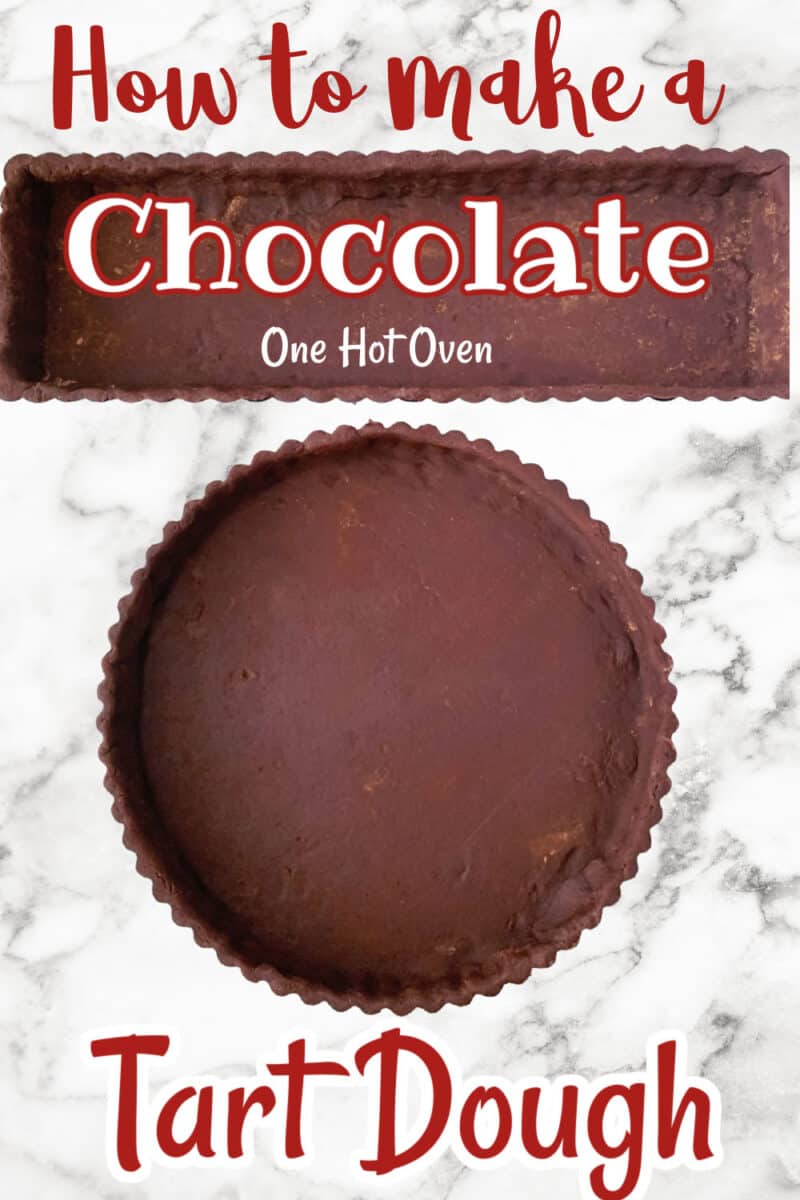
Add this Chocolate Tart Crust to your recipe box; it’s simple to make and tastes amazing. This shortcrust is buttery rich and perfectly crispy with a deep chocolate flavor.
Want to save this recipe?
Enter your email & I’ll send it to your inbox. Plus, get great new recipes from me every week!
This page may contain affiliate links; please see my full disclosure for policy details. I earn commissions if you shop through the links on this page.
Today, we are making a Chocolate Pâte Sablée, which is the extra fancy name for a chocolate tart shell. And, just in case you are confused, this tart is also called a rich shortcrust pastry, shortbread crust, shortcrust, or just a crust. No matter what, this dough is easy to make.
What is a Pâte Sablée?
Sablée translates to “sandy” which describes the texture of the dough.
This is a rich, sweetened dough that contains egg yolk. The method to make this tart dough is similar to a pie dough where you cut butter into flour, and for this recipe cocoa powder, along with the yolk, then mix in the cream.
You can make a plain Shortcrust Tart Dough using this recipe.
The texture of a baked Pâte Sablée is just slightly crumbly and tender, with a melt-in-your-mouth texture. This is very similar to our favorite Dark Chocolate Shortbread Cookies or these very citrusy Lemon Shortbread Cookies.
Chocolate Shortbread Crust Ingredients
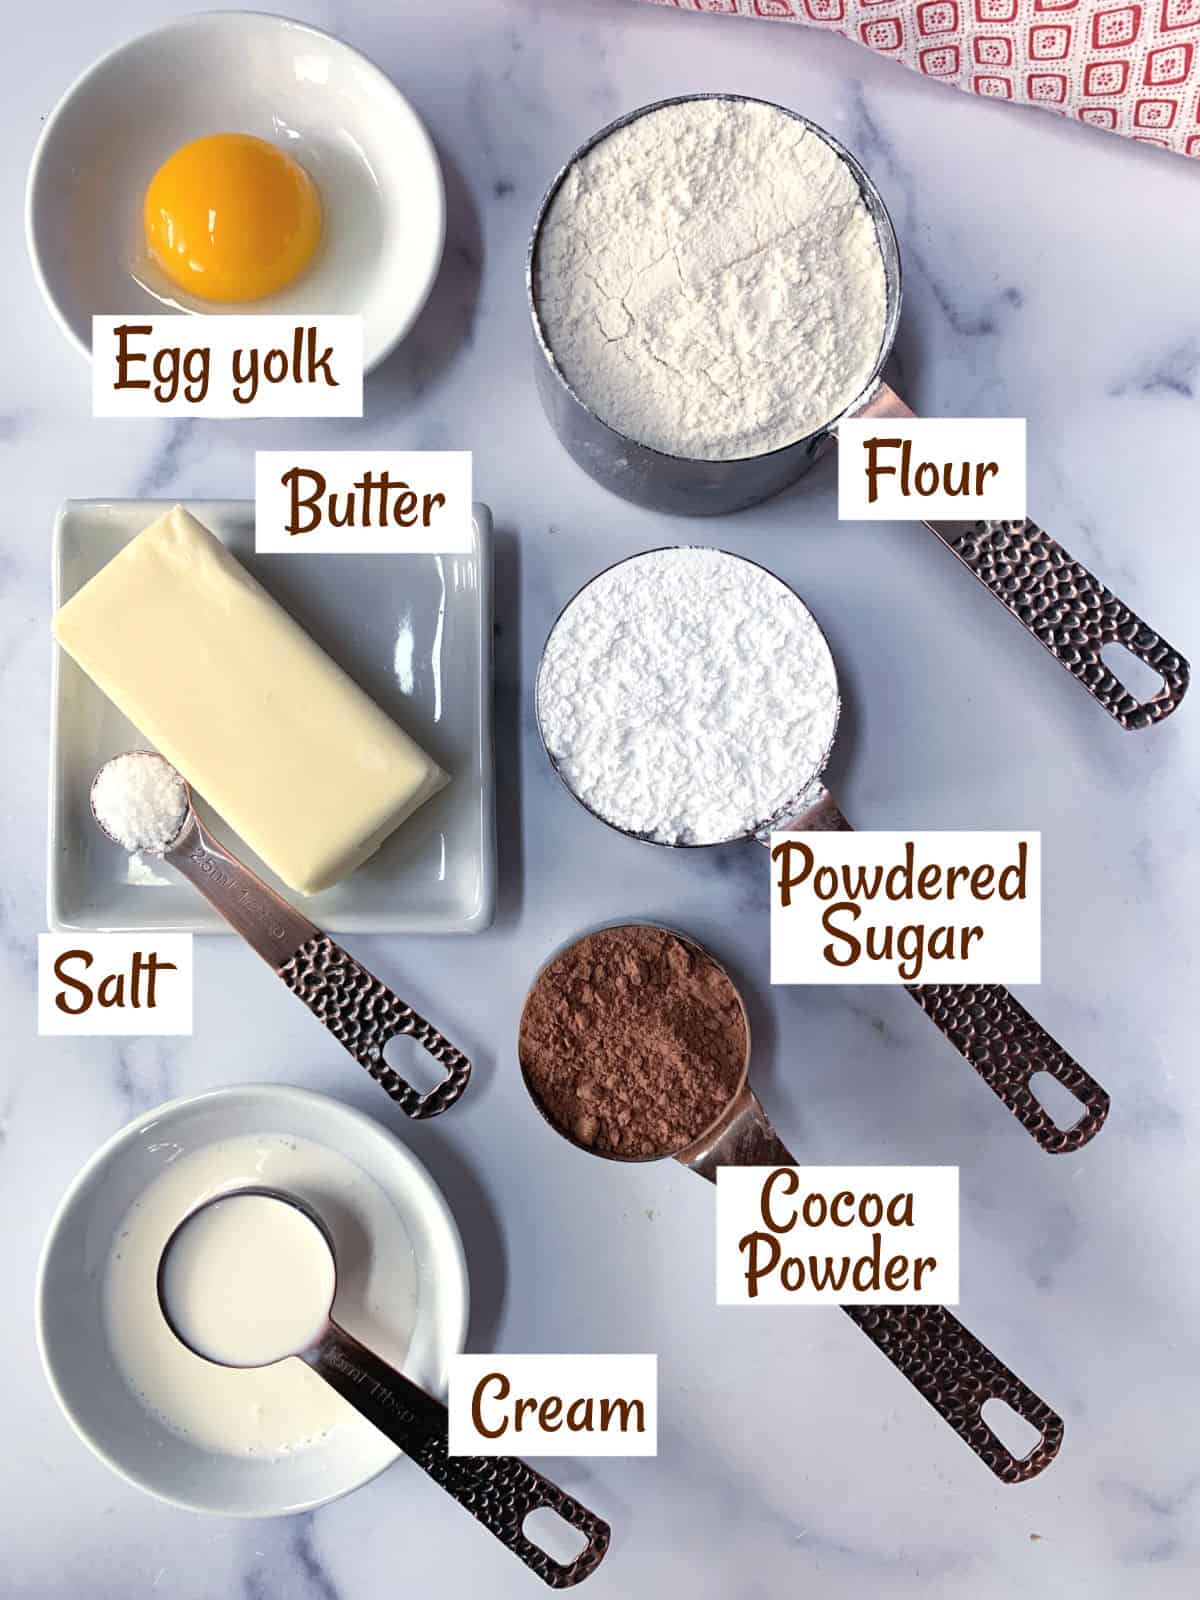
Notes on the ingredients
- Flour – For this crust, all-purpose flour is readily available and works well in this recipe.
- Powdered Sugar -Also known as confectioner’s sugar or icing sugar. Powdered sugar contains a small amount of cornstarch, which helps create a lighter, tender crust than using granulated sugar. Using just granulated sugar creates a more crumbly crust.
- Butter -This tart is all about great butter flavor, and I prefer to use unsalted butter since I add salt to the recipe. Cube this butter and keep it cold.
- Egg -Using the egg yolk adds richness to the dough and also helps bind the dough. You can use the whole egg, but then reduce the amount of cream you add.
- Cocoa Powder—Make sure to use good, unsweetened quality cocoa powder; after all, this dessert is about chocolate.
- Heavy Cream – This adds just an extra bit of richness to the dough and, in the end, helps bring the dough together. Half and half can be substituted.
Let’s make a tart
Making the dough
Note – This dough needs to be chilled before baking
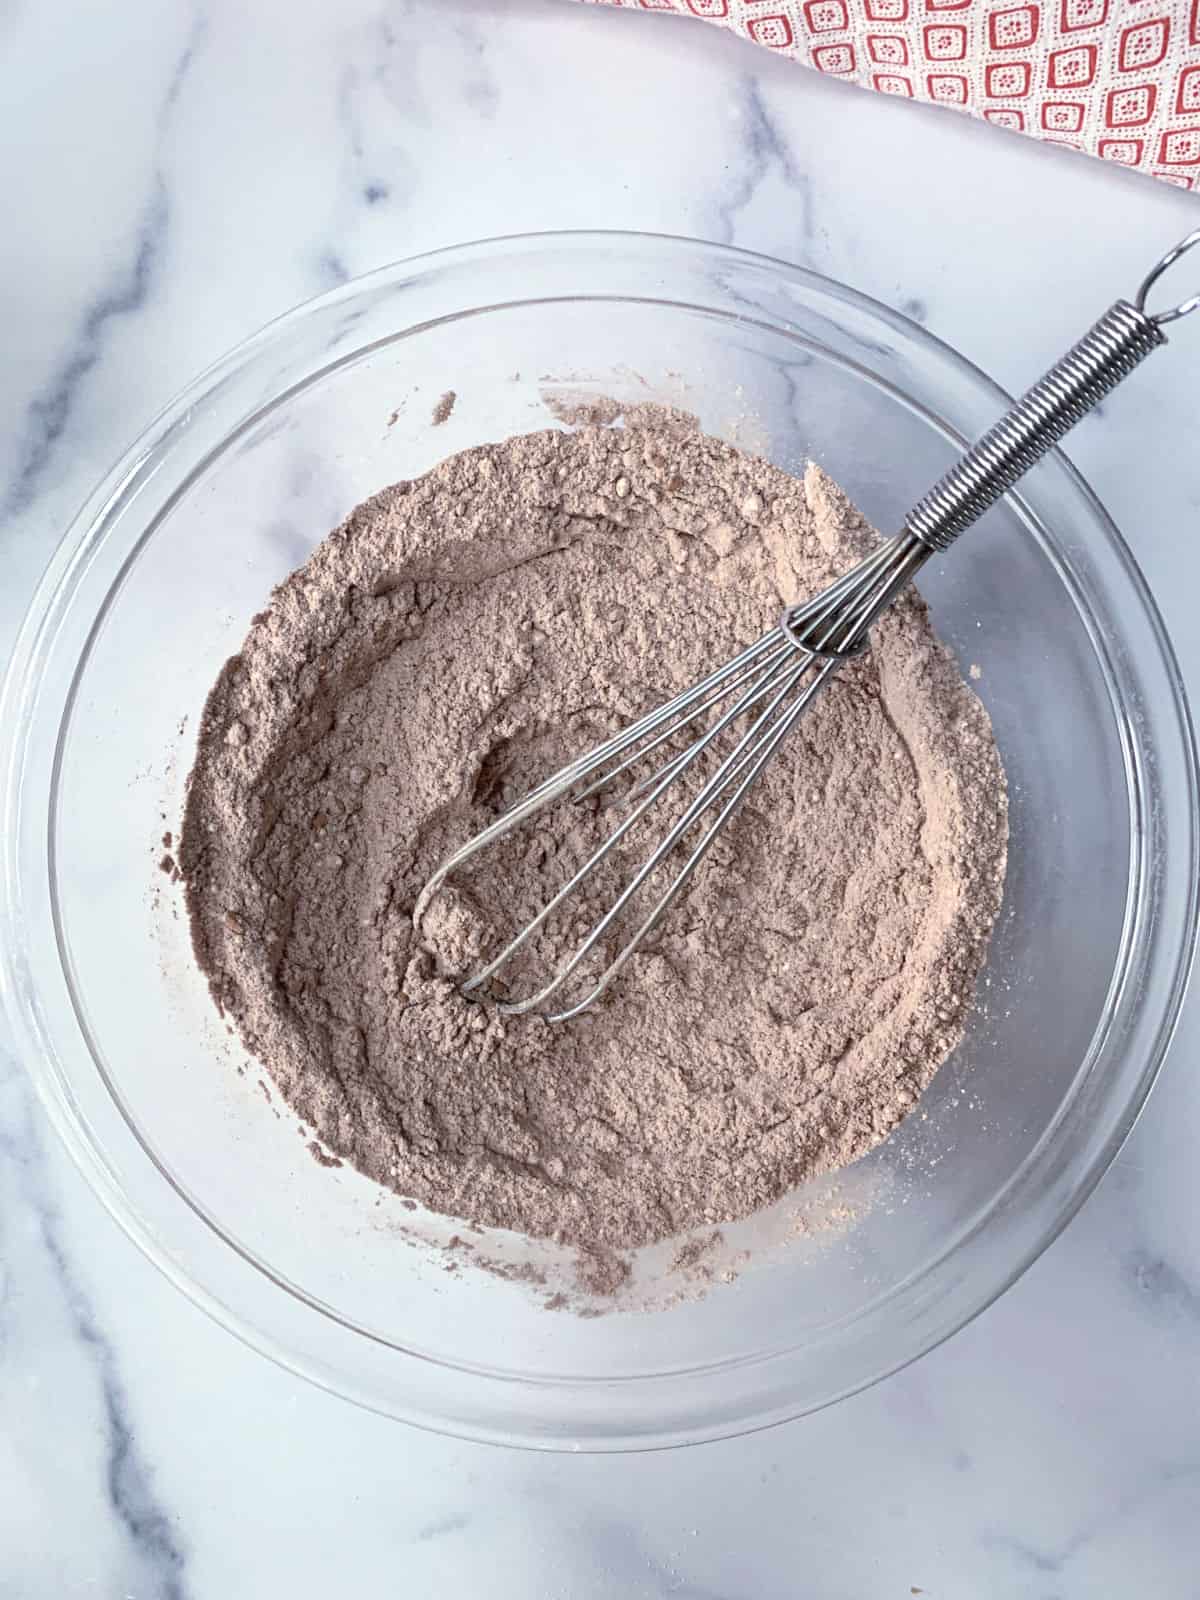
Step 1. Add the flour, powdered sugar, cocoa powder, and salt to a large mixing bowl and whisk together until the mixture is blended and lumps are broken up.
Step 2. Cube the cold butter and add it to the flour mixture, then toss well to coat the butter evenly.
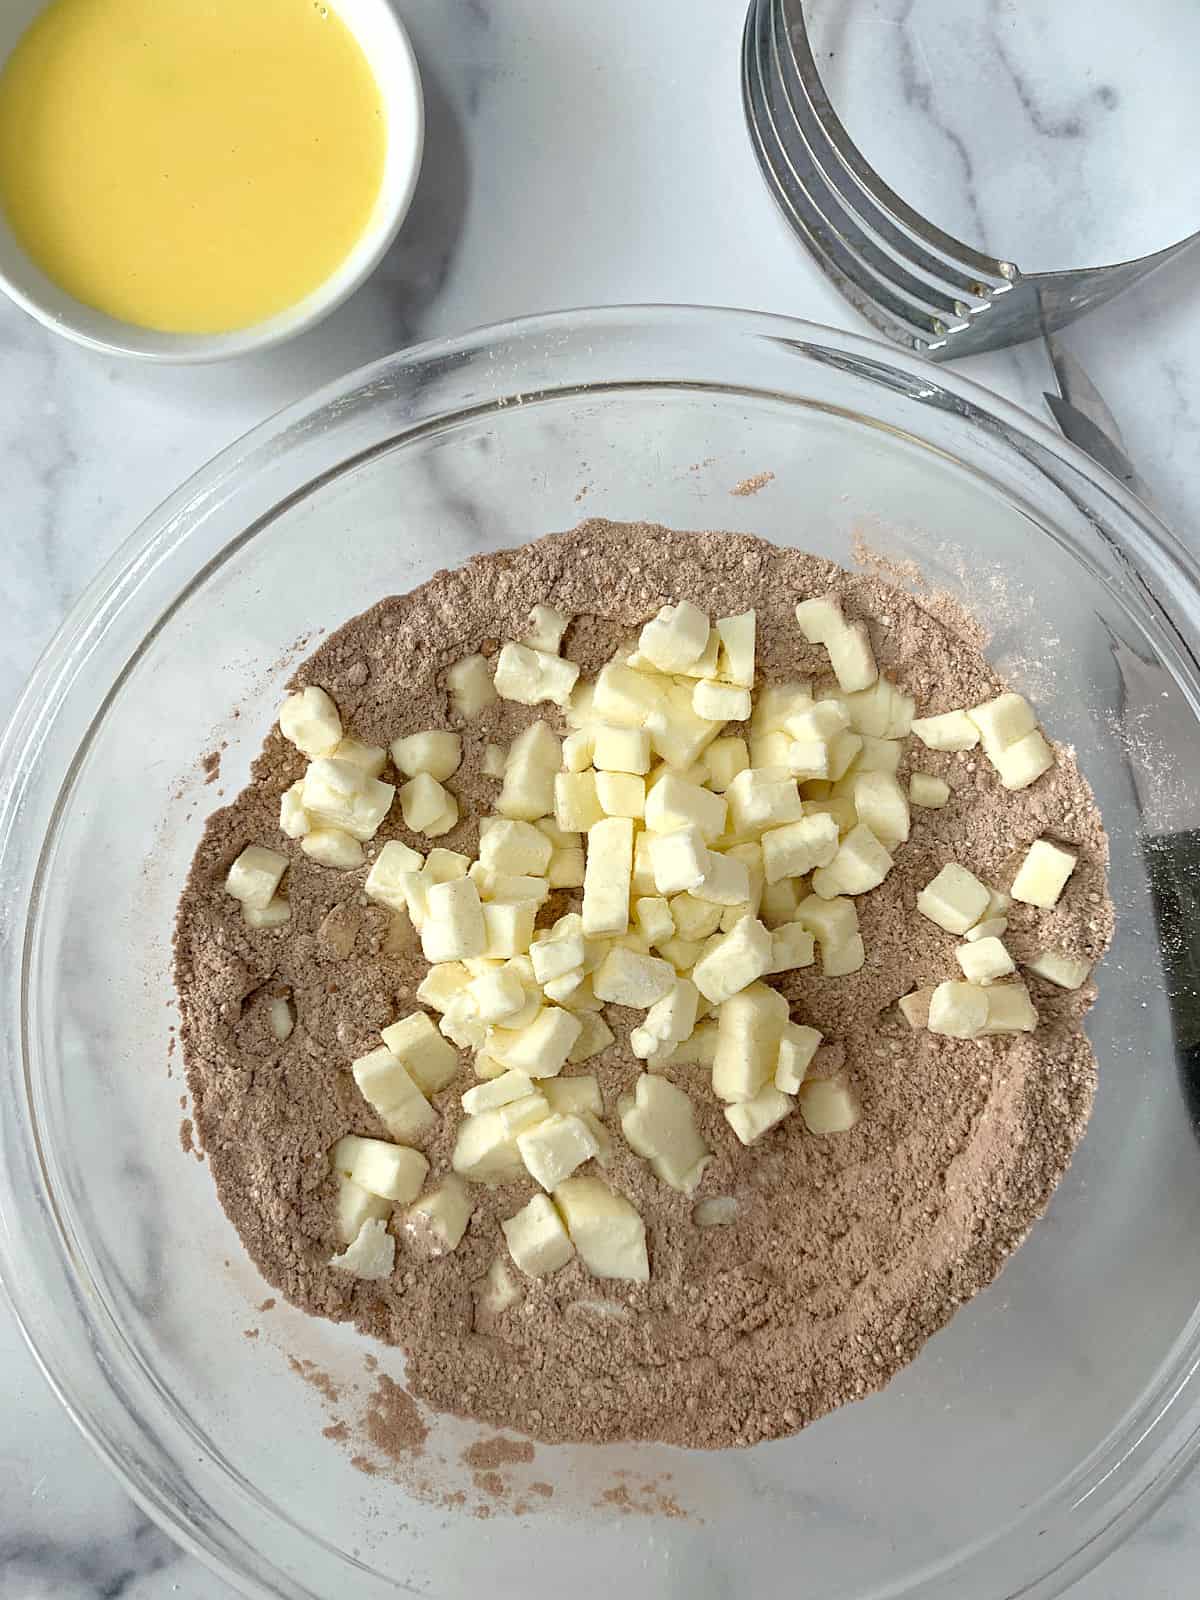
Step 3. Mix the egg yolk and one tablespoon of cream, then pour this into the bowl.
Step 4. Cut the butter into the flour mixture with a pastry blender or two knives until a soft dough begins to form.

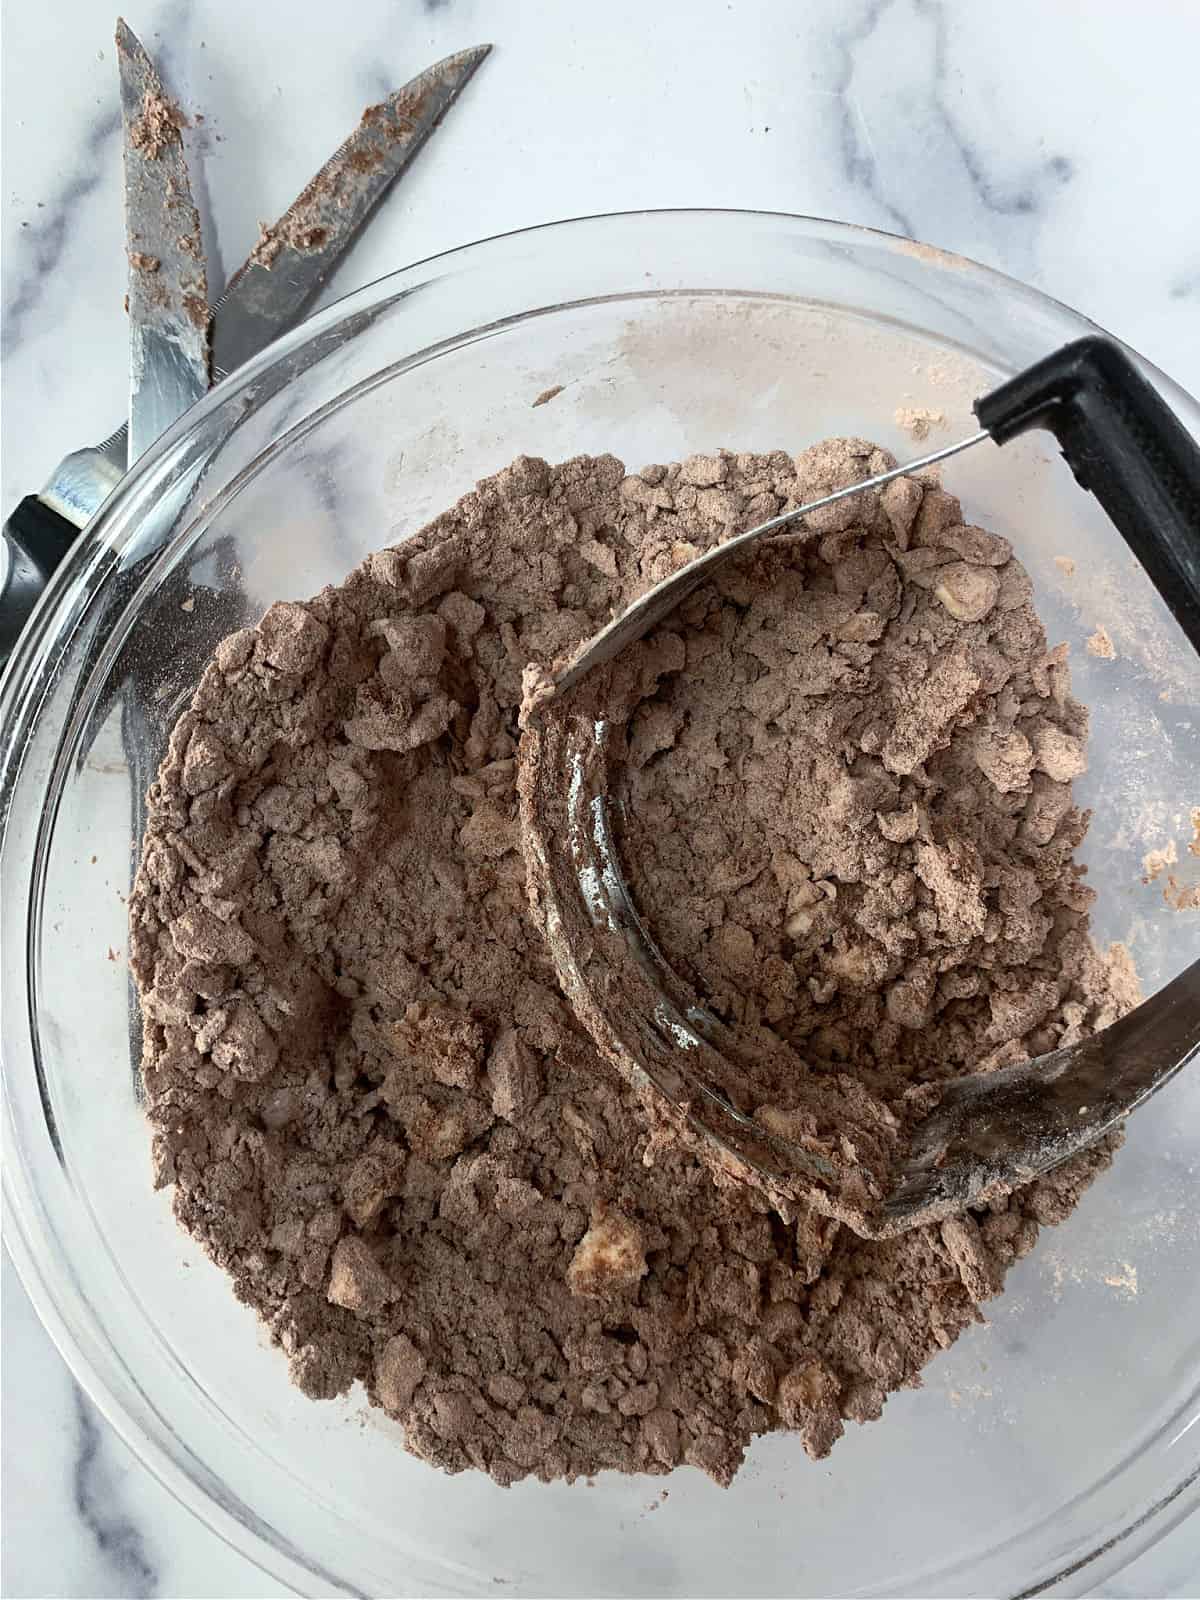
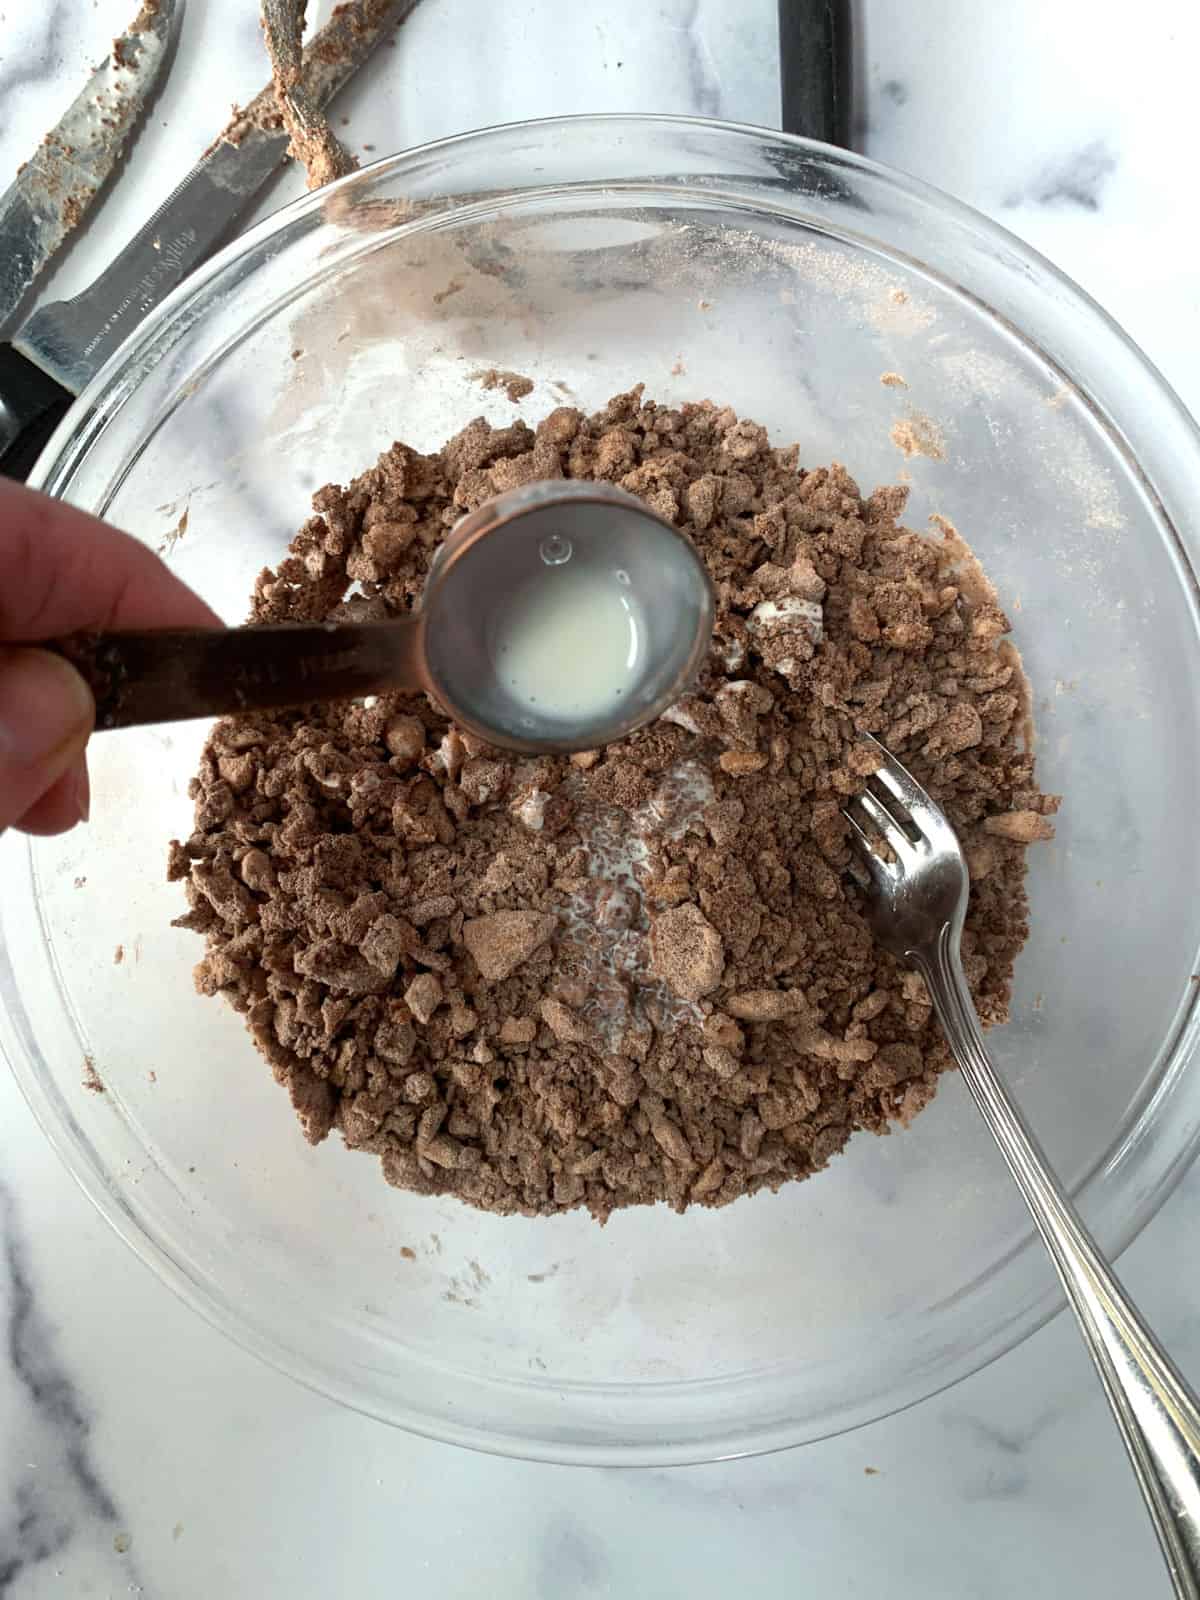
Step 5. Add the remaining cream and mix that in with a fork. At this point, the dough will still be crumbly.
Step 6. At this point, the dough will still be crumbly. Start pressing the dough together with your hands to form a cohesive dough.
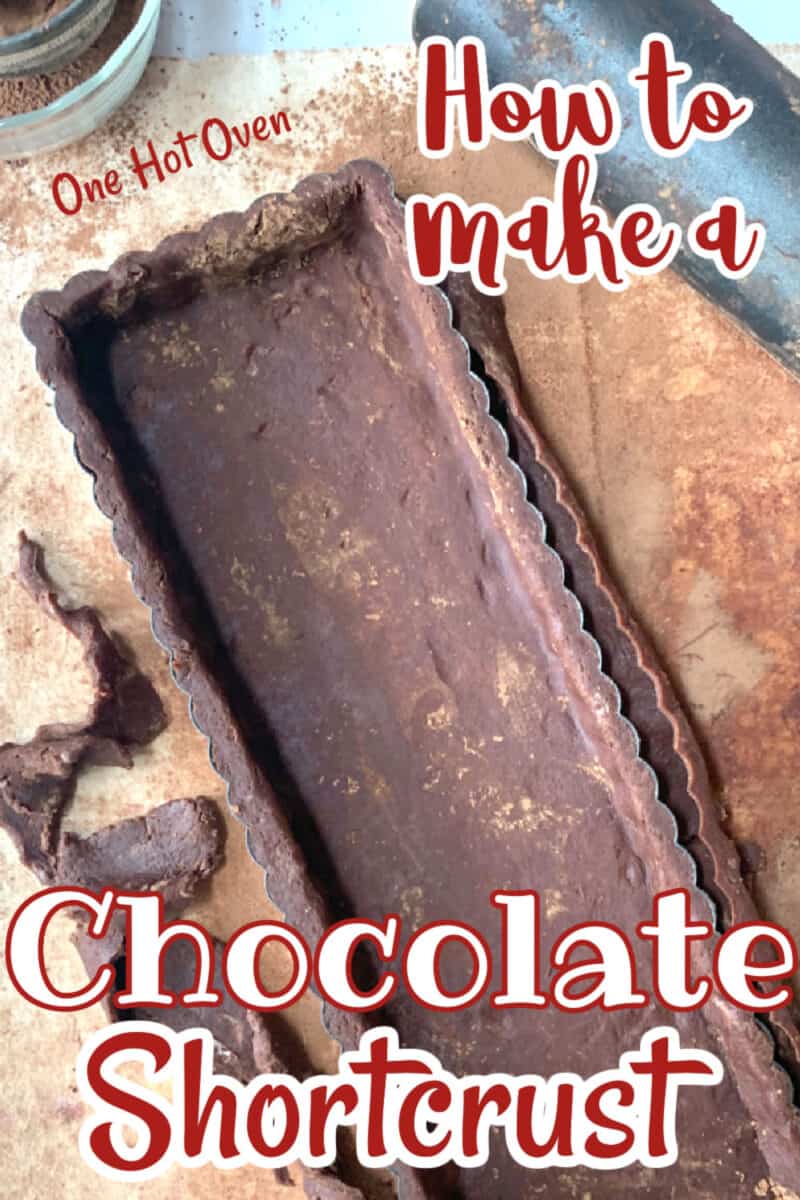
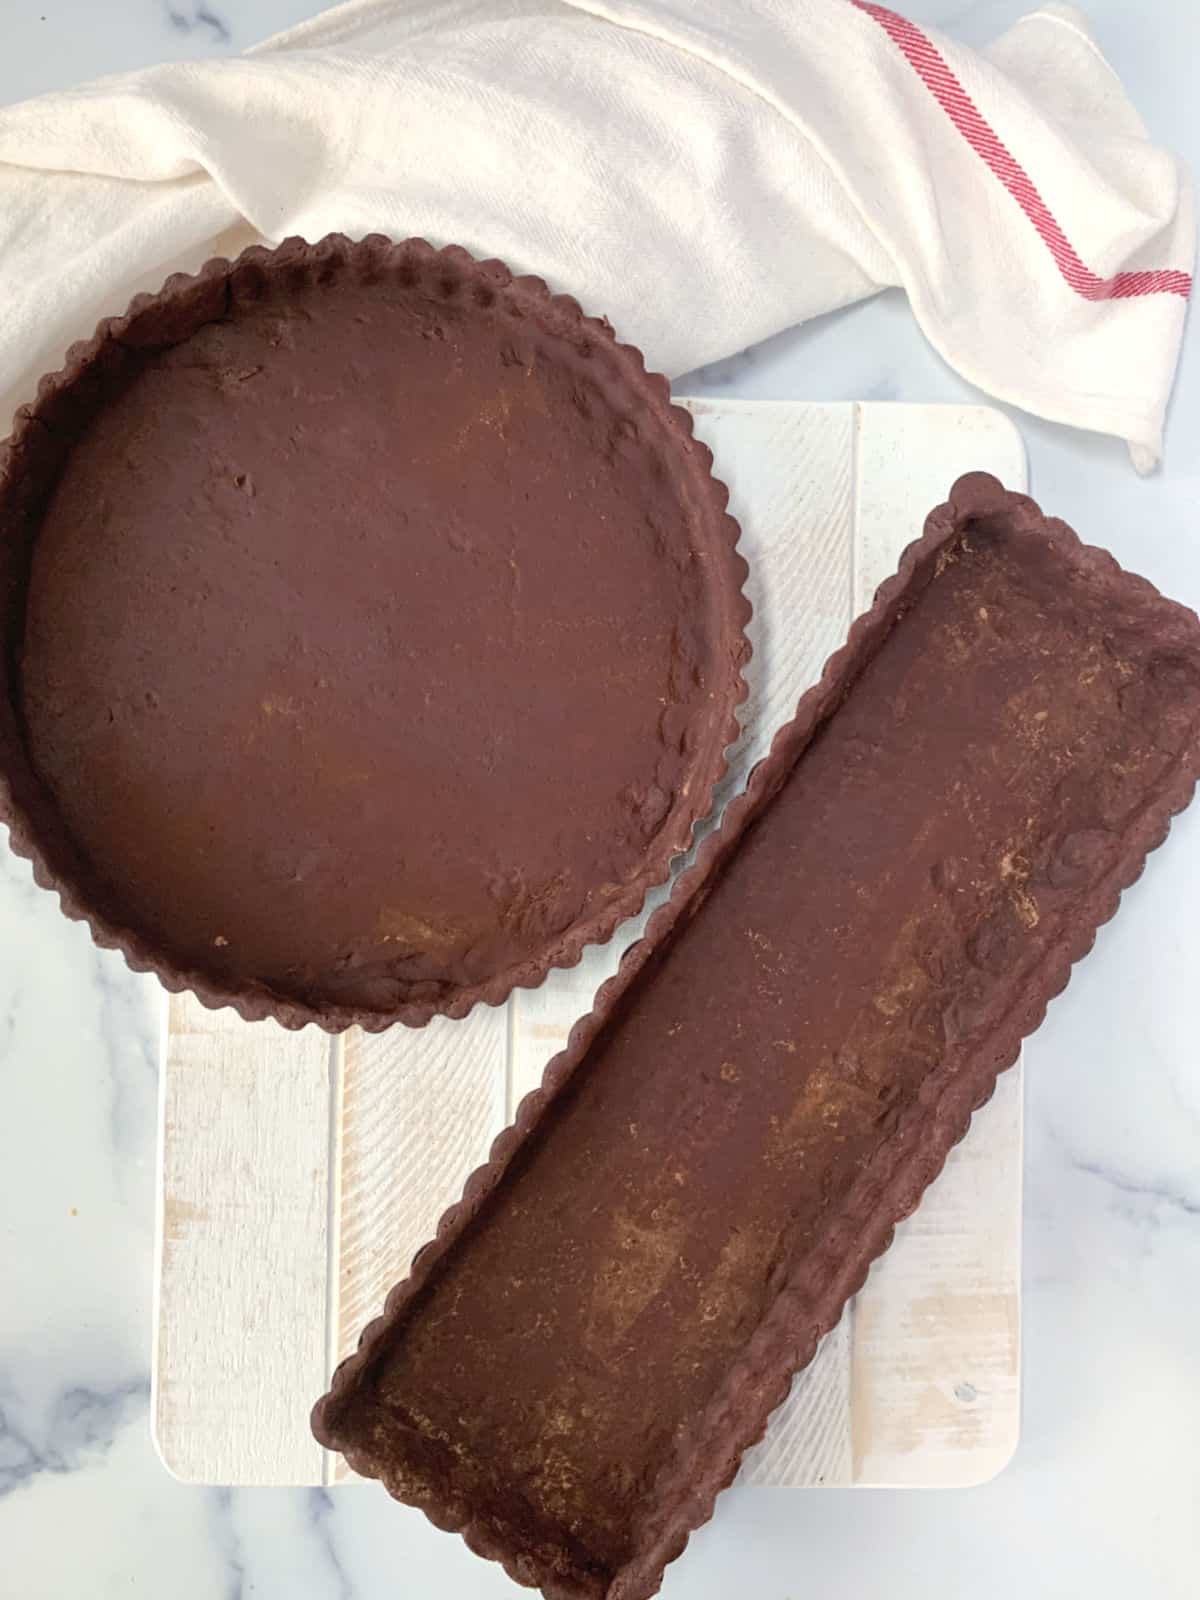
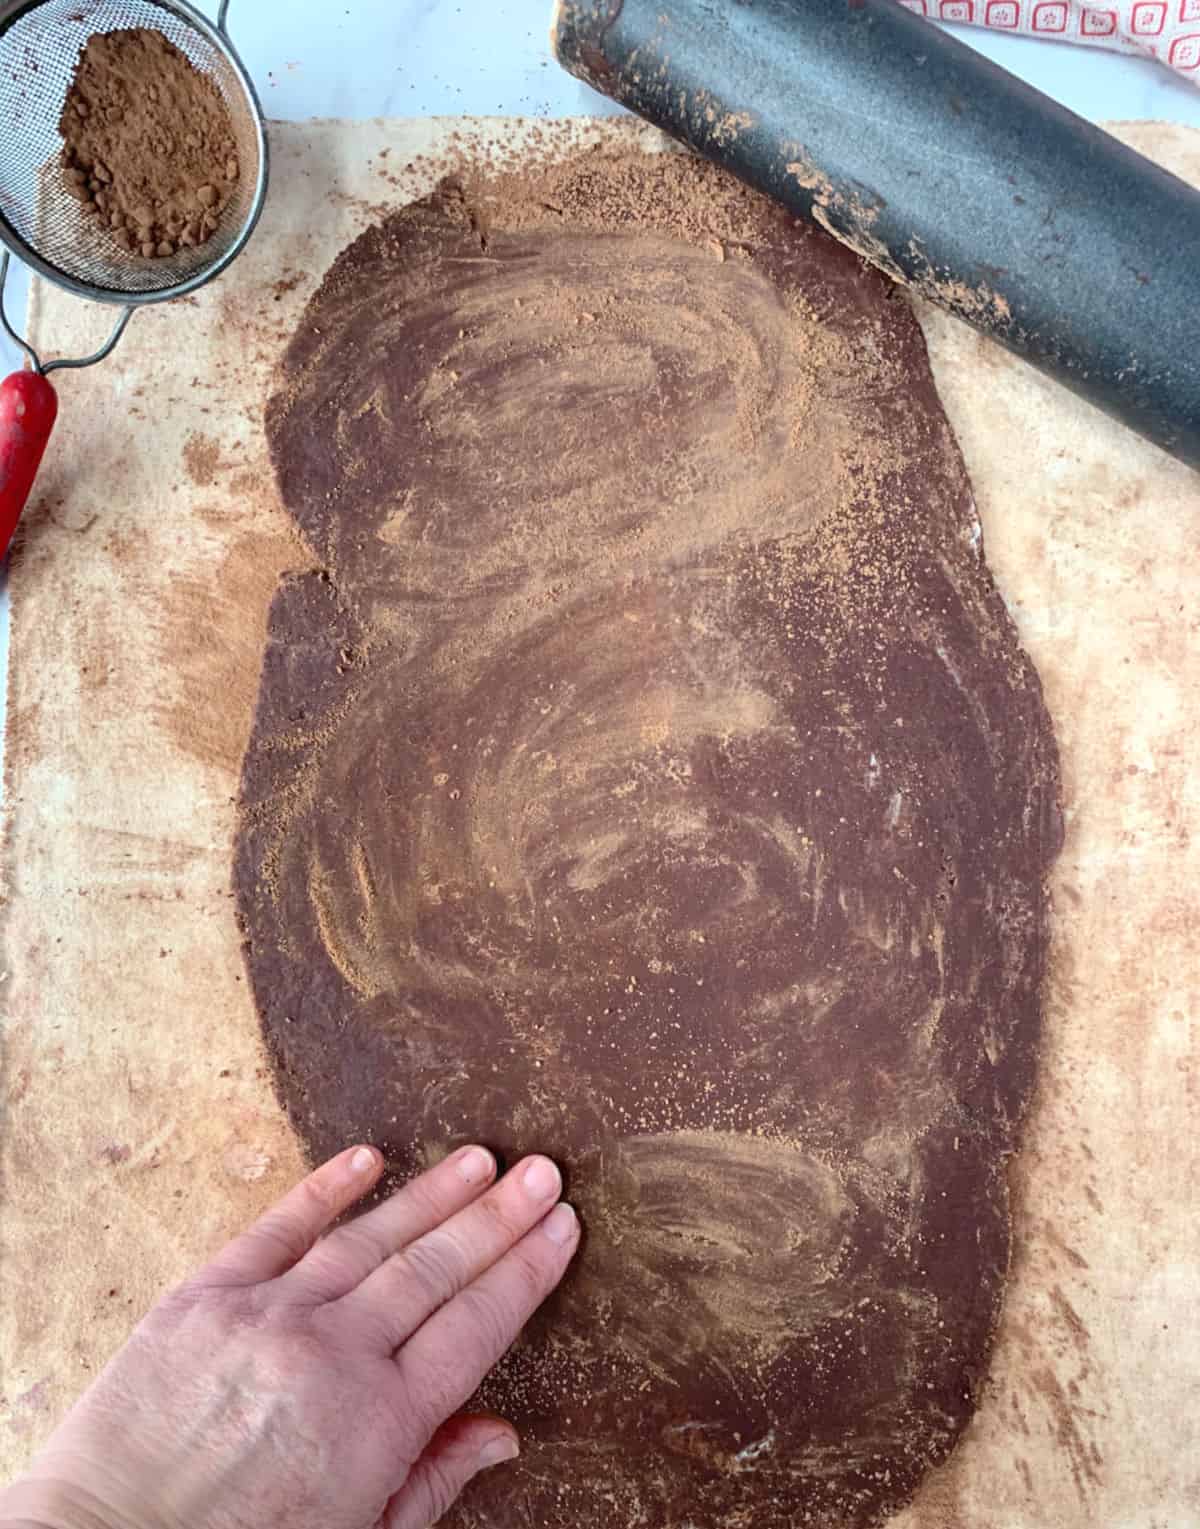
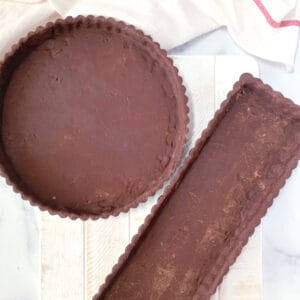
Step 7. Sprinkle cocoa powder on a rolling mat or a smooth surface. Turn the dough onto the mat and gently knead to bring it together, forming it into a large disk: round if using a round tart pan or more oblong if using a rectangular pan. Wrap the disk in plastic wrap and chill for one hour.
Rolling the dough
Step 8. To roll the dough, set the chilled dough on the rolling mat sprinkled with cocoa powder (do this instead of flour). Let it sit for about 10 minutes, which will make it easier to roll.
Step 9. To roll, sprinkle the top of the dough with cocoa powder or flour. This dough is slightly soft and can be sticky, so be sure to keep the rolling surface covered with powder or flour. For a 14 x 4-inch rectangle pan, roll the dough to about 16 x 8 inches. For a 9-inch round tart pan, roll the dough into a circle approximately 13 inches in diameter.
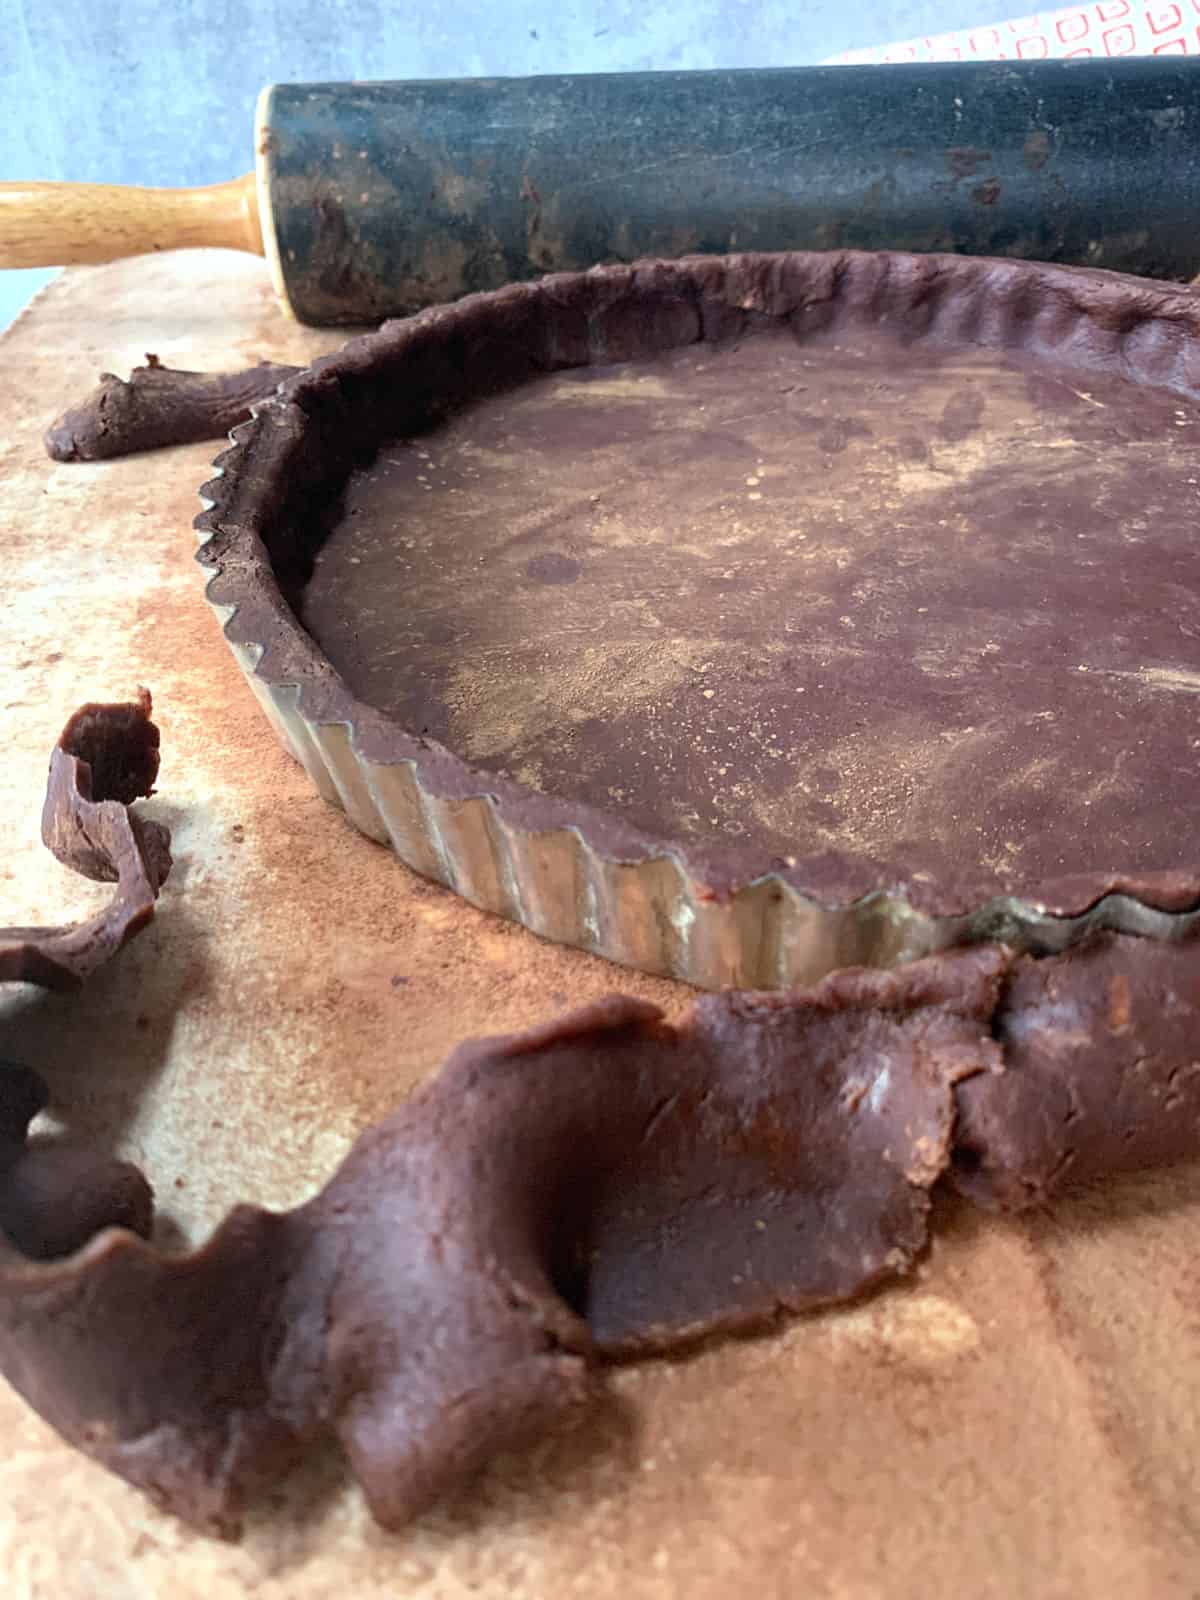
Step 10. To transfer the dough to the pan, roll it loosely around the rolling pin and unroll it into the pan.
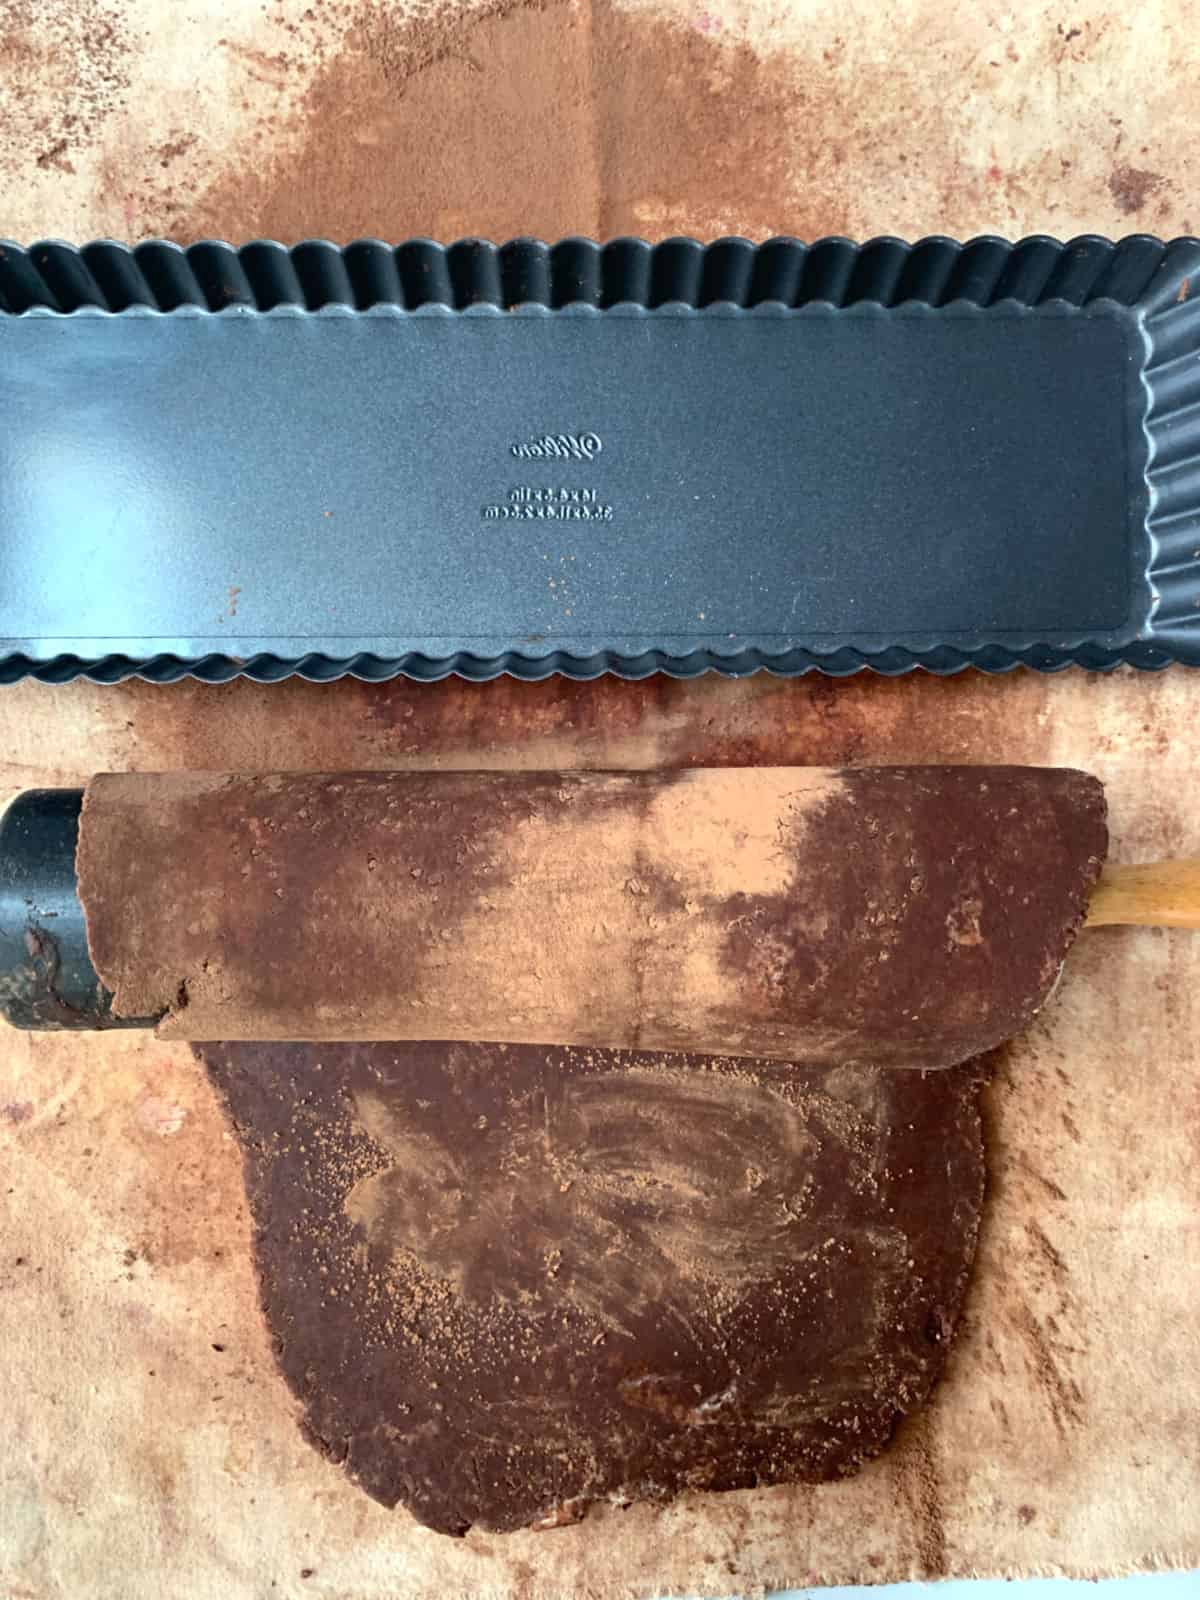
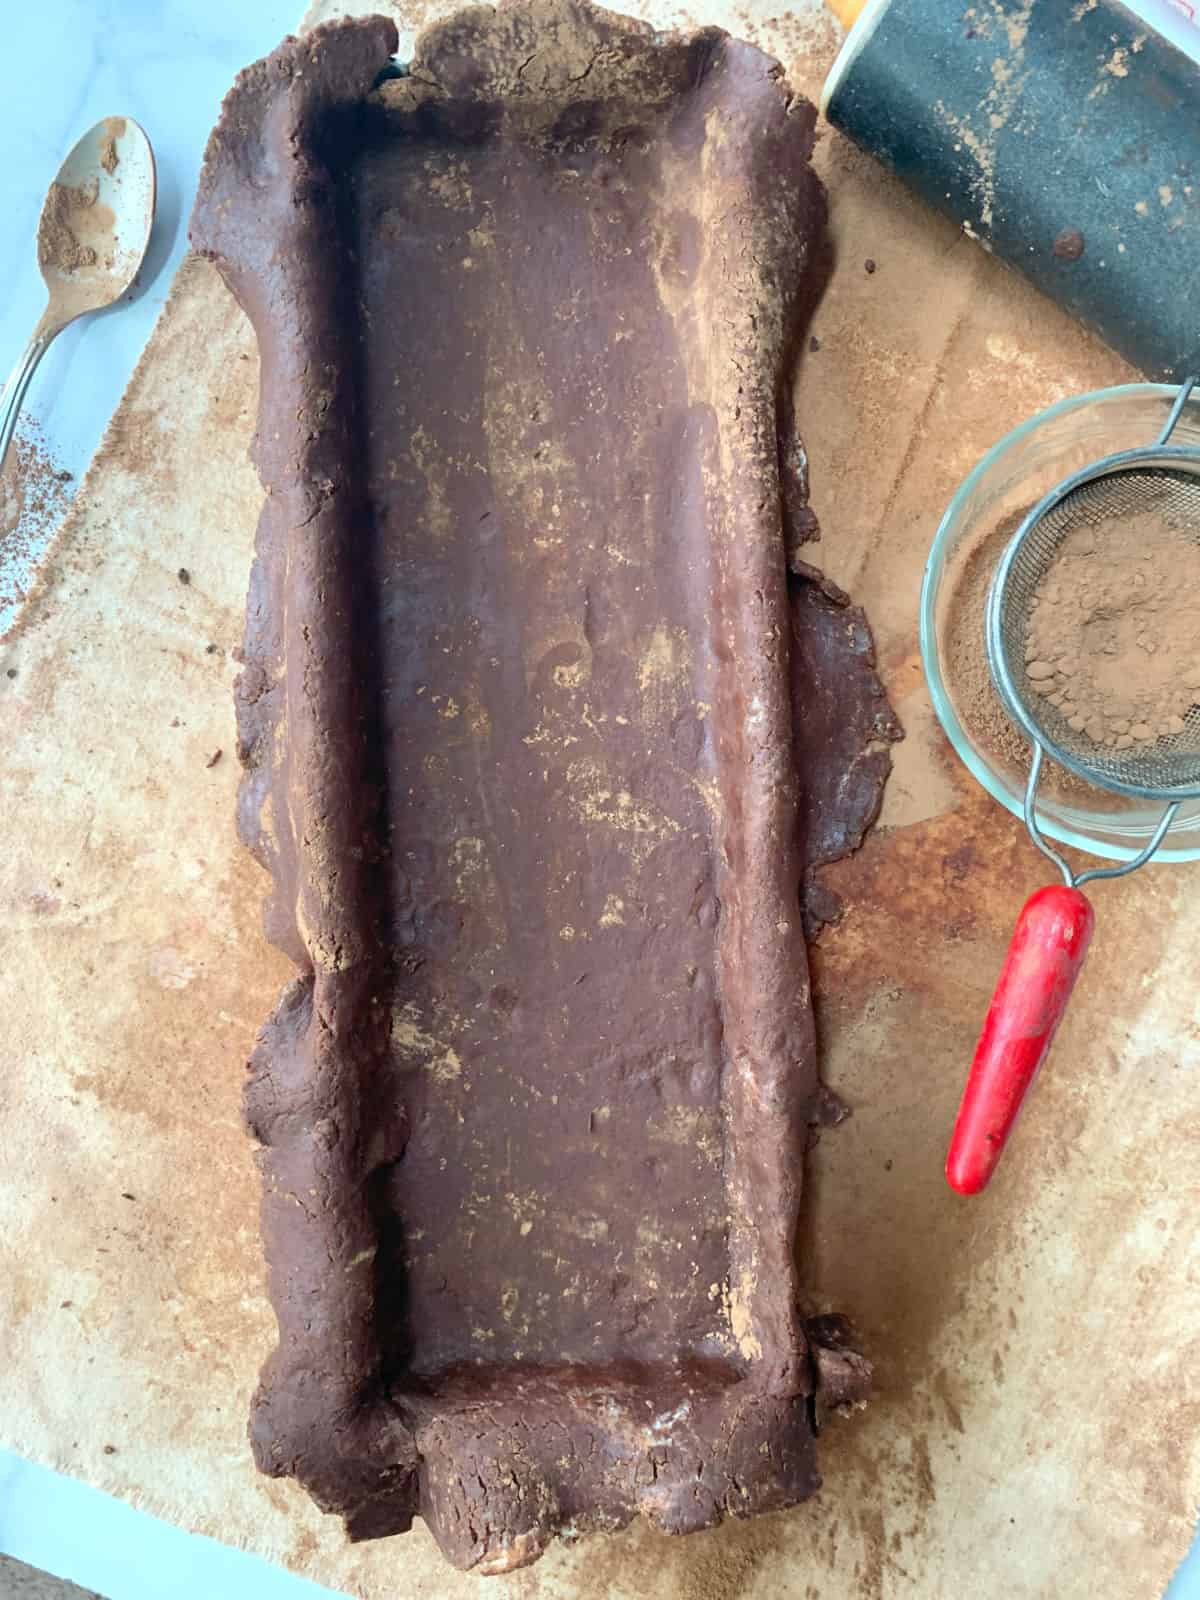
Step 11. Once in the pan, gently pick up the sides and ease the dough into the edges.
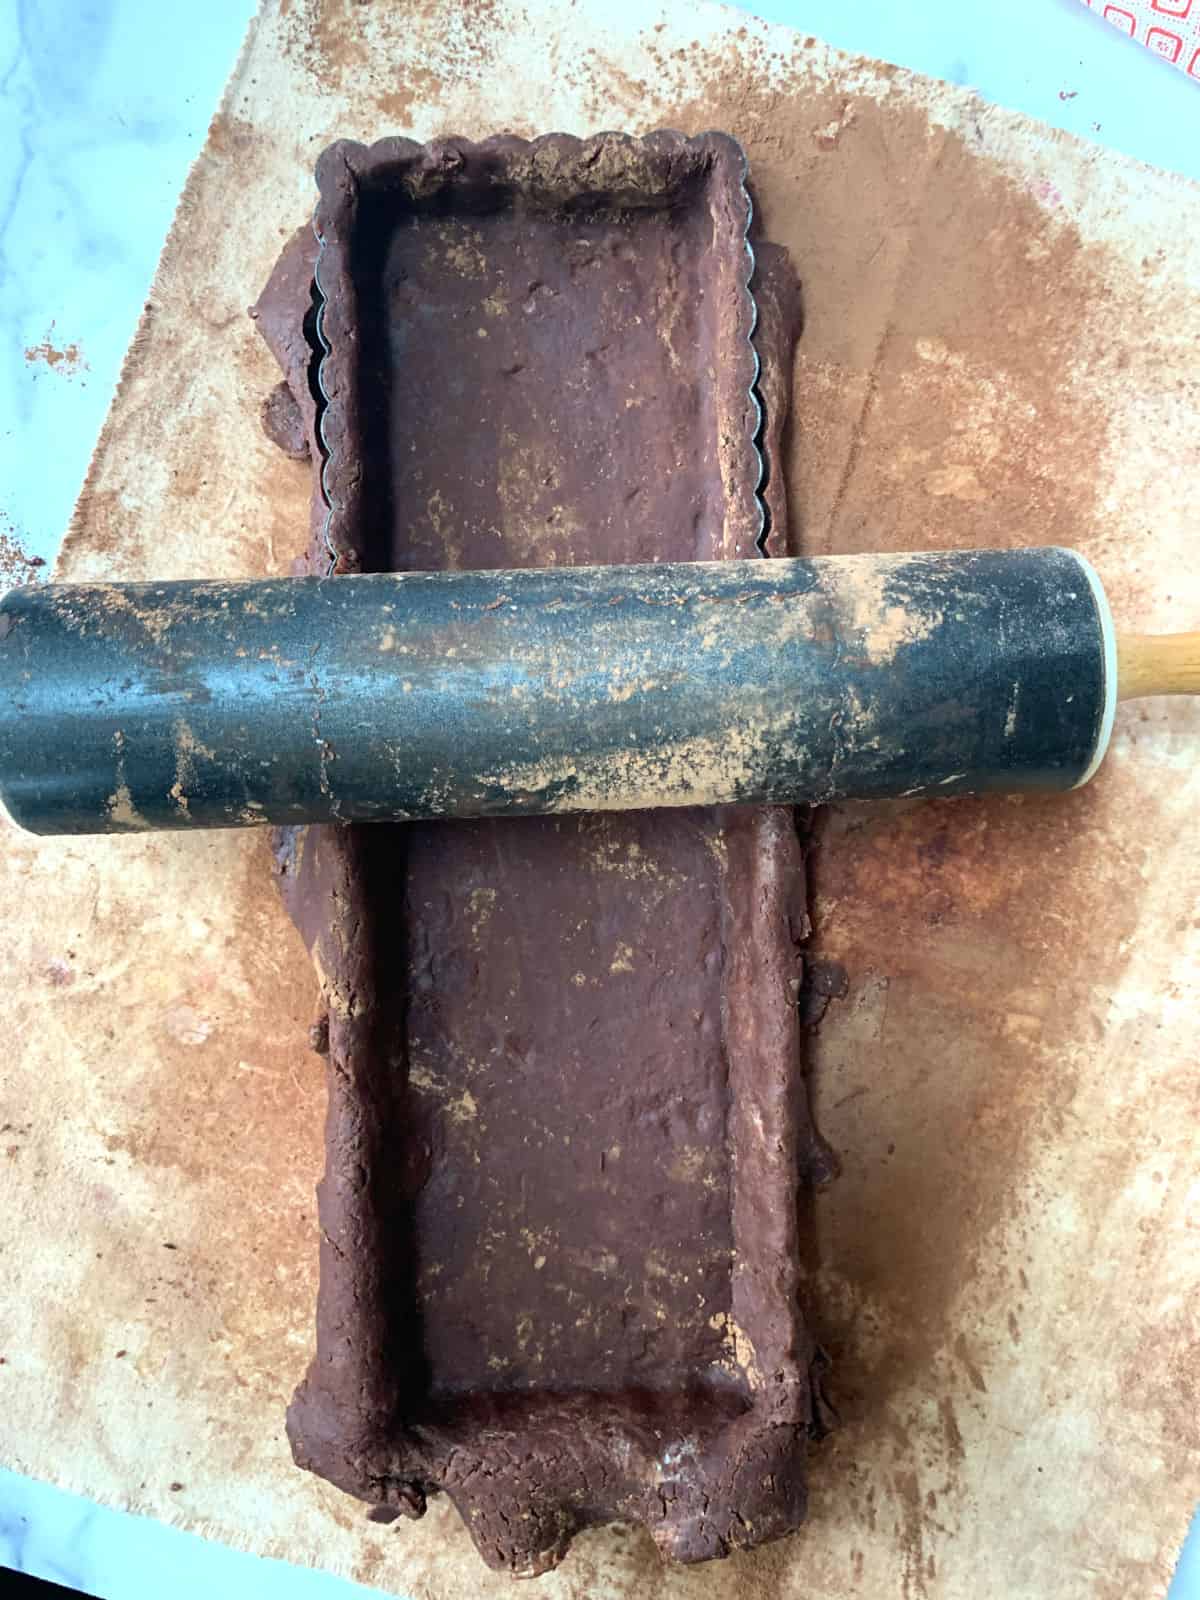
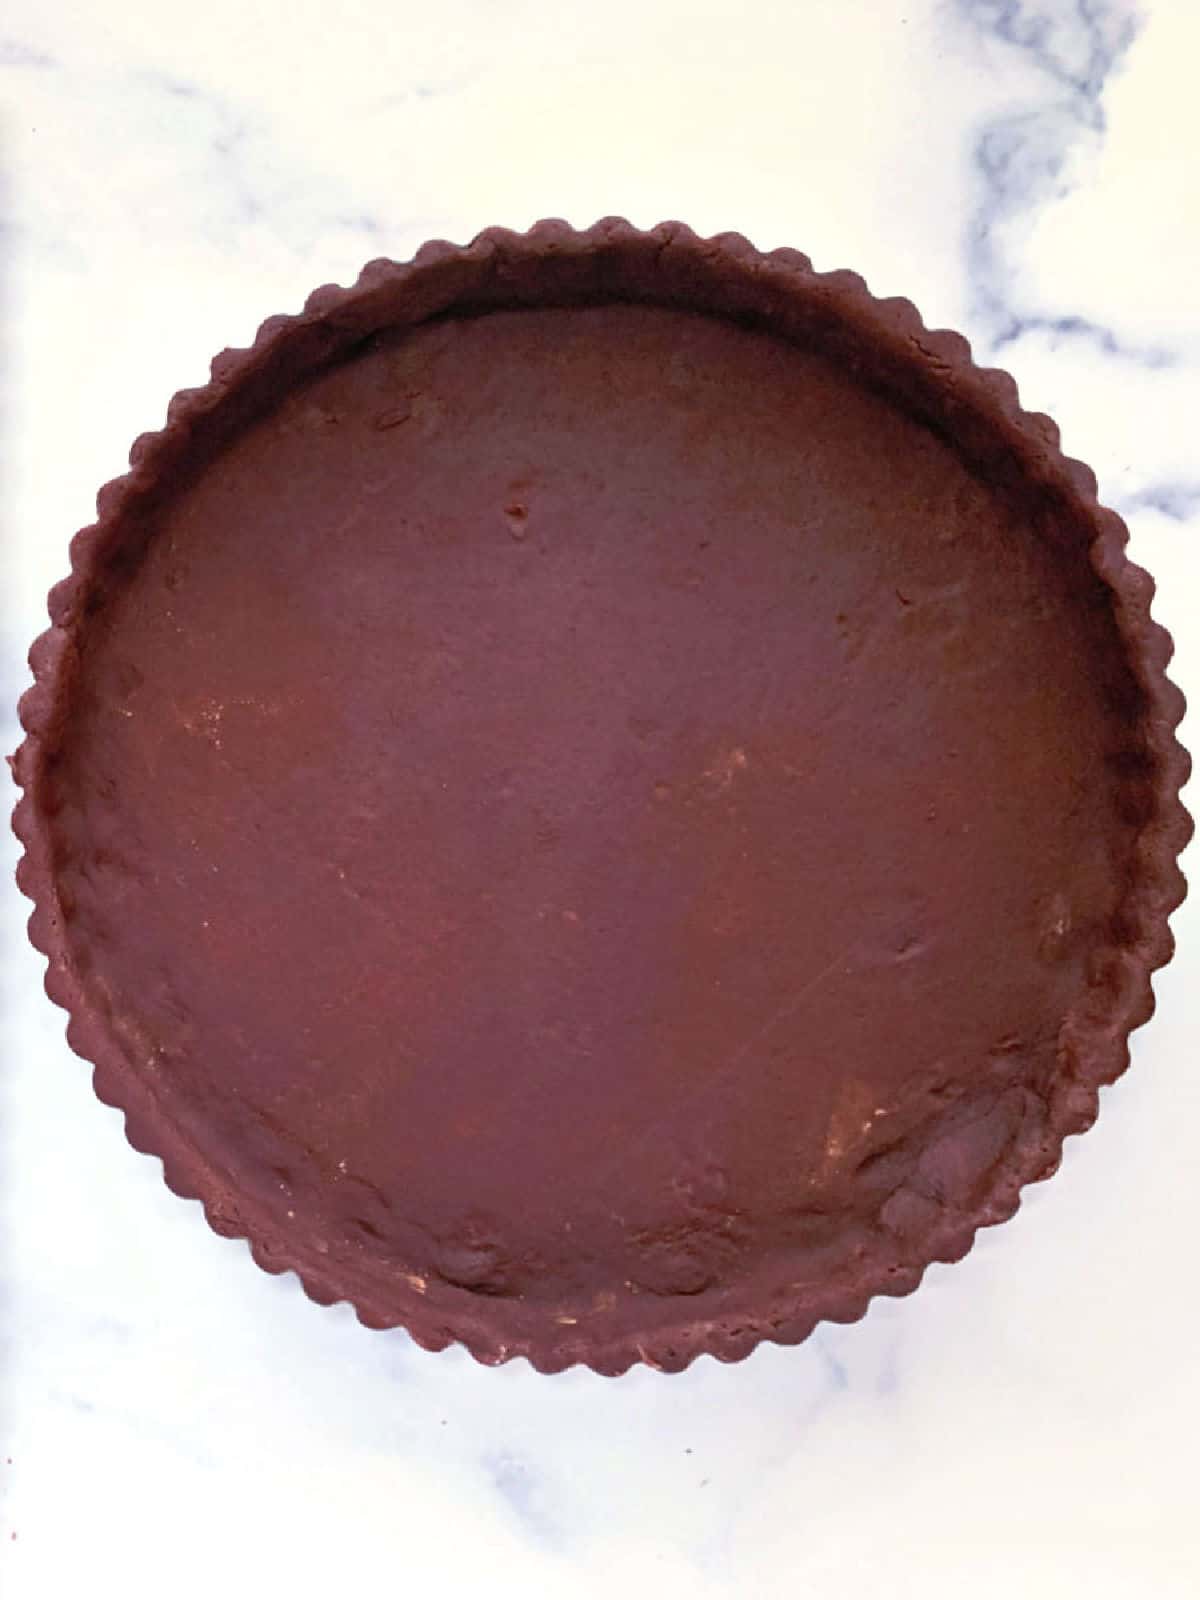
Step 12. Take the rolling pin and roll it over the pan to remove the excess dough. I suggest you freeze or chill the tart dough again for 20 minutes before baking, as this helps the dough not shrink.
Baking the tart shell
You have several options for baking the tart shell. Most tarts hold a pre-cooked filling, meaning you must bake the tart shell fully. You can also partially bake the unbaked tart shell when adding a filling that needs to be baked. To learn about blind baking, this post on How To Blind Bake Pie Crusts explains this process in full.
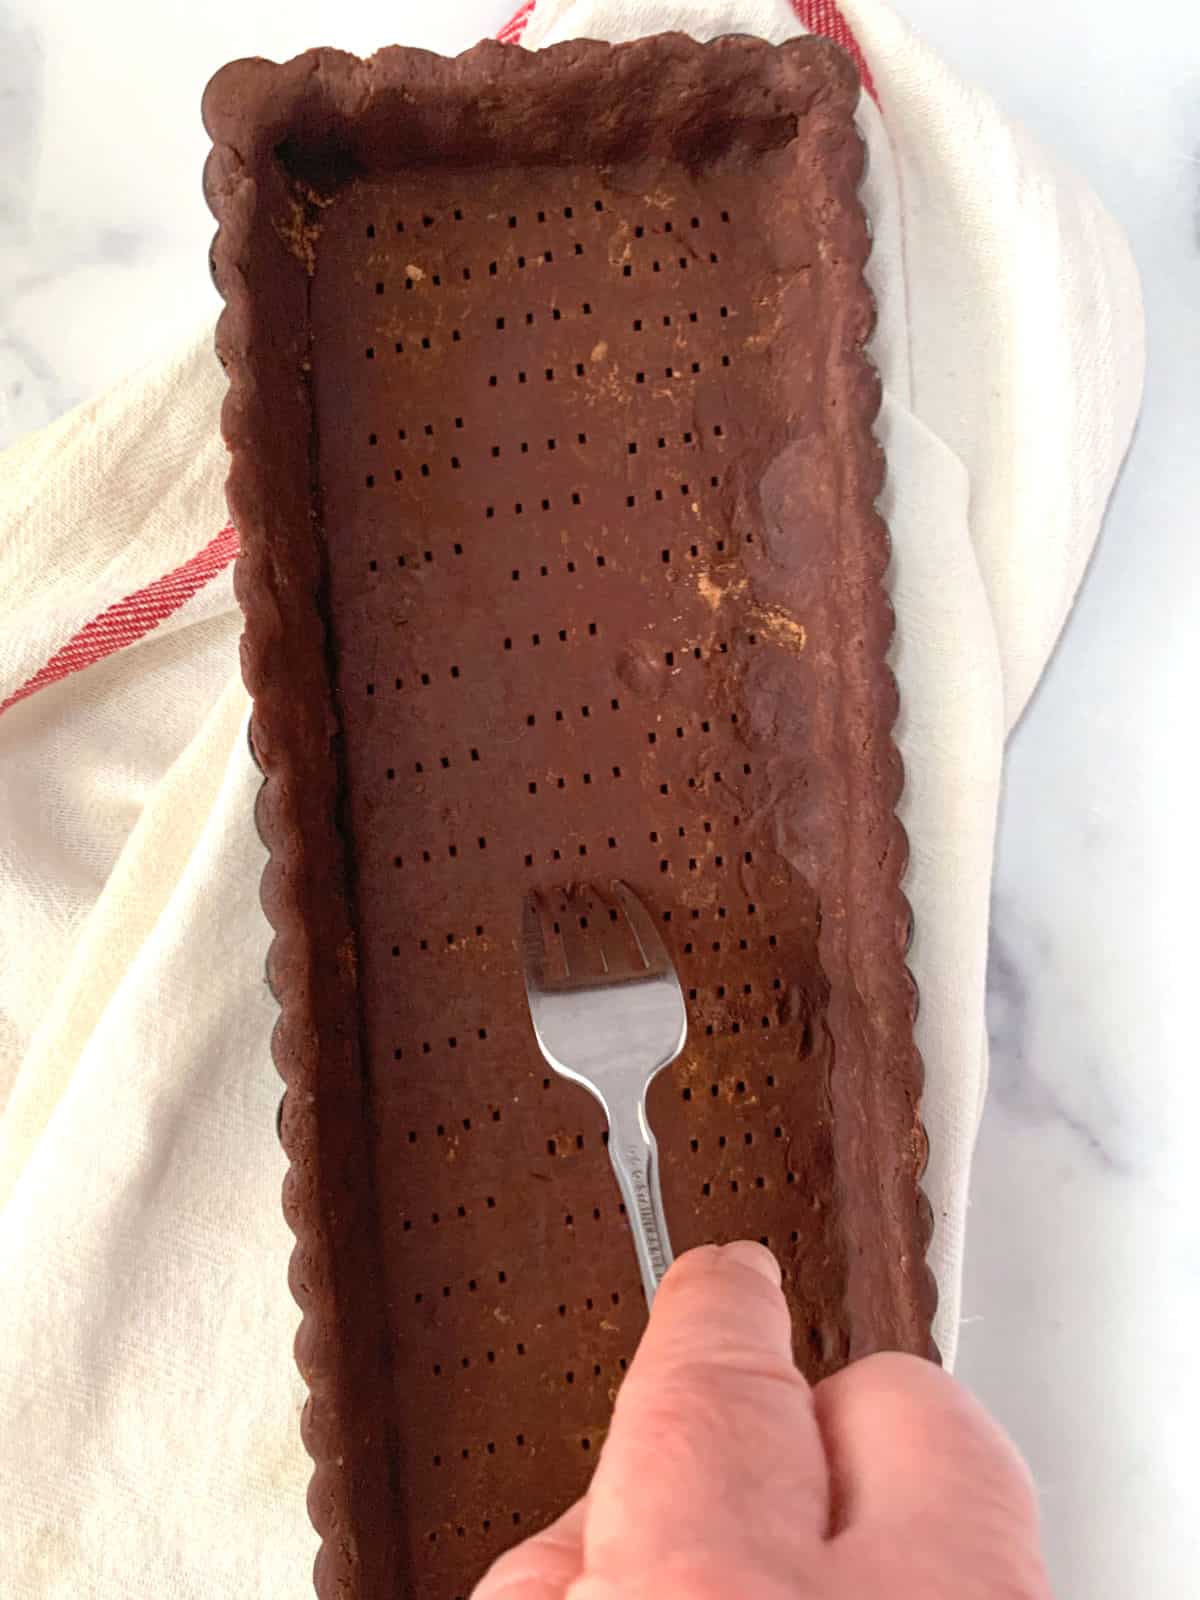
Step 13. Remove the chilled pastry dough from the freezer and prick it with a fork in an up-and-down motion along the bottom. This is called docking; it allows steam to escape from the bottom of the dough, preventing it from puffing up.
See Tip #4 – Make sure to place the tart pan on a baking sheet.
Step 14. Line the bottom and sides of the tart pan with parchment paper so there is a little overhang all around.
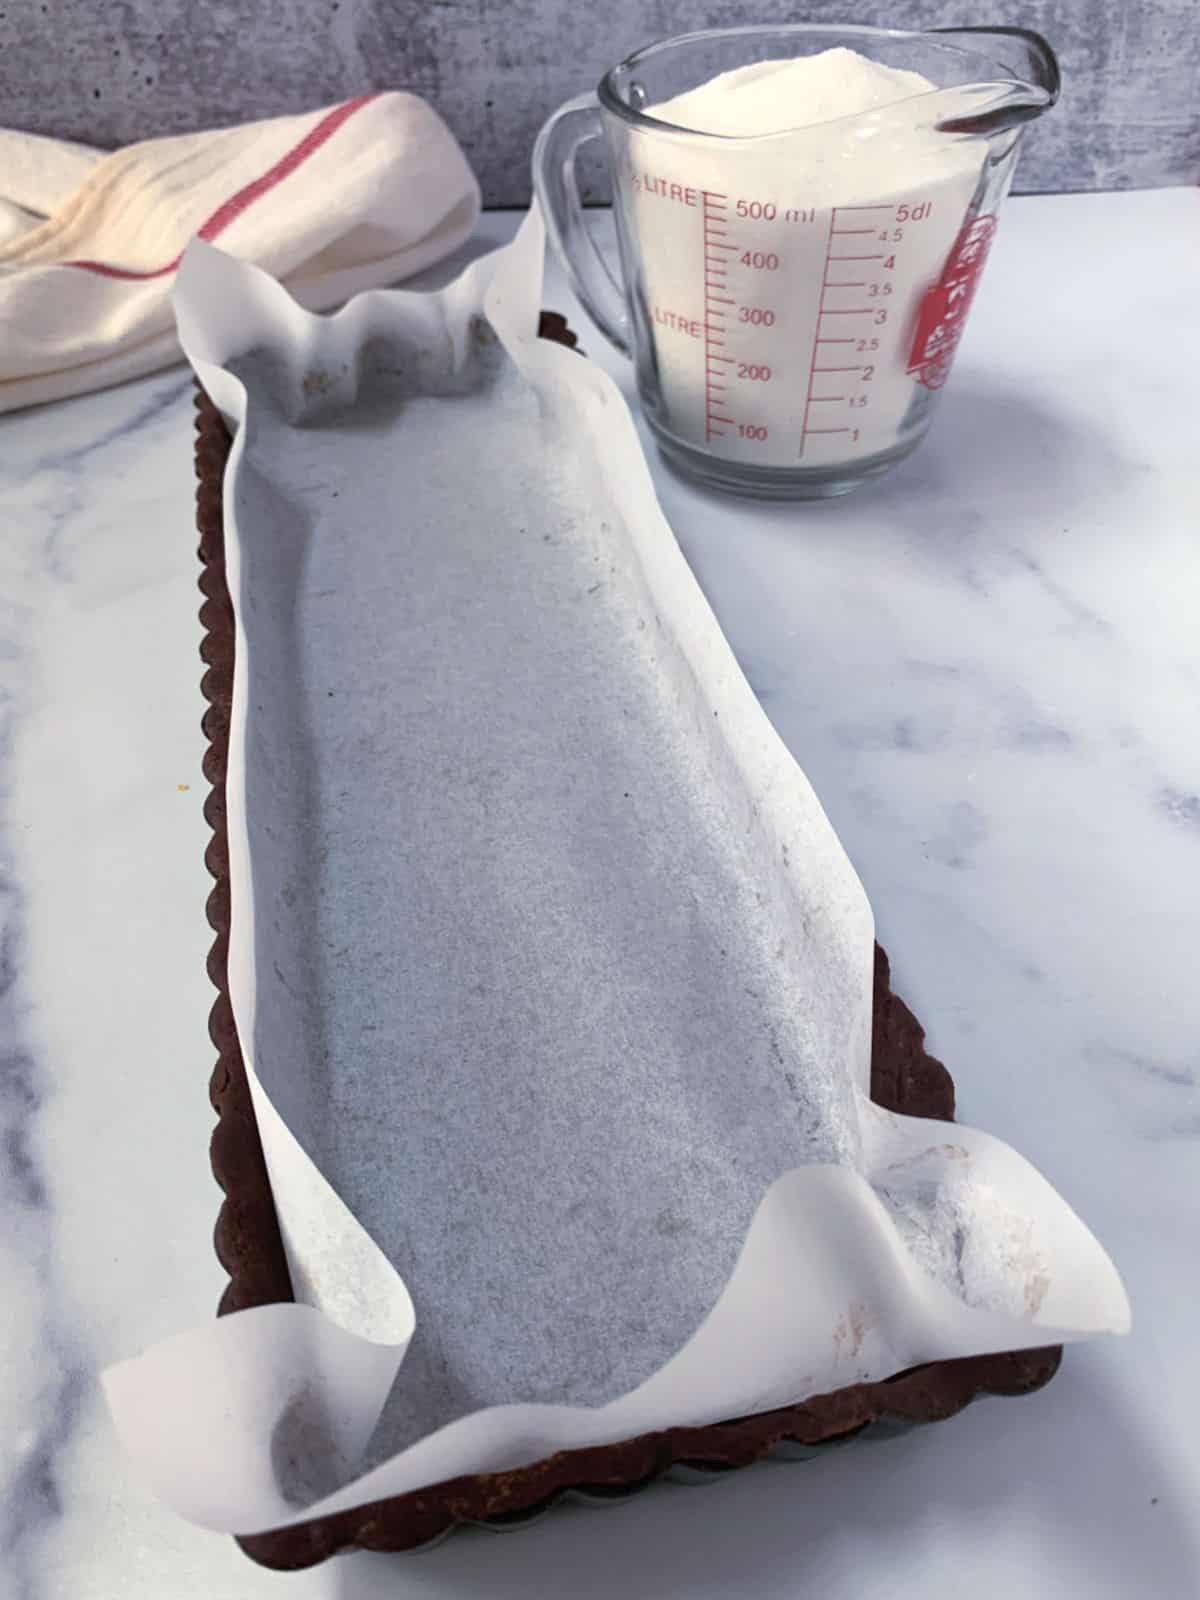
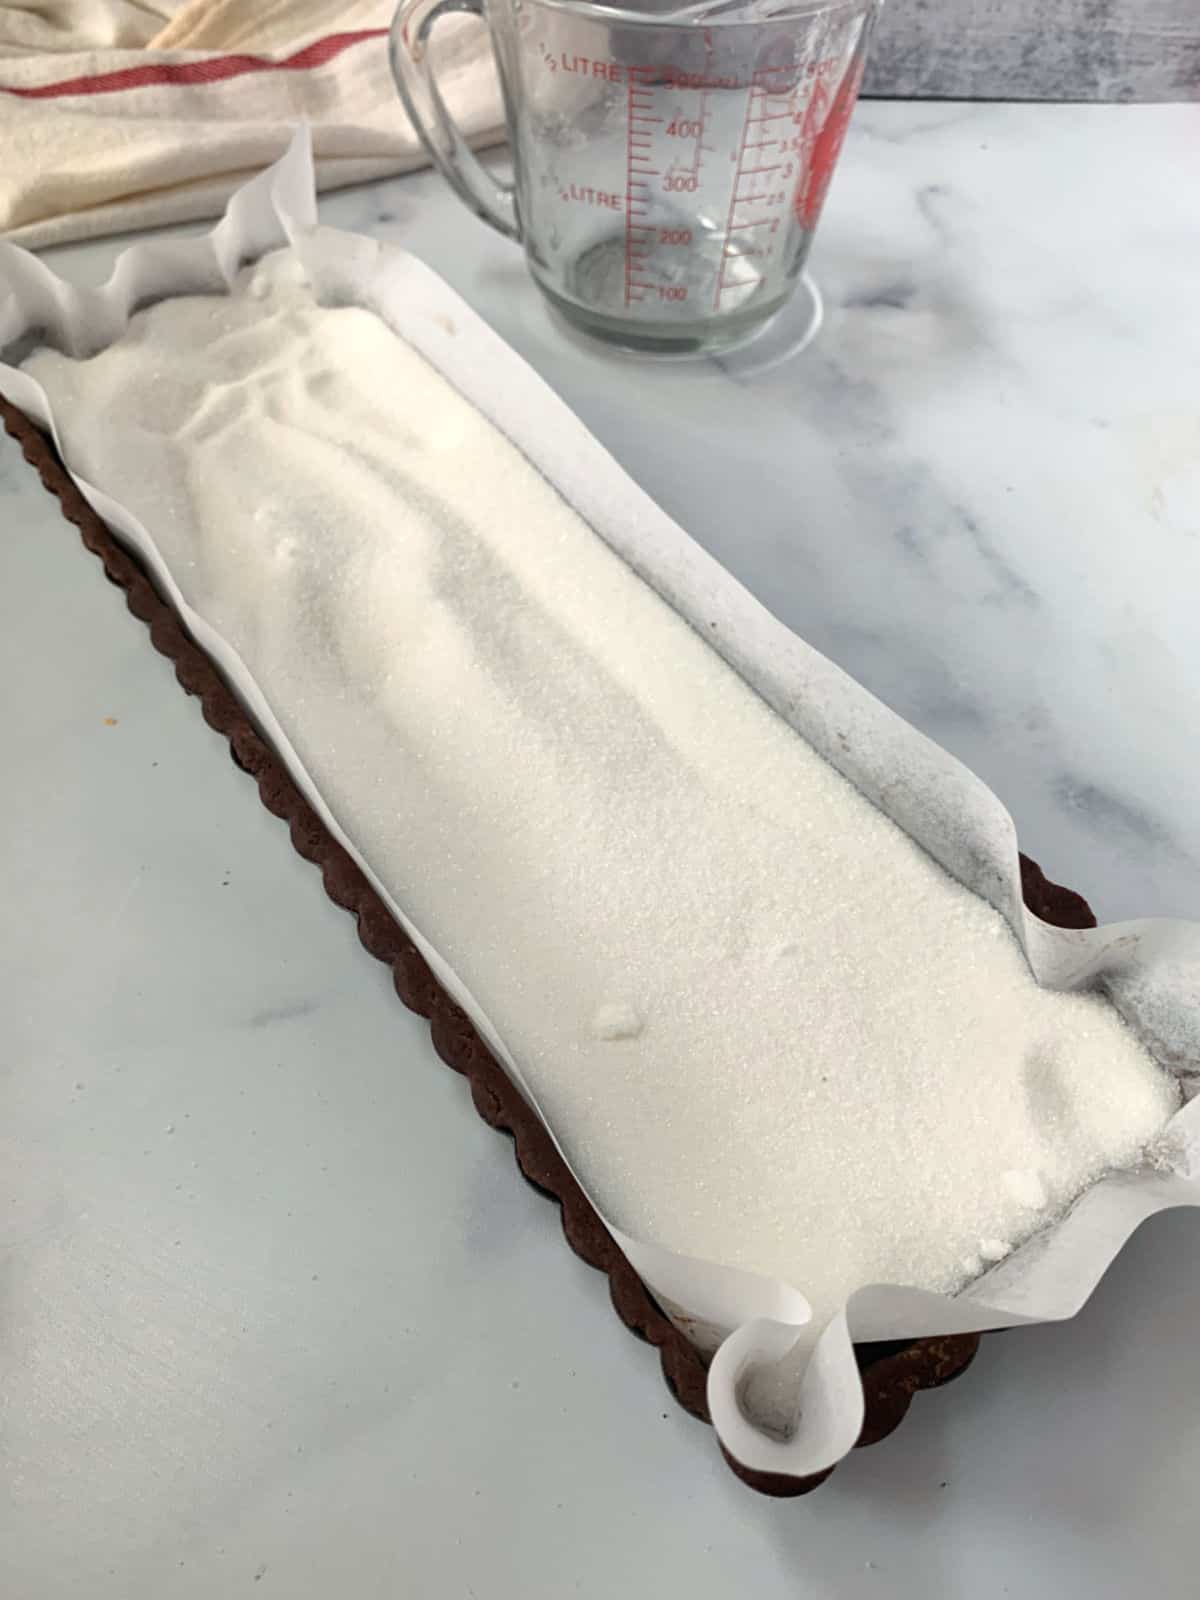
Step 15. Fill the tart shell with sugar, dried beans, rice, or lentils nearly to the top, making sure to get into the corners. This keeps the dough’s shape as it bakes.
Step 16. Heat the oven to 350 degrees F. To partially bake the tart shell, bake for 15 minutes. Remove the pan from the oven, carefully scoop out the weights, and gently remove the parchment paper. Then, return the pan to the oven and bake for an additional 5 minutes. To fully bake the tart shell, bake for an additional 10 minutes.
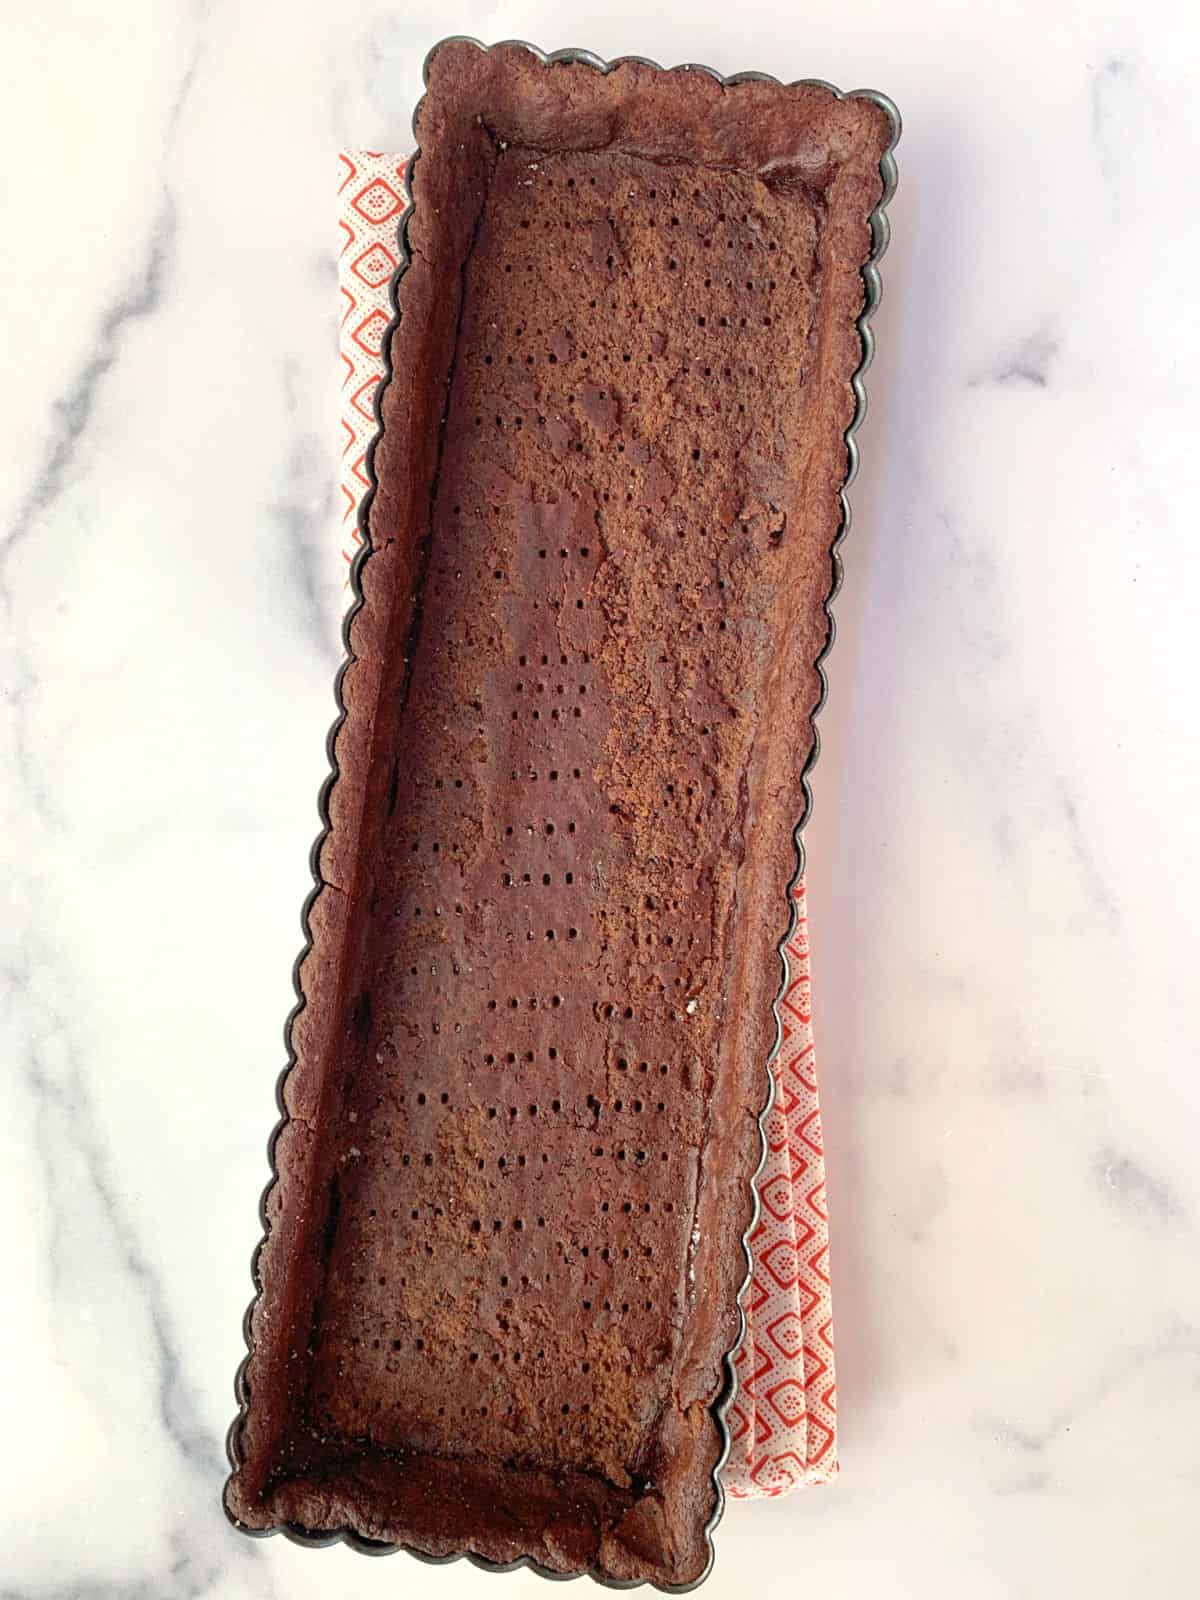
Step 17. Add your favorite filling once the tart shell is fully or partially baked. The tart shell can be wrapped in plastic or foil for several days before adding the filling.
Variations – You can make this chocolate shortbread crust in a round tart pan.
- This Chocolate Raspberry Tart has a crispy chocolate shortbread crust that is filled with a creamy vanilla pastry cream.
- We love this Chocolate Peppermint Tart for our St. Patrick’s Day dessert, but it’s so easy to make you can enjoy this minty tart anytime.
Tart Tips
Tip #1 – rolling the dough
Since this is chocolate dough, I like to roll it in cocoa powder instead of flour. You can definitely use flour, but I prefer not to see white flour in my chocolate dough.
Tip #2 – the rolling mat
I get asked what I roll my dough on: a muslin rolling mat. I keep one for plain dough and one for chocolate dough.
Tip #3 – the baking pan
If you don’t have a tart pan, use a pie plate instead. It will work, too!
Tip #4 – Put the pan on a baking sheet
Since tart pans have a removable bottom, if you happen to pick the pan up with your hand under the bottom, you could lift the pie crust up too. Trust me, this happens!!! Set the tart pan on a baking sheet to move it from the counter to the oven to avoid having a tart disaster.
The tart pans
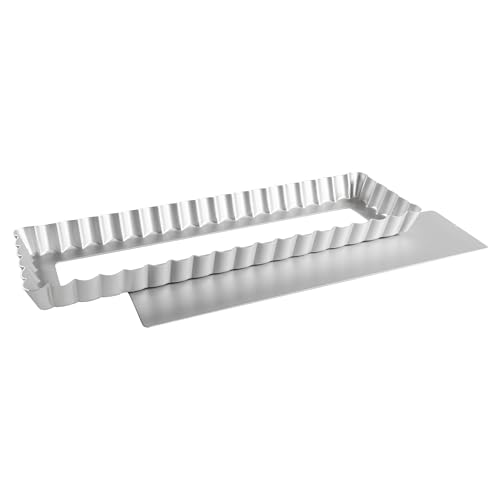
My favorite nonstick rectangle tart pan is 14 x 4.5 inches with a removable bottom and it makes an extra-long tart for a pretty presentation.
I love how sturdy this round nonstick 9.5″ tart pan is with a removable bottom. It makes tart-making easy.
Pastry crust FAQs
Yes. You can freeze either the unbaked tart shell or the baked tart shell. Wrap in plastic wrap, then in foil, and freeze for up to three months.
This really is a necessary step to ensure that the dough relaxes, and it helps prevent the dough from shrinking.
For a shortcrust tart, the dough needs to be at least blind-baked before adding a filling. This seals the pastry dough and prevents it from becoming soggy due to the wet filling.
They do seem similar, but there is a difference. The recipes for tart crust usually contain flour, butter, sugar, eggs, and sometimes cream, and bake up with a crispy shell. Pie crusts are usually just flour, butter, and water, and once baked, the crust is very flaky.
Like what you see? Be sure to follow One Hot Oven for more delicious, sweet, and savory recipes!
Recipe
Chocolate Shortbread Tart Crust


Ingredients
- 1 cup AP flour
- ¼ cup unsweetened cocoa powder
- ½ cup powdered sugar
- ⅛ teaspoon salt
- 6 tablespoons unsalted butter
- 1 egg yolk
- 2 tablespoons heavy cream
Instructions
- Note: This dough requires a one-hour chill time before being baked.
- When ready to bake heat the oven to 350°
- Whisk the flour, cocoa powder, powdered sugar, and salt in a large mixing bowl.
- In a small bowl mix the egg yolk, and one tablespoon of the cream together.
- Cut the butter into small dice and add to the flour mixture and toss to coat the butter with the flour.
- Add the beaten egg yolk mixture to the bowl and using a pastry blender or two knives cut in the butter and yolk into the flour until a soft dough starts to form. At this point, the dough will look a bit crumbly.
- Add the remaining cream and mix that in with a fork. At this point, the dough will still be crumbly. With your hands start pressing the dough together to form a cohesive dough
- Turn the dough onto a rolling mat and lightly knead to bring the dough together. Form into a rectangle shape or a round shape depending on the type of pan, and wrap the dough in plastic wrap and refrigerate for an hour.
- To roll out the dough: Remove the dough from the fridge and let it sit on the counter for a few minutes to soften slightly for easy rolling. Lightly sprinkle cocoa powder on a rolling mat, or use flour, and then sprinkle the top of the dough with a little cocoa powder or flour.Roll the dough for a round tart pan into a 12-inch (30cm) circle for a 9-inch or 10-inch pan. For a 14 x 4-inch rectangle tart pan roll the dough into a 16 x 8-inch rectangle.
- Next, gently roll the dough up around the rolling pin and then unroll the dough over the tart pan. Lift the excess dough from the sides to fill the bottom of the pan. Work your fingers around the pan to press the dough in the bottom and the side.
- Using a fork, prick holes in the bottom of the crust.
- Take the rolling pin and roll it over the top of the tart pan to remove the excess dough. If you have excess cocoa powder or flour brush it away with a pastry brush. Cover pan with plastic wrap and place in the freezer until firm, about 20 minutes. Freezing the dough makes it less likely it will shrink during baking.
- Note: This dough is fairly soft and if you want feel free to press it into the tart pan. I prefer the rolling pin method that makes the dough nice and smooth.
How to blind bake the tart dough
- Heat the oven to 350° and place the tart pan on a larger baking sheet so it will be easier to move the pan around without touching the removable bottom.
- Cut a piece of parchment paper bigger than the tart pan and press it onto the dough bottom and sides, with some parchment overhanging the sides. Fill the tart shell with sugar/dried beans/uncooked rice, making sure they’re fully distributed over the entire surface
- Partially bake the tart for 20 minutes. Remove from the oven and gently scoop or spoon the sugar/dried beans/uncooked rice out of the tart shell and then gently remove the parchment paper. Let the tart cool completely before filling.
- Fully bake the tart dough by following the above steps, and after you remove the weights, bake for another 10 minutes. Let the dough totally cool before adding the filling.
- Once the tart shell is fully or partially baked add your favorite filling. At this point, the tart shell can be kept wrapped in plastic wrap or foil for several days before adding the filling.
Notes
- After you form the dough into a disk, wrap the dough in plastic wrap then place it in a freezer bag, and freeze for up to three months. To use, let the dough thaw in the refrigerator then roll as directed.
- You can also roll the dough and fill the tart pan with the dough and freeze this. Wrap the pan in plastic wrap then cover with foil and put it in a freezer bag and freeze for up to three months. To bake, let sit on the counter while the oven is heating, then bake as directed.
As an Amazon Associate I earn from qualifying purchases.
Nutrition
First published: Jan. 16, 2022, Last updated: Feb. 17, 2022, for better readability.
Thank you for stopping by the One Hot Oven blog!
Please leave a comment to say hello or tell me what you are baking; I always love hearing from fellow bakers. Do you have any questions or want to chat about the recipe? Please visit my About page for information, and I’ll be happy to help!
About Jere’ Cassidy
From learning to cook on a farm in Indiana to culinary school in California, my passion for food is never-ending. Turning on my oven to bake something for friends and family is my happy place. I am glad to be sharing sweet and savory family-friendly recipes for your cooking and baking inspiration.


This tart crust turned out perfect, and crisp! I have never made one before so I appreciate the in depth instructions. I used mine for a chocolate and pecan tart. Everyone loved it. Will definitely be using this recipe again. I plan on trying your Chocolate Mousse Tart with it next.
Glad this recipe worked well for you. And, a chocolate pecan tart sounds amazing.
Thanks so much for this recipe! My sable recipes all have almond flour in them and I needed a recipe that would accommodate a nut allergy! Worked beautifully in my baked chocolate tarts.
I’m a bit confused by the butter measurements. Is it 6 ounces + 6 tablespoons or are you saying 6 ounces OR 6 tablespoons? 6 tablespoons is about 1/2 the amount of 6 ounces.
Thanks for any clarification you provide!!
can this be made in a food processor?
I made it in a Ninja food processor. It worked out well! I definitely forgot to chill it, though, so even with weights it poofed up, but that was my fault entirely. I just used a glass to press it back down and to the sides. I made this and a chocolate pie crust recipe at the same time and preferred your recipe. Thanks!
This tasted so amazing! Thanks a lot for sharing this super easy to make recipe! Fam really loves it! Will surely have this again! Highly recommended!
So glad you like this chocolate tart crust. It’s always good to have an easy recipe.
Ohh this crust comes out so delicious! I love how easy it was to prep too. I filled mine with chocolate pie because… double chocolate hehe!
I made two of these last night ready for some tarts I want to make at the weekend. I have popped them both in the freezer so that I am ahead with my prep.
I can’t believe how easy this was! I was worried that it would take me all night to get them looking perfect, but it didn’t, your instructions and photos were so clear! I felt like a pastry chef 😉
Cannot wait to make my orange chocolate tarts with these pretty pastry cases! They really did look good!
Orange chocolate tarts…that just sounds amazing.