


With just a few ingredients and an overnight chill, you can make tasty homemade refrigerator dill pickles with this easy recipe for a crunchy side. Homemade pickles are known for their tangy flavor and crisp texture. These easy-to-make dills have a fresh taste that beats those from the grocery store.

Want to save this recipe?
Enter your email & I’ll send it to your inbox. Plus, get great new recipes from me every week!
This page may contain affiliate links; please see my disclosure for policy details. I earn commissions if you shop through the links on this page.
Did you know making homemade dill pickles is a breeze? You don’t need to dedicate an entire afternoon; you can make a few pint jars in 30 minutes. Here’s all you need to know to start your own batch of homemade dill pickles right away.
Growing up, I used to can pickles, but it was quite the process with all the special equipment involved. However, with this recipe, there’s no need for canning whatsoever. In fact, I believe these simple-to-make refrigerator dill pickles might just become your new favorite summertime recipe.
What Type Of Cucumber To Use

- For the perfect pickles, you need the right cucumbers; I use Kirby cucumbers. These are the short, stubby ones, about 6 inches long, with bumpy skin, firm flesh, and a solid interior.
- They’re the go-to for pickling, known as “pickling cucumbers” for a reason. Kirbys are crunchy, not too strong in flavor, and can handle a bold hot brine. They make the crispiest pickles around.
- I also make Bread and Butter Pickles and always use Kirby cucumbers for the best-tasting pickles.
- Look at the farmer’s market for cucumbers, and in the summer, I can often find Kirby’s in the grocery stores. Just make sure they are fresh.
- If you can’t find Kirby cucumbers, try using Persian cucumbers.
Ingredients To Make The Best Dill Pickles

- Kirby cucumbers – I used four cucumbers that were about 1 1/4 lbs.
- White vinegar – this provided the pickling power.
- Fresh dill – I like to use fresh dill heads and dill leaves. In a pinch, you can substitute dill seeds.
- Kosher salt – this will add flavor, plus salt acts as a preservative.
- Whole black peppercorns – use peppercorns for a little spice and heat.
- Fresh garlic cloves – make sure to peel the cloves for flavor.
How To Make Pickles Extra Crunchy
We love crunchy pickles, and this is the trick to making them crunchy: soak the cucumber slices in ice water for an hour. It’s worth the time.
How To Make Quick Refrigerator Pickles
Equipment needed – Make sure you are using sterilized jars and lids.
Step 1. Wash the cucumbers, cut off their ends first, then slice them into shapes like 1/4″ round slices or thick spears. Make sure to consider the height of your jar in relation to the length of the cucumber pieces to ensure they fit well inside.

Step 2. Soak the cucumber slices in a large container filled with ice water and let sit for about an hour. Drain well when done soaking.

Step 3. Pack the jars by adding a clove of garlic, peppercorns, red pepper flakes and dill sprigs to the bottom of each jar. Then pack in the cucumbers.

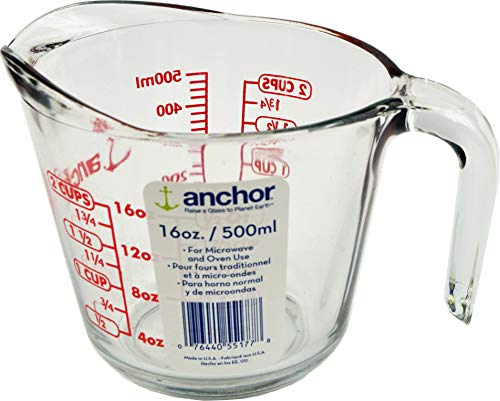
Step 4. Make the brine by combining the water, vinegar, and salt in a measuring cup and heat in the microwave for a few minutes until the salt dissolves.
Step 5. Pour the pickling brine into sterilized jars until the cucumbers are completely submerged and the jar is full.

Step 6. Let the jars sit uncovered for an hour to cool, then seal the lids tightly and place the jars in the refrigerator to soak up the brine.

Step 7. Chill the pickles a few days before eating.
Are you surprised how fast it is to make a jar of pickles? Besides soaking the cucumbers, you can make these crisp pickles in 30 minutes. Once you taste them, you will forever make your own. They are perfect for snacking on, adding to a cheeseboard, or topping your favorite sandwich.

Equipment
I get asked all the time if you have to use a canning jar for these pickles, and the answer is NO. Feel free to use any jar with a tight-fitting lid, and make sure it is cleaned and sterilized.
This recipe makes two pint-sized jars of pickles. I use the 16-ounce wide-mouth mason jars.
If you are into pickling, try these Pickled Red Onions that take just minutes to make.
Did you know you can pickle fruits and vegetables? This Picking Guide will walk you through the steps for pickling success.

Subscribe here for more great recipes, and follow One Hot Oven for more tasty sweet and savory recipes! Pinterest | Instagram | Facebook
Recipe
Tried it? Rate ⭐⭐⭐⭐⭐ & comment below—your feedback keeps the oven mitts flying here at One Hot Oven.

Easy Homemade Dill Pickles
Equipment

Ingredients
- 4 Kirby cucumbers this will be a little over a pound
- 1 cup white vinegar
- 1¼ cups water
- fresh dill sprigs use the leaves and the flower heads
- 4 cloves garlic peeled
- 1 tablespoon kosher salt
- 1 teaspoon whole black peppercorns
- ¼ teaspoon red pepper flakes
Instructions
Prep the cucumbers
- Wash the cucumbers and cut the ends off. Either cut the cucumbers in thick spears or cut them into ¼" rounds.
- Fill a large bowl with water and ice cubes, then add the cut cucumbers to the bowl. Let sit for an hour, then drain well. This will help make the pickles crispy.
Prepare the herbs and spices
- Peel the garlic cloves. Pull off sprigs of the dill and cut some of the flower heads off to fit in the jar.
- Divide the garlic, dill, peppercorns and red pepper flakes to the bottom of the sterilized jars.
Make the brine
- In a 2 cup measuring cup add the water, vinegar and salt. Stir well. Place the cup in the microwave and heat on medium power for two minutes, or until the salt is dissolved.You can also heat the brine in a saucepan.
- Pack the jars with the prepared cucumbers. Pour the hot brine over the cucumbers until they are completely submerged.
- Let the pickles sit on the counter for about an hour until the brine has cooled. I like placing more dill on the top of the cucumbers and then sealing the jar with the lids.
- Place the jars in the refrigerator and enjoy after two days.
Notes
Notes on the jars
- Make sure your jars and lids are clean and sterilized. I wash mine in the dishwasher and then give them a dip in a big bowl filled with hot water and bleach.
- You can use any jar that has a tight-fitting lid. This is perfect if you like to recycle jars.
- I like using 16-ounce wide-mouth canning jars.
Using dill seeds
If you can’t find fresh dill use 2 teaspoons of dill seeds for this recipe.As an Amazon Associate I earn from qualifying purchases.
Nutrition
Thank you for stopping by the One Hot Oven blog. Please leave a comment to say hello or tell me what you are baking; I always love hearing from fellow bakers. Do you have any questions or want to chat about the recipe? Please visit my About page for information, and I’ll be happy to help!
Hello there, I’m Jere’
From learning to cook on a farm in Indiana to culinary school in California, my passion for food is never-ending. Turning on my oven to bake something for friends and family is my happy place, and I am glad to be here at One Hot Oven sharing sweet and savory family-friendly recipes for your cooking and baking inspiration.


Love these! So quick and easy, and so much flavor!