
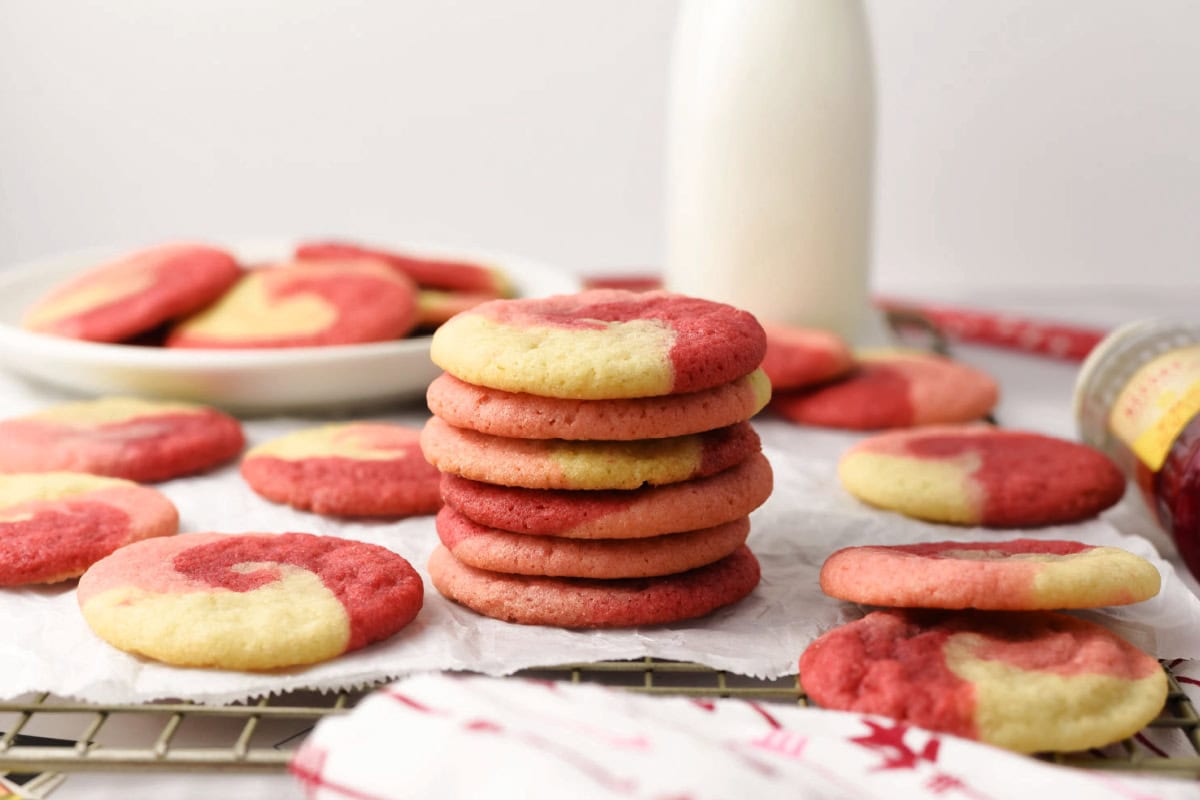
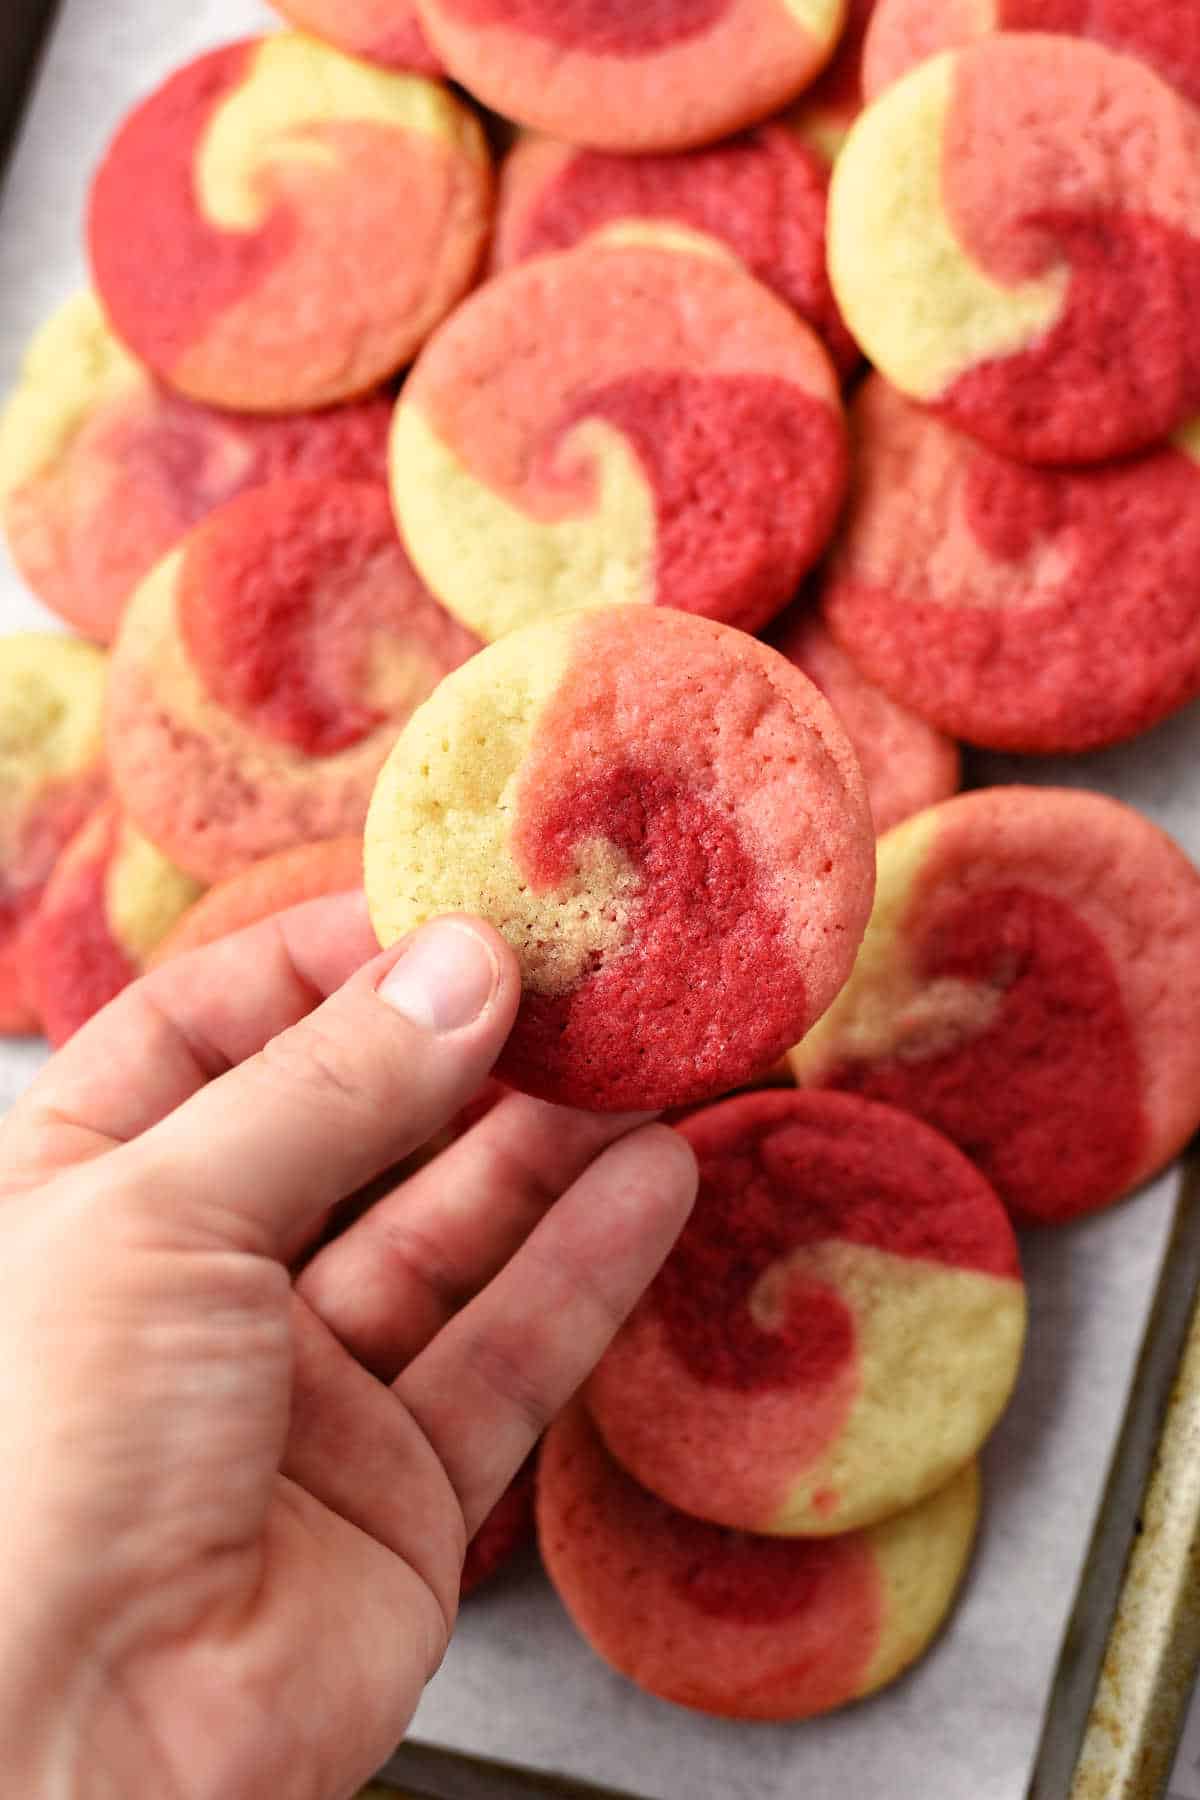
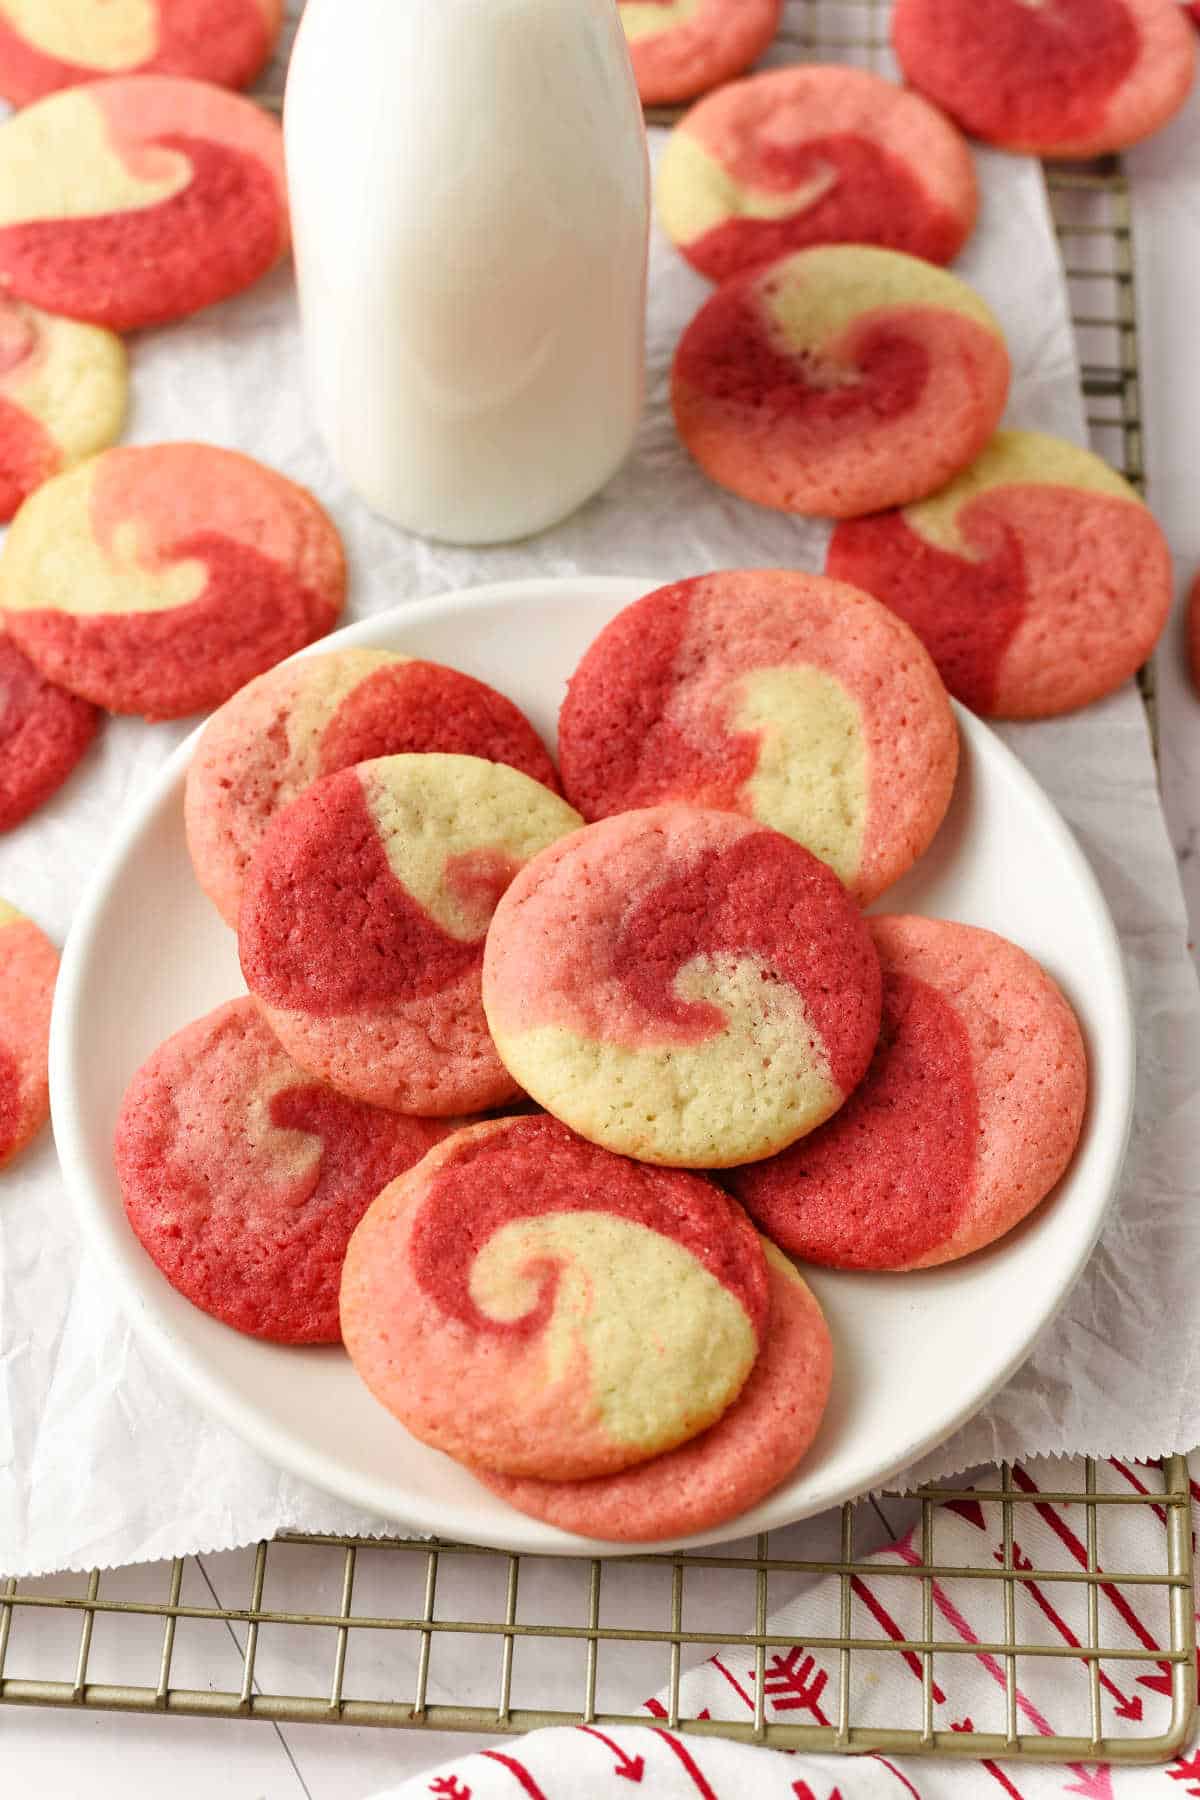
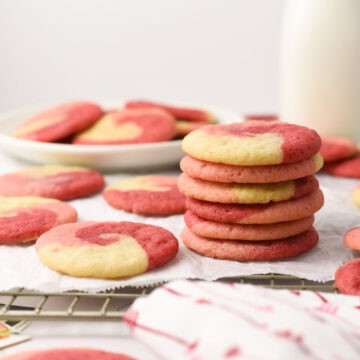
Enjoy these fun and festive sugar cookies. You’ll make one simple dough, tint a couple of portions, then press and gently swirl the colors together for a pretty red-and-pink pinwheel look. The steps are easy to follow, the colors stay clear, and the cookies bake up soft and just right.
Want to save this recipe?
Enter your email & I’ll send it to your inbox. Plus, get great new recipes from me every week!
This page may contain affiliate links; please see my disclosure for policy details.
These aren’t the classic rolled-up pinwheel cookies that require careful layering and tight logs. Instead of rolling and slicing, you simply press small pieces of dough together and give them a gentle swirl in your hands. It’s a much easier approach that still gives you that pretty pinwheel look, without the extra steps or stress.
If you’re putting together a Valentine’s Day cookie tray, add my dark chocolate slice-and-bake shortbread cookies for a make-ahead option that pairs perfectly with the pink and red swirls, and my Valentine’s thumbprint cookies for a fun-filled cookie that looks great right alongside them.
For another sugar cookie you can customize by season, try these autumn leaf sugar cookies with maple syrup, which use the same basic dough idea with a fall twist.

- Type of recipe: Swirl sugar cookies
- Cooking method: Chilling the dough, then baking
- Skill level: Easy to medium
- Flavors & textures: Buttery and sweet, with soft centers and lightly crisp edges
Table of contents
Recipe Ingredients
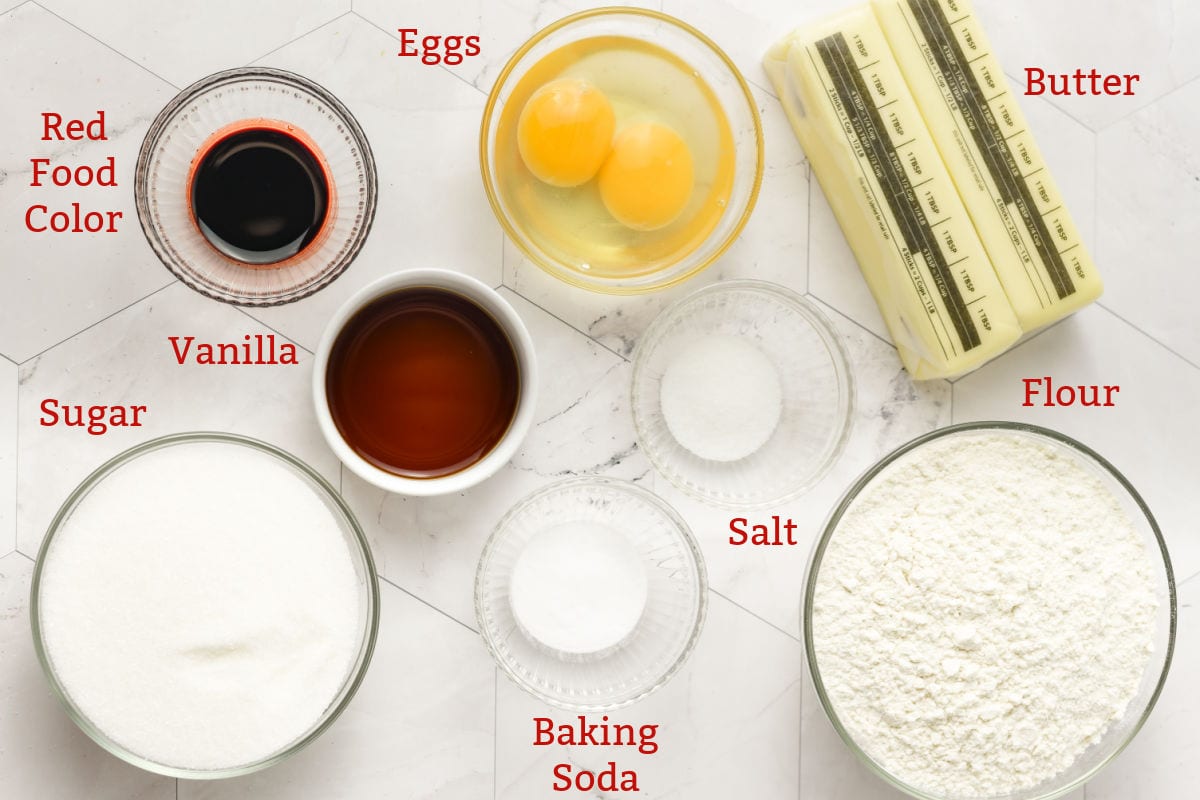
- Butter: Use unsalted butter so you control the salt level. Make sure it’s softened to room temp so it creams easily with the sugar.
- Granulated Sugar: Regular white sugar works best for these cookies.
- Egg + Egg Yolk: The extra yolk is the secret to richer dough and a softer, chewier center. Use room temperature eggs so they mix in evenly.
- Vanilla Extract: Adds that classic sugar cookie flavor. Pure vanilla is best, but use what you’ve got, and try making homemade vanilla.
- All-Purpose Flour: Spoon and level the flour so you don’t pack in too much.
- Baking Soda and Salt: These work together to help the cookies bake evenly and maintain a balanced flavor.
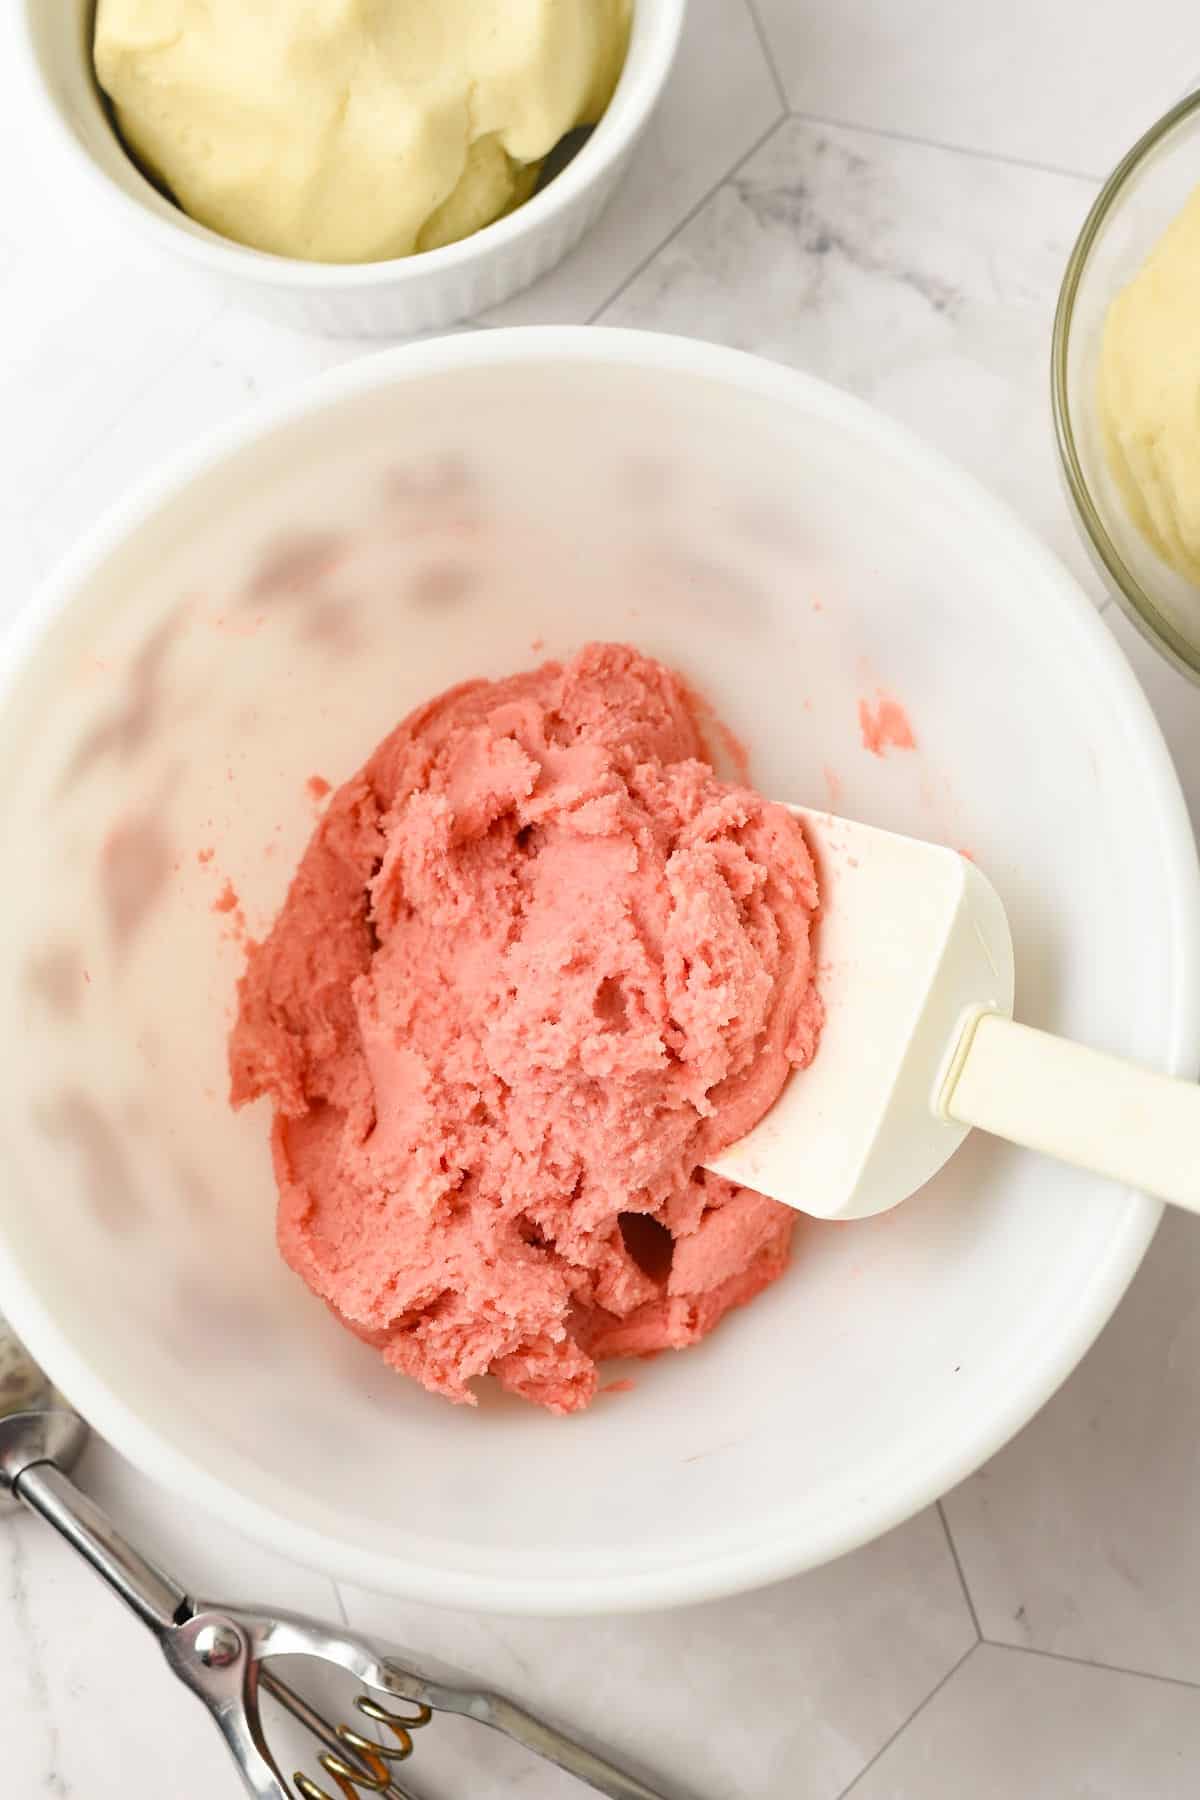
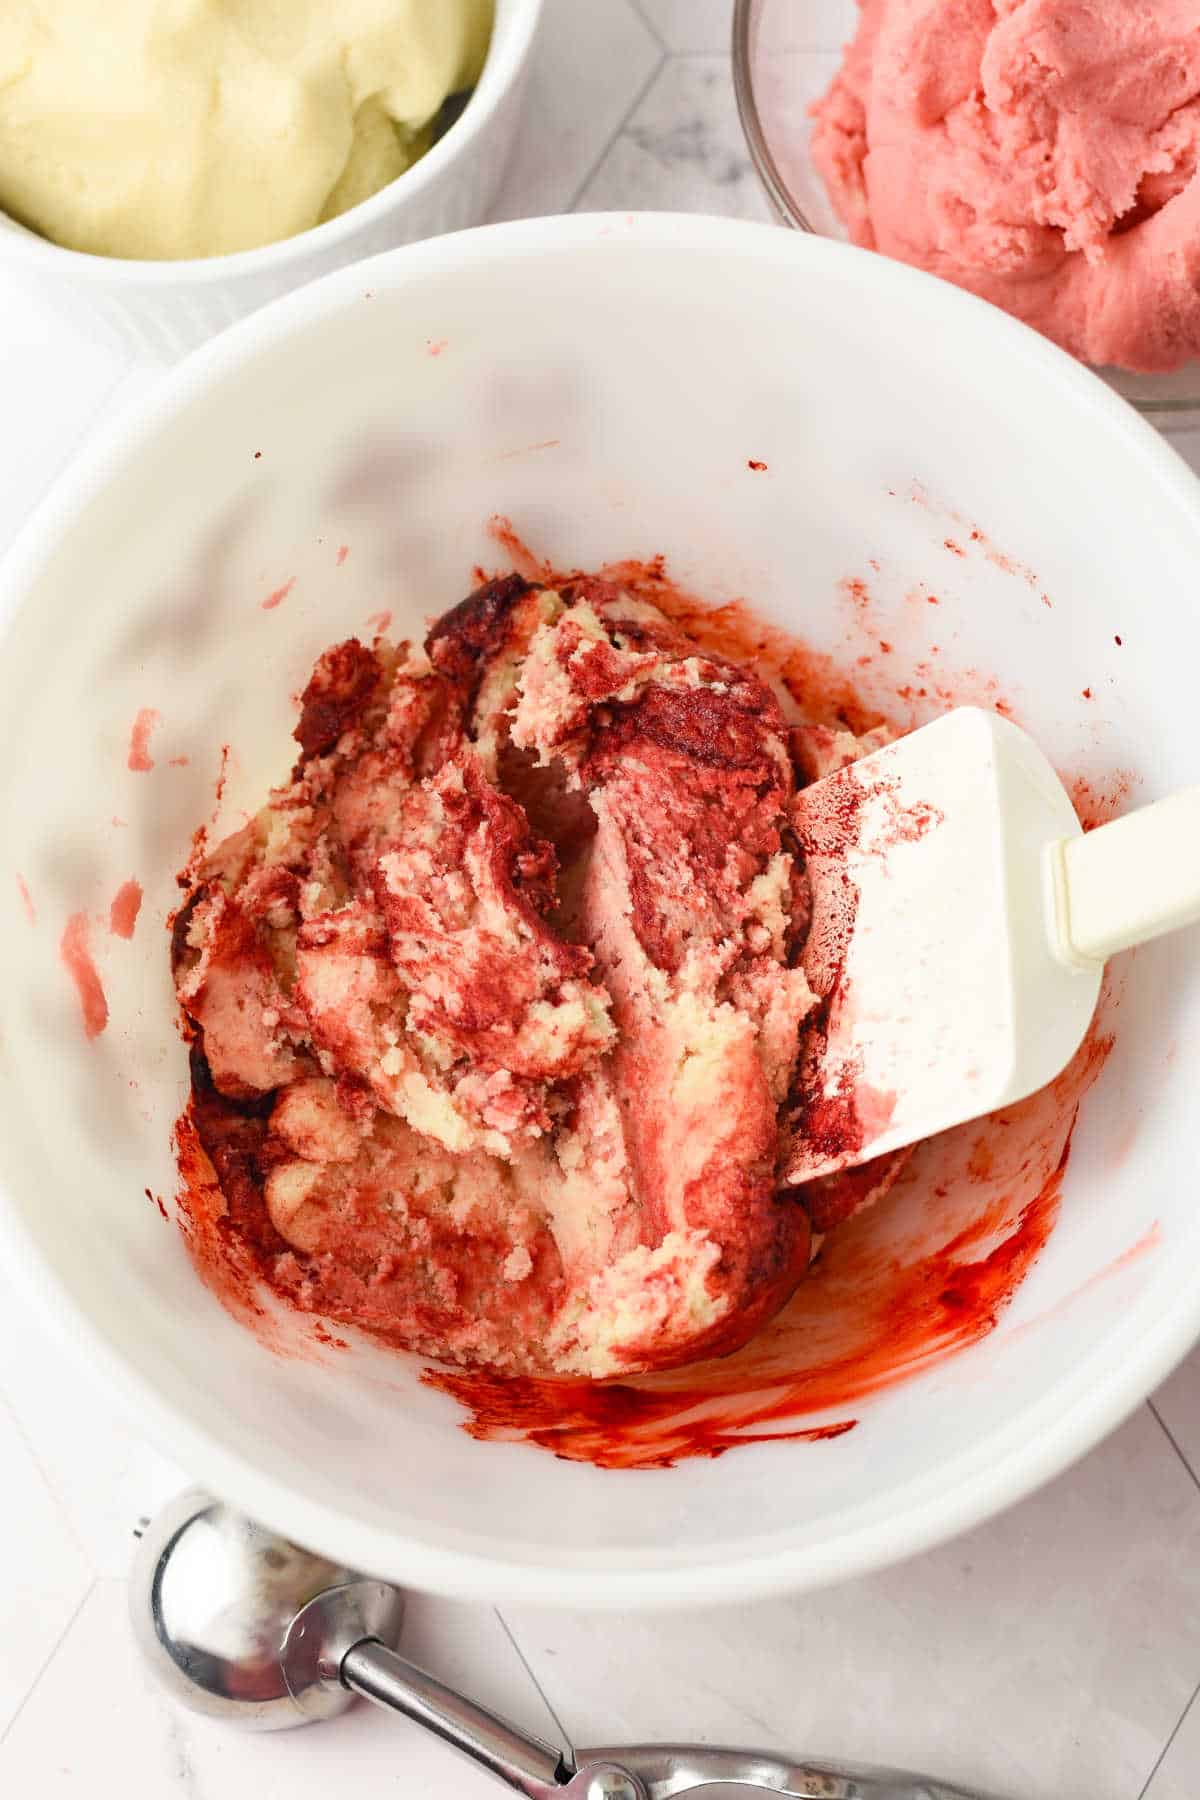
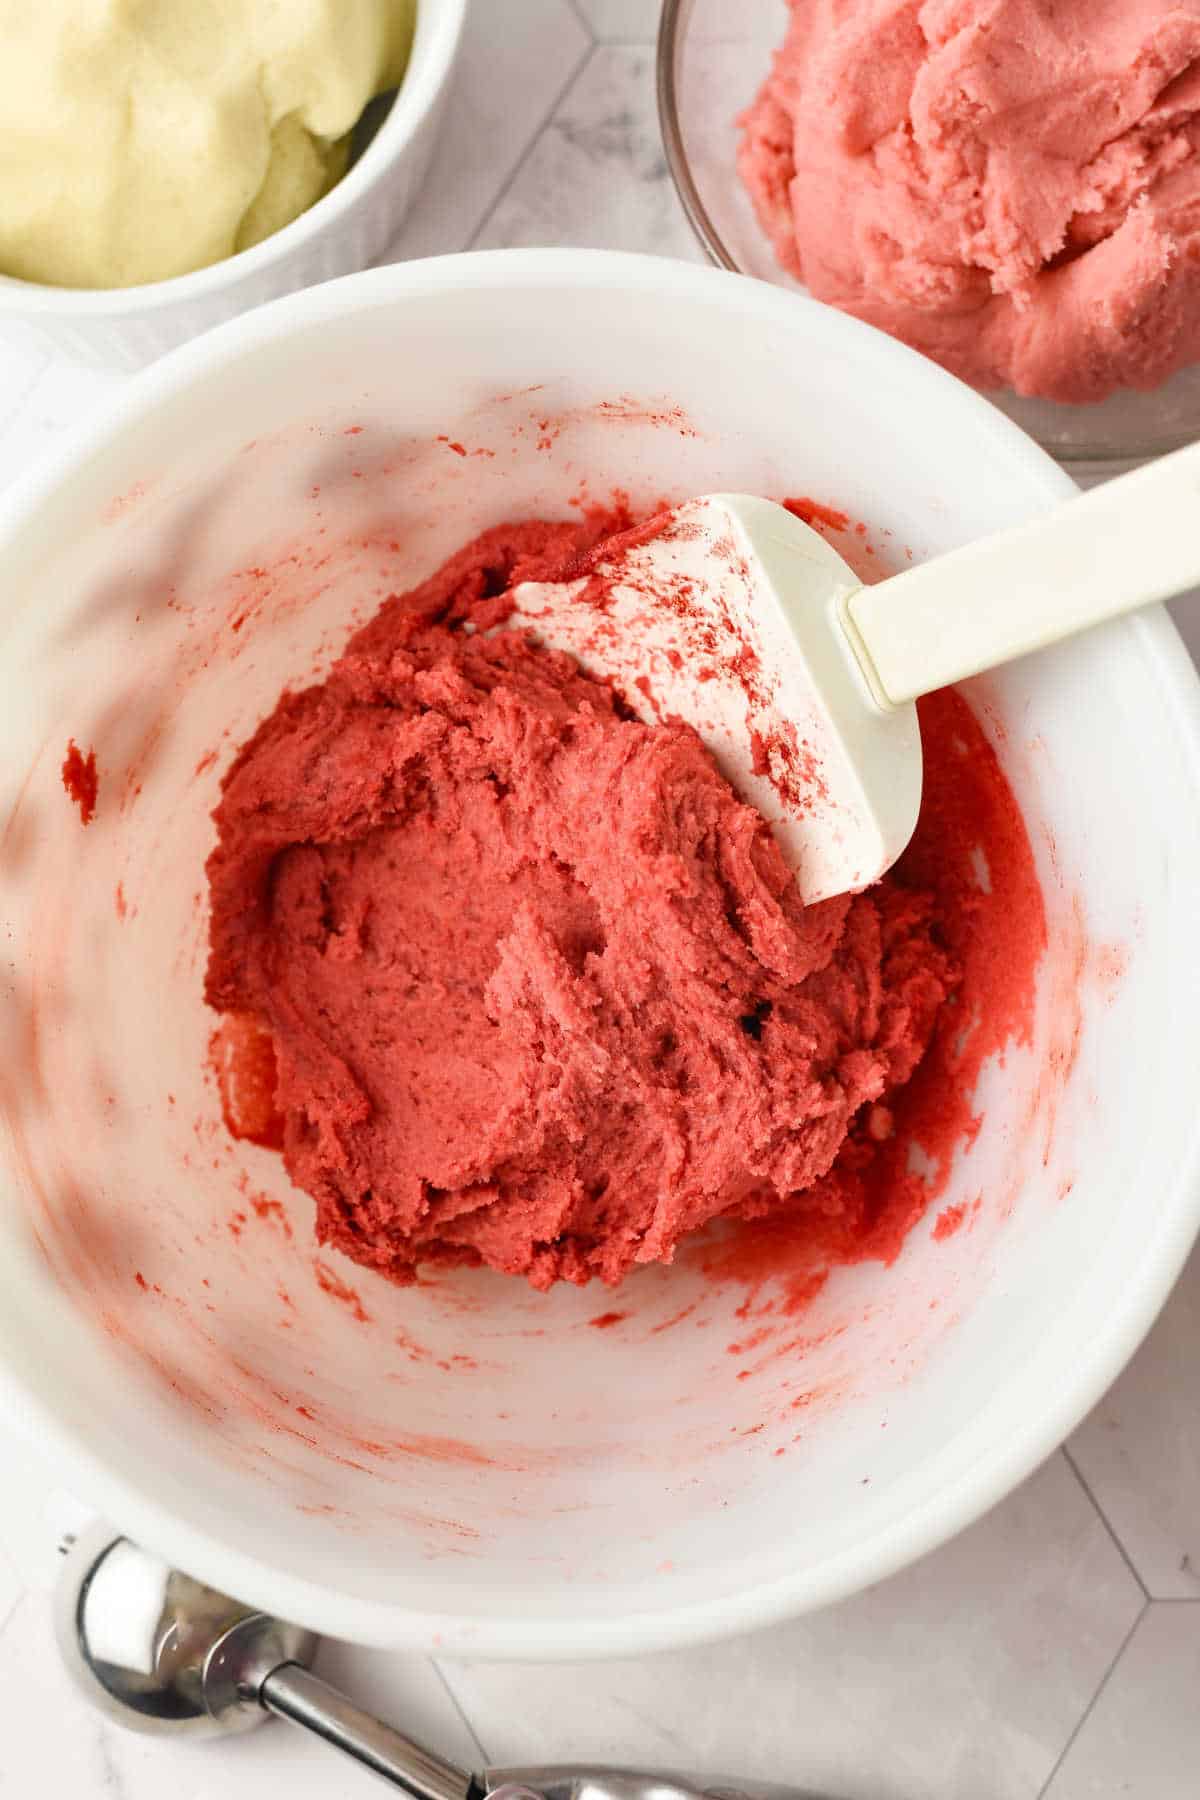
- Red Food Coloring: Tint one portion light pink and one portion red. Gel food coloring gives a stronger color, but liquid works fine.
How To Make Swirl Cookies
Make the cookie dough
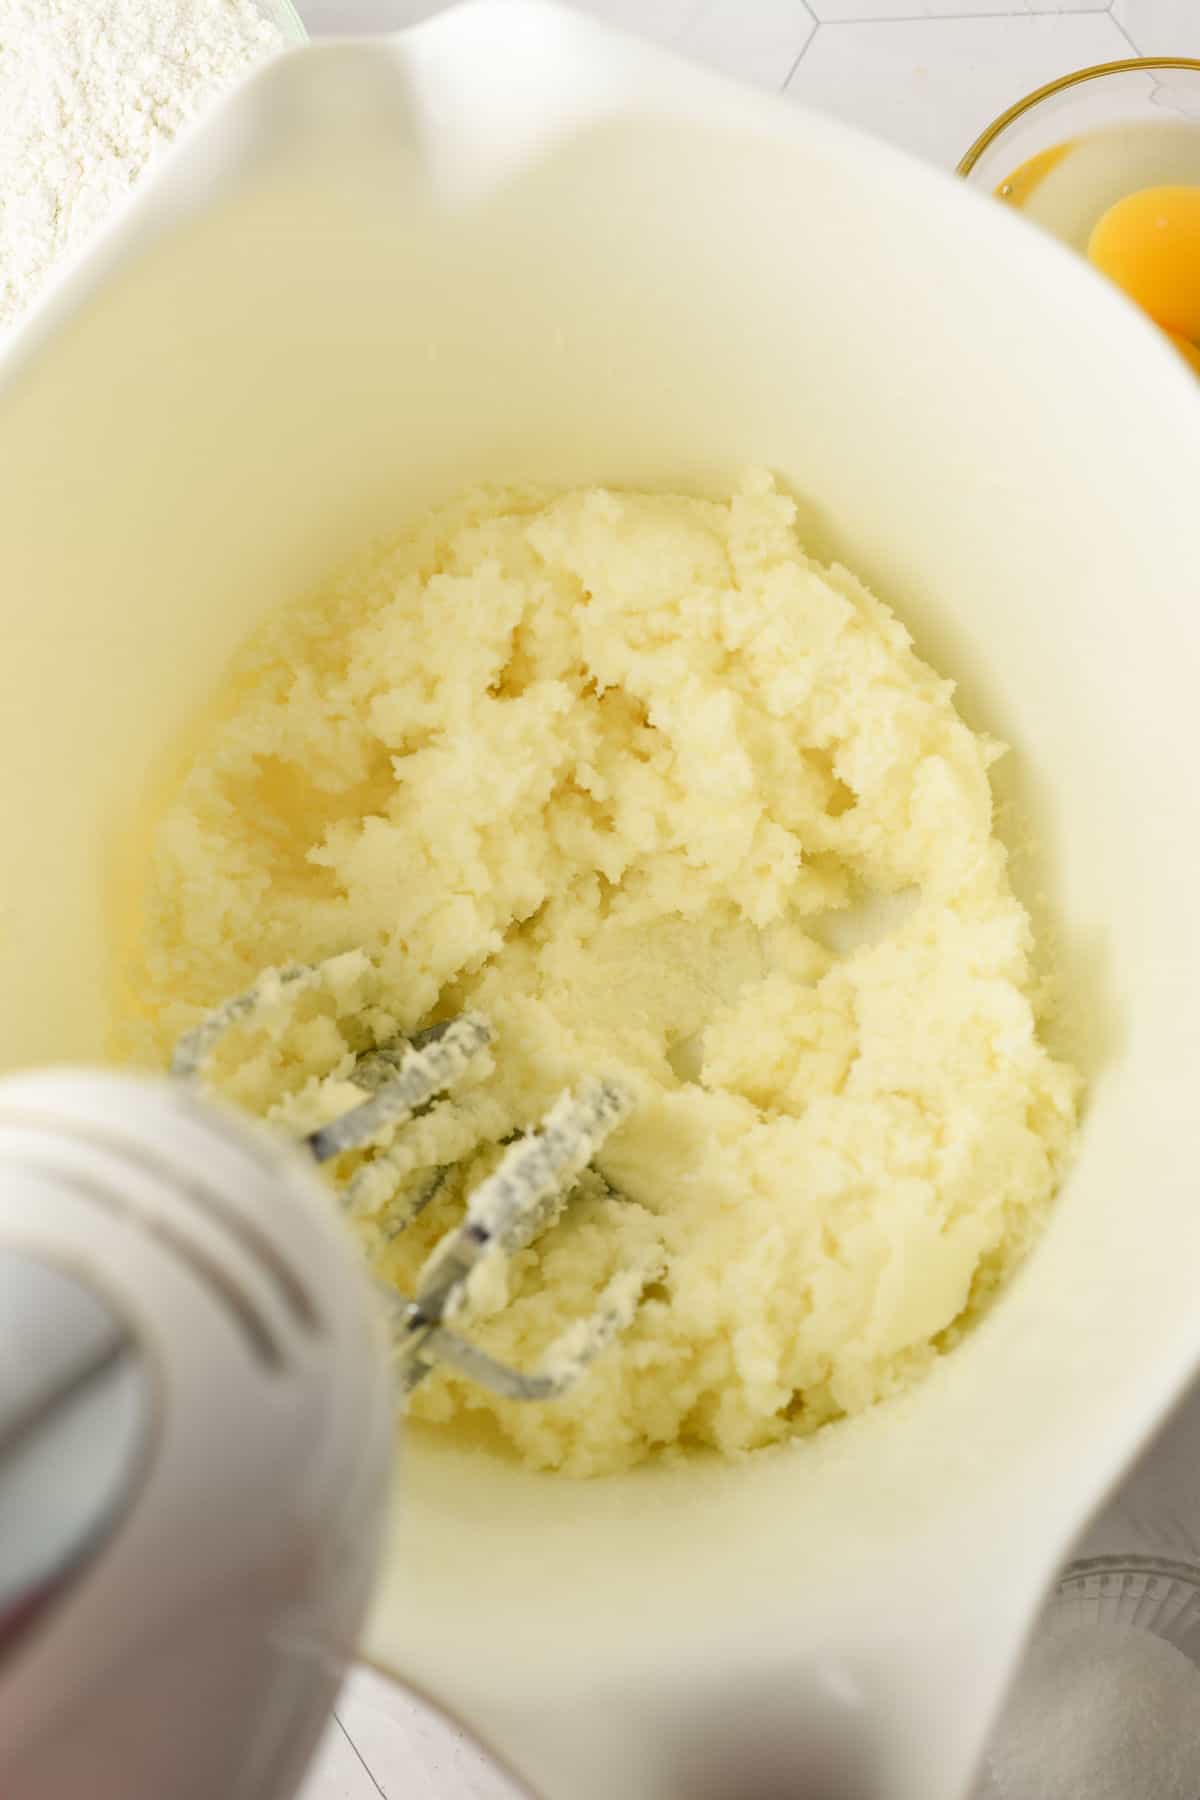
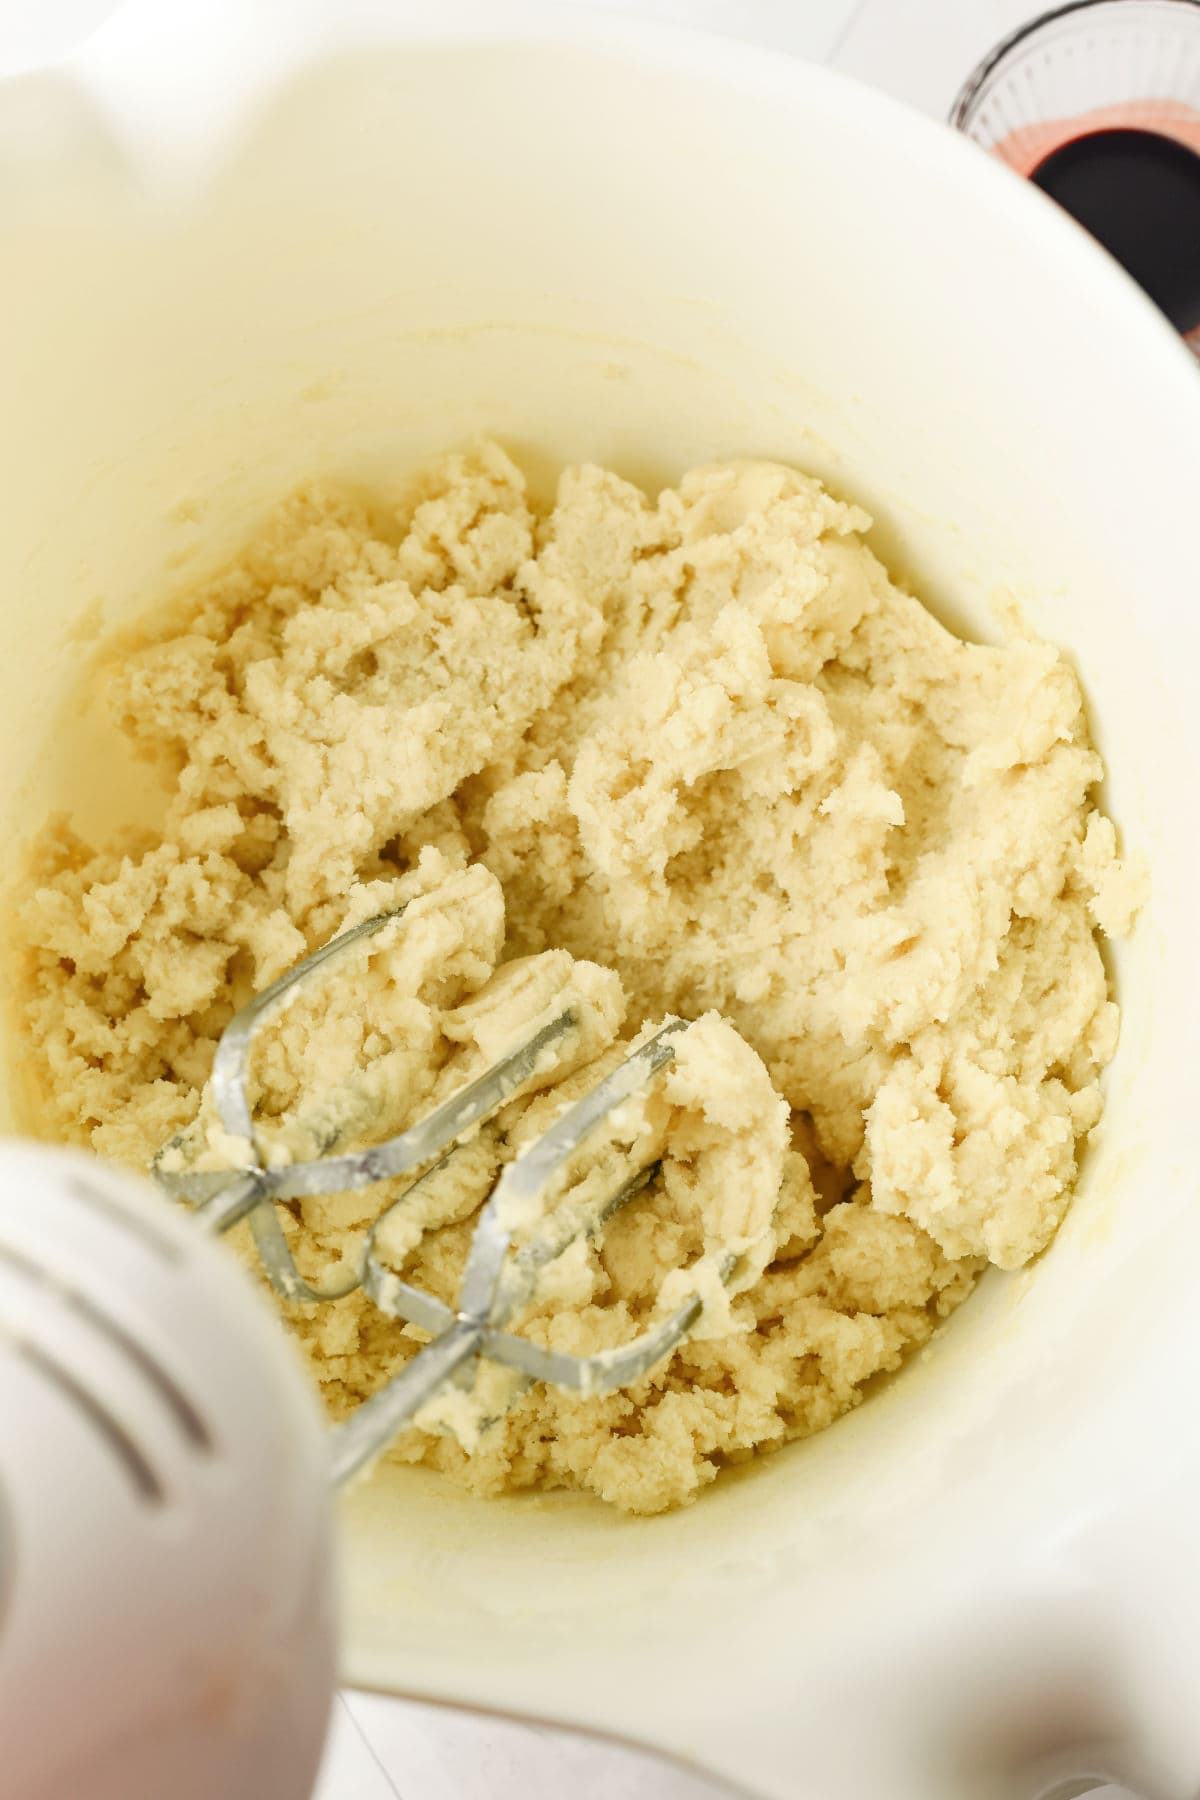
Step 1. Cream the butter and sugar together until light and fluffy
Step 2. Mix in the whole egg and the egg yolk, along with the vanilla.
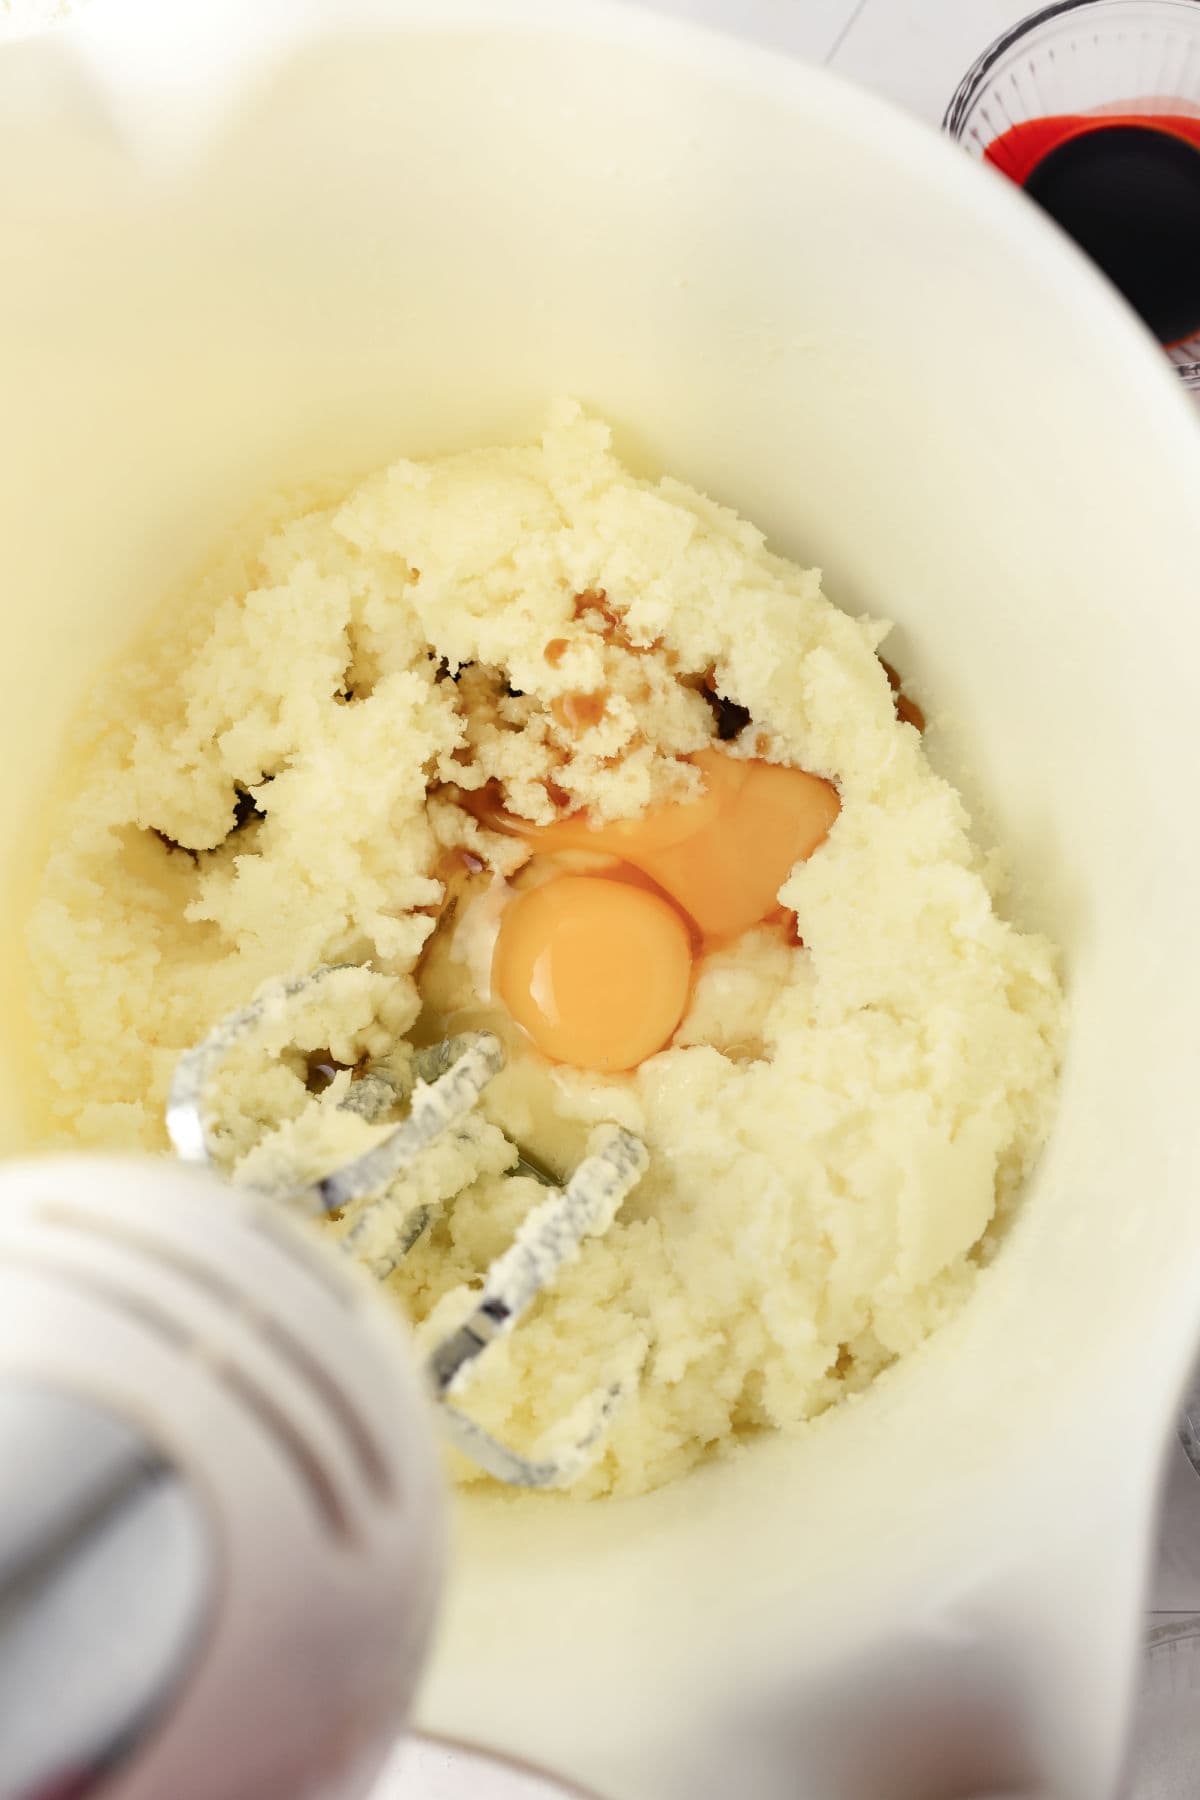
Step 3. Mix in the baking soda and salt, then add the flour in 1/2 cup increments until a soft dough forms.
Divide and color the dough
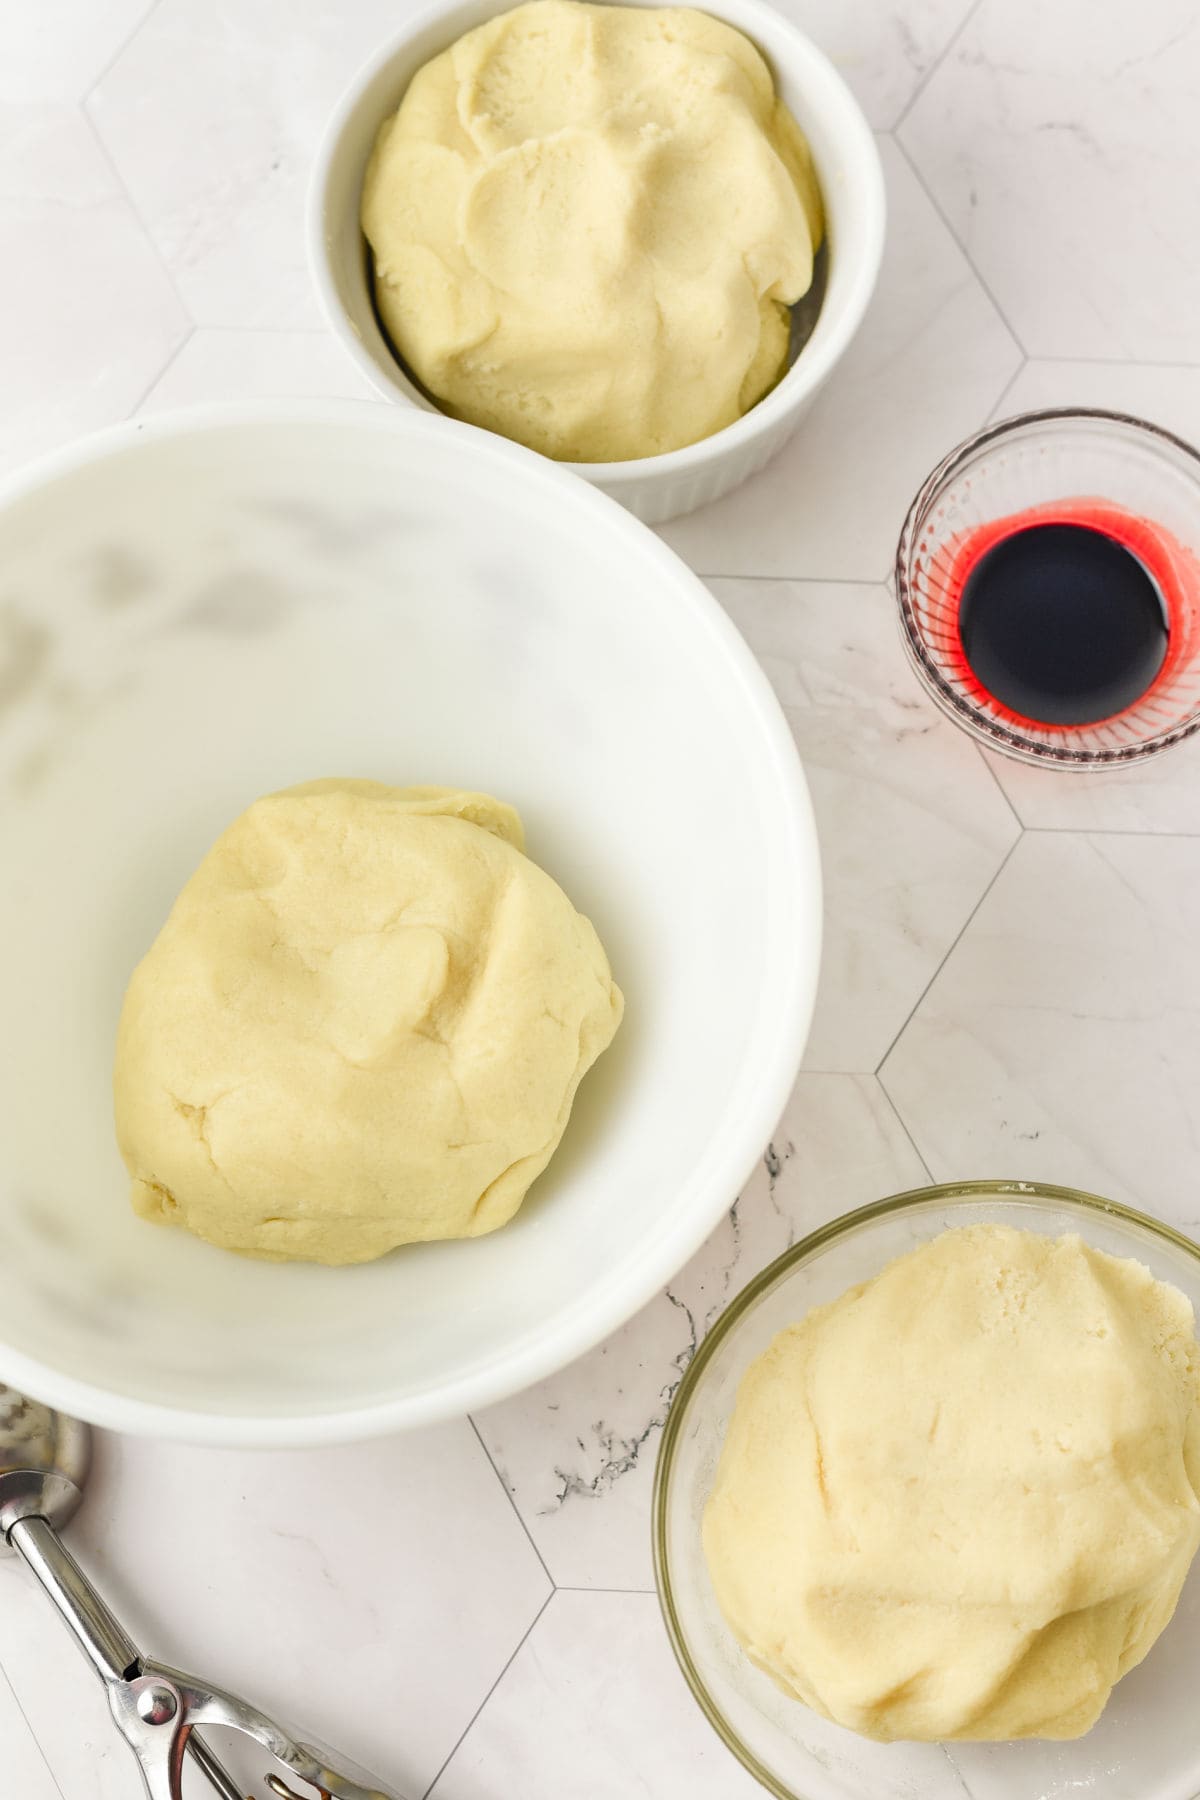
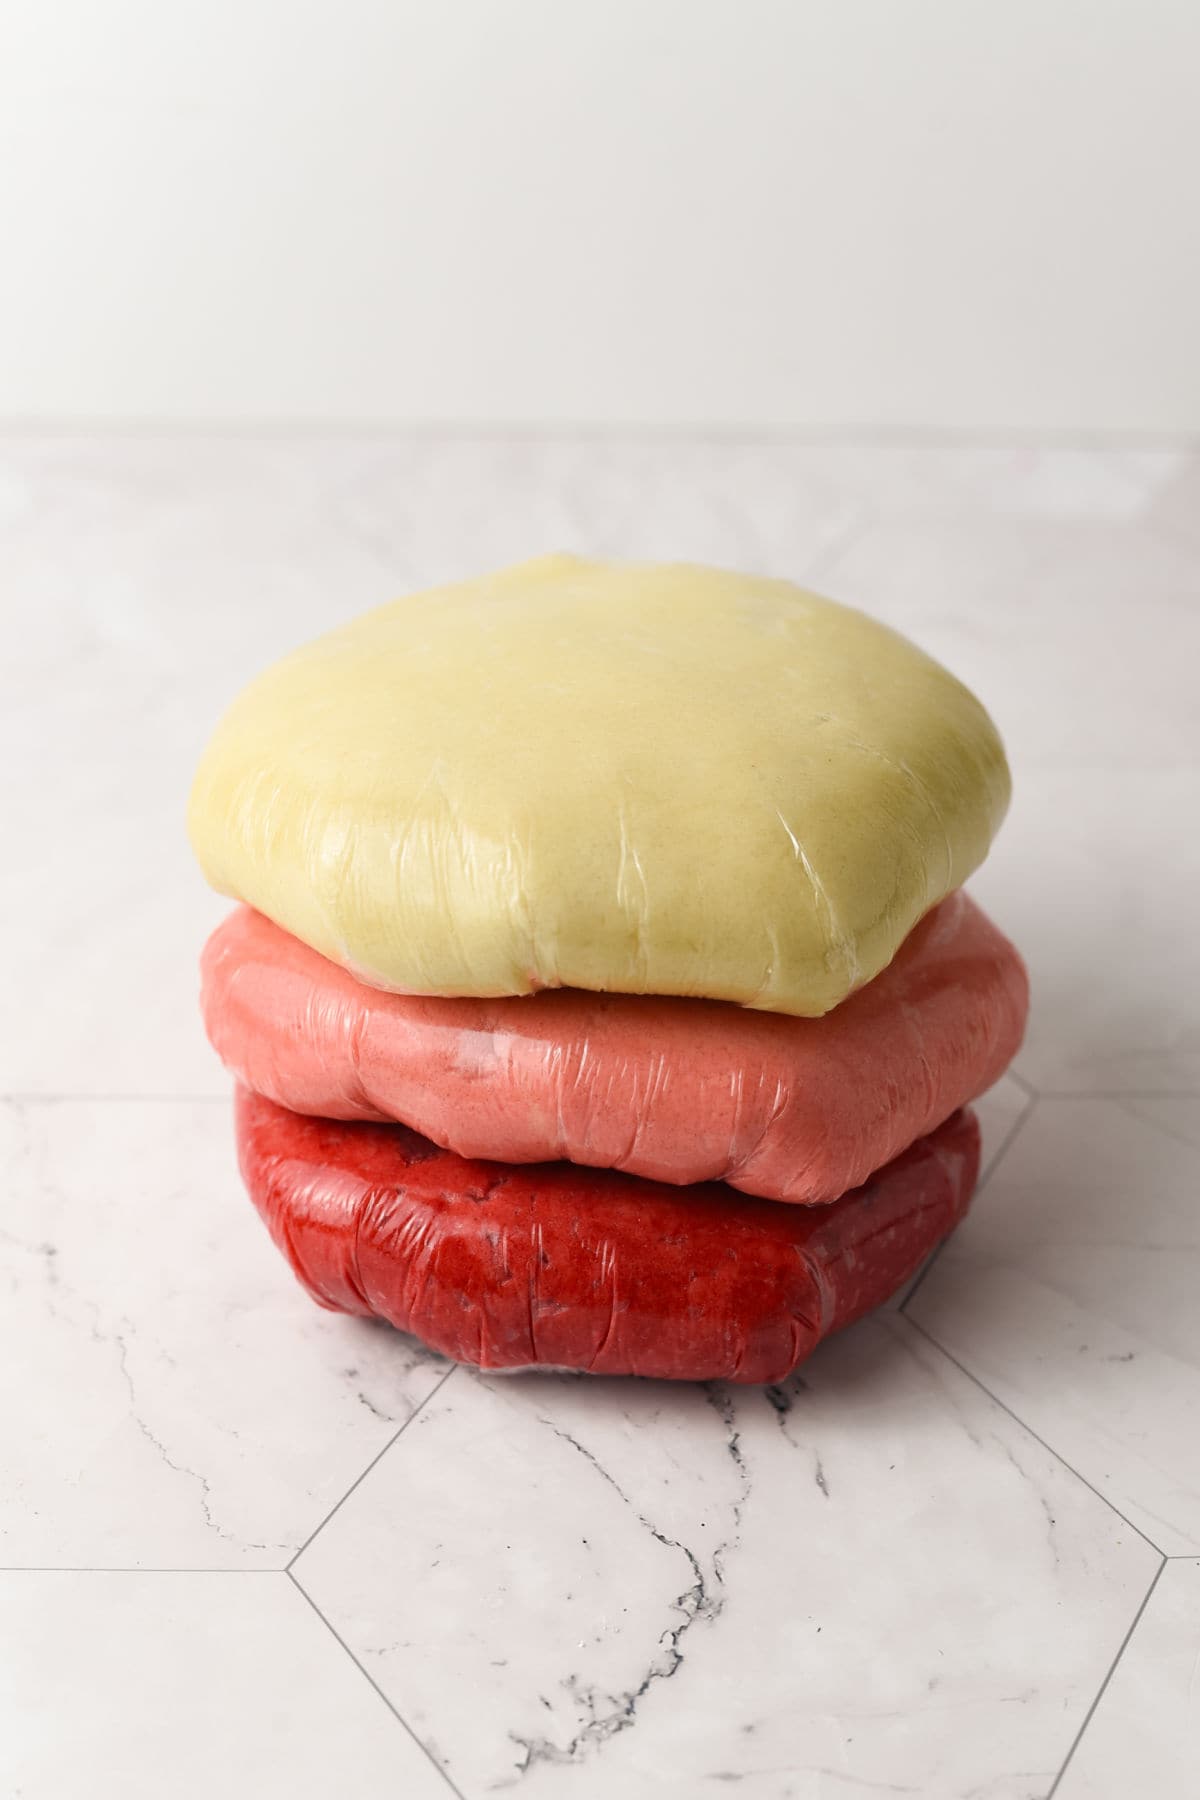
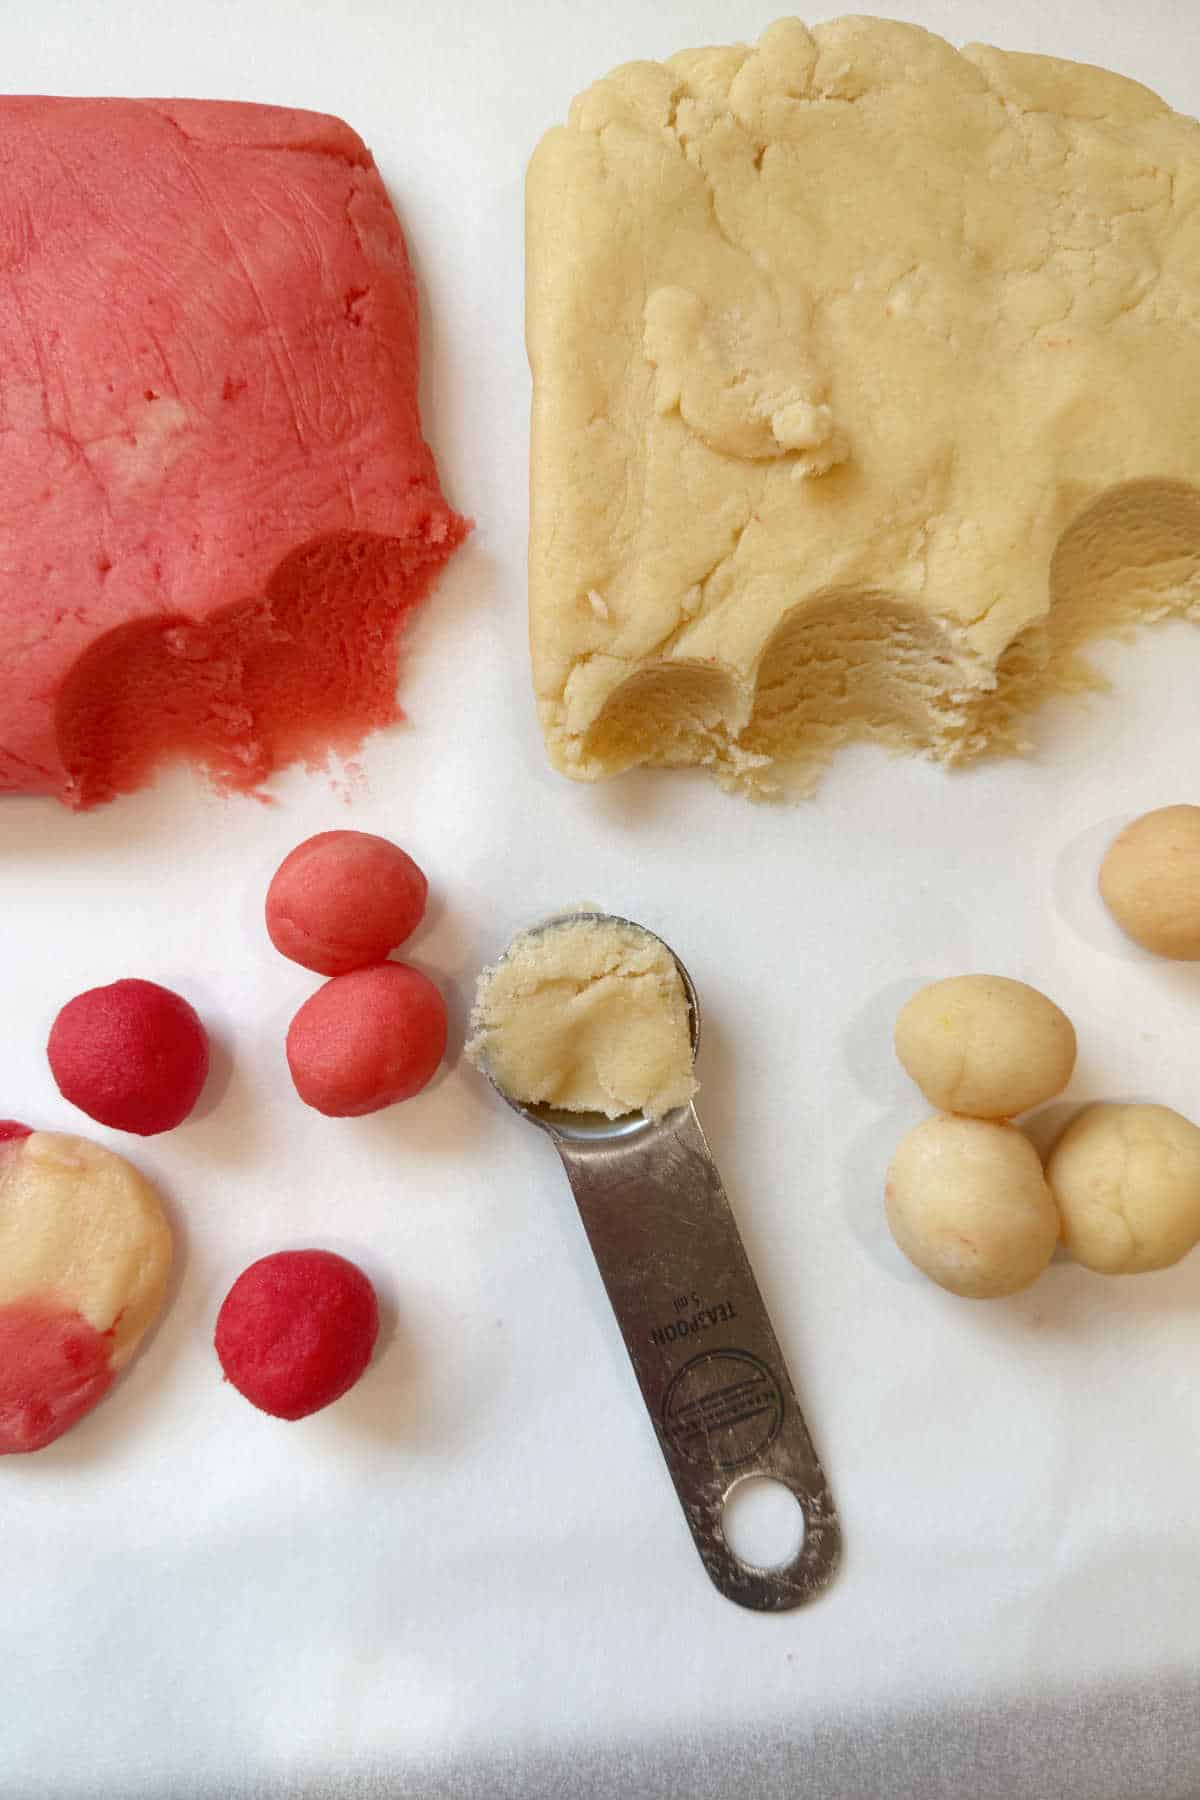
Step 4. Divide the dough into three equal portions. Leave one portion plain, tint one light pink and the third one red.
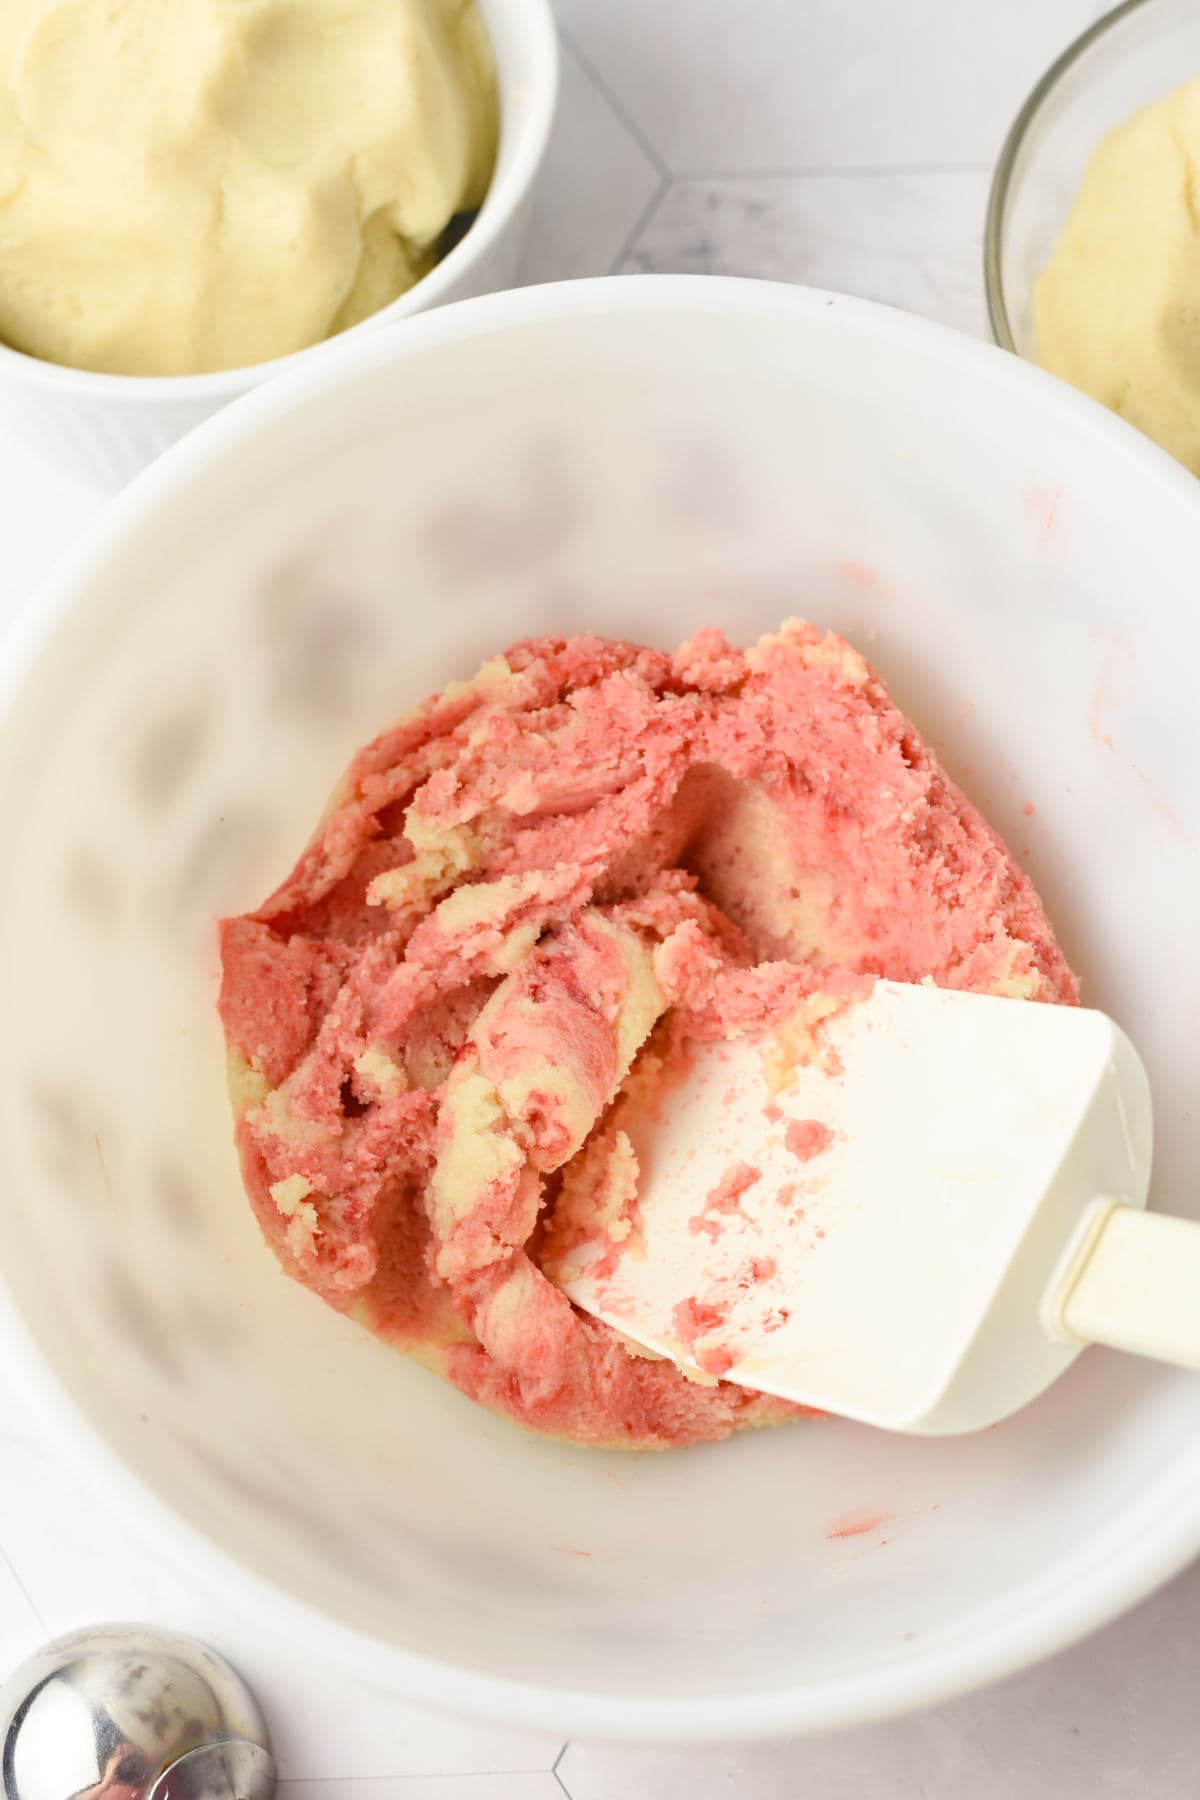
Step 5. Wrap each portion and chill the dough for at least 1 hour so it’s easy to handle, which helps prevent the cookies from spreading.
Scoop the dough
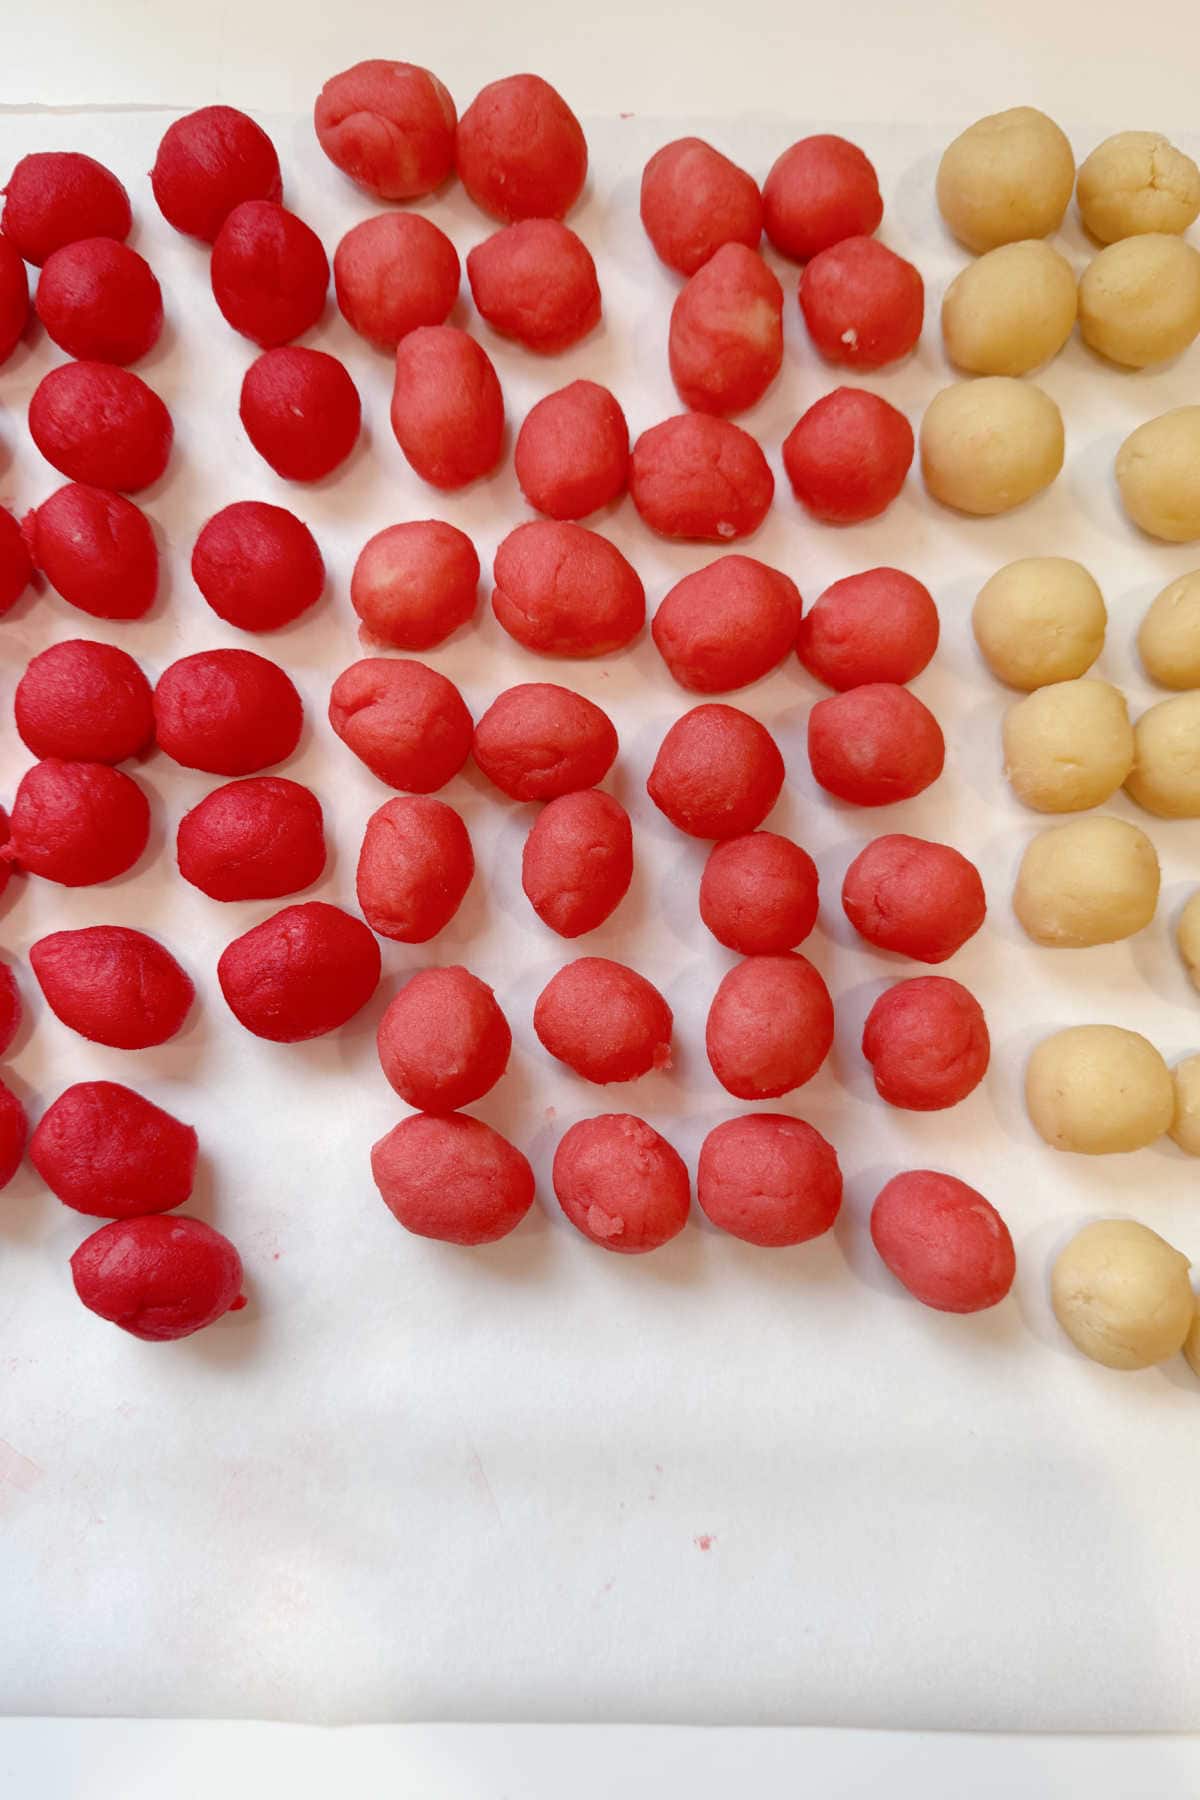
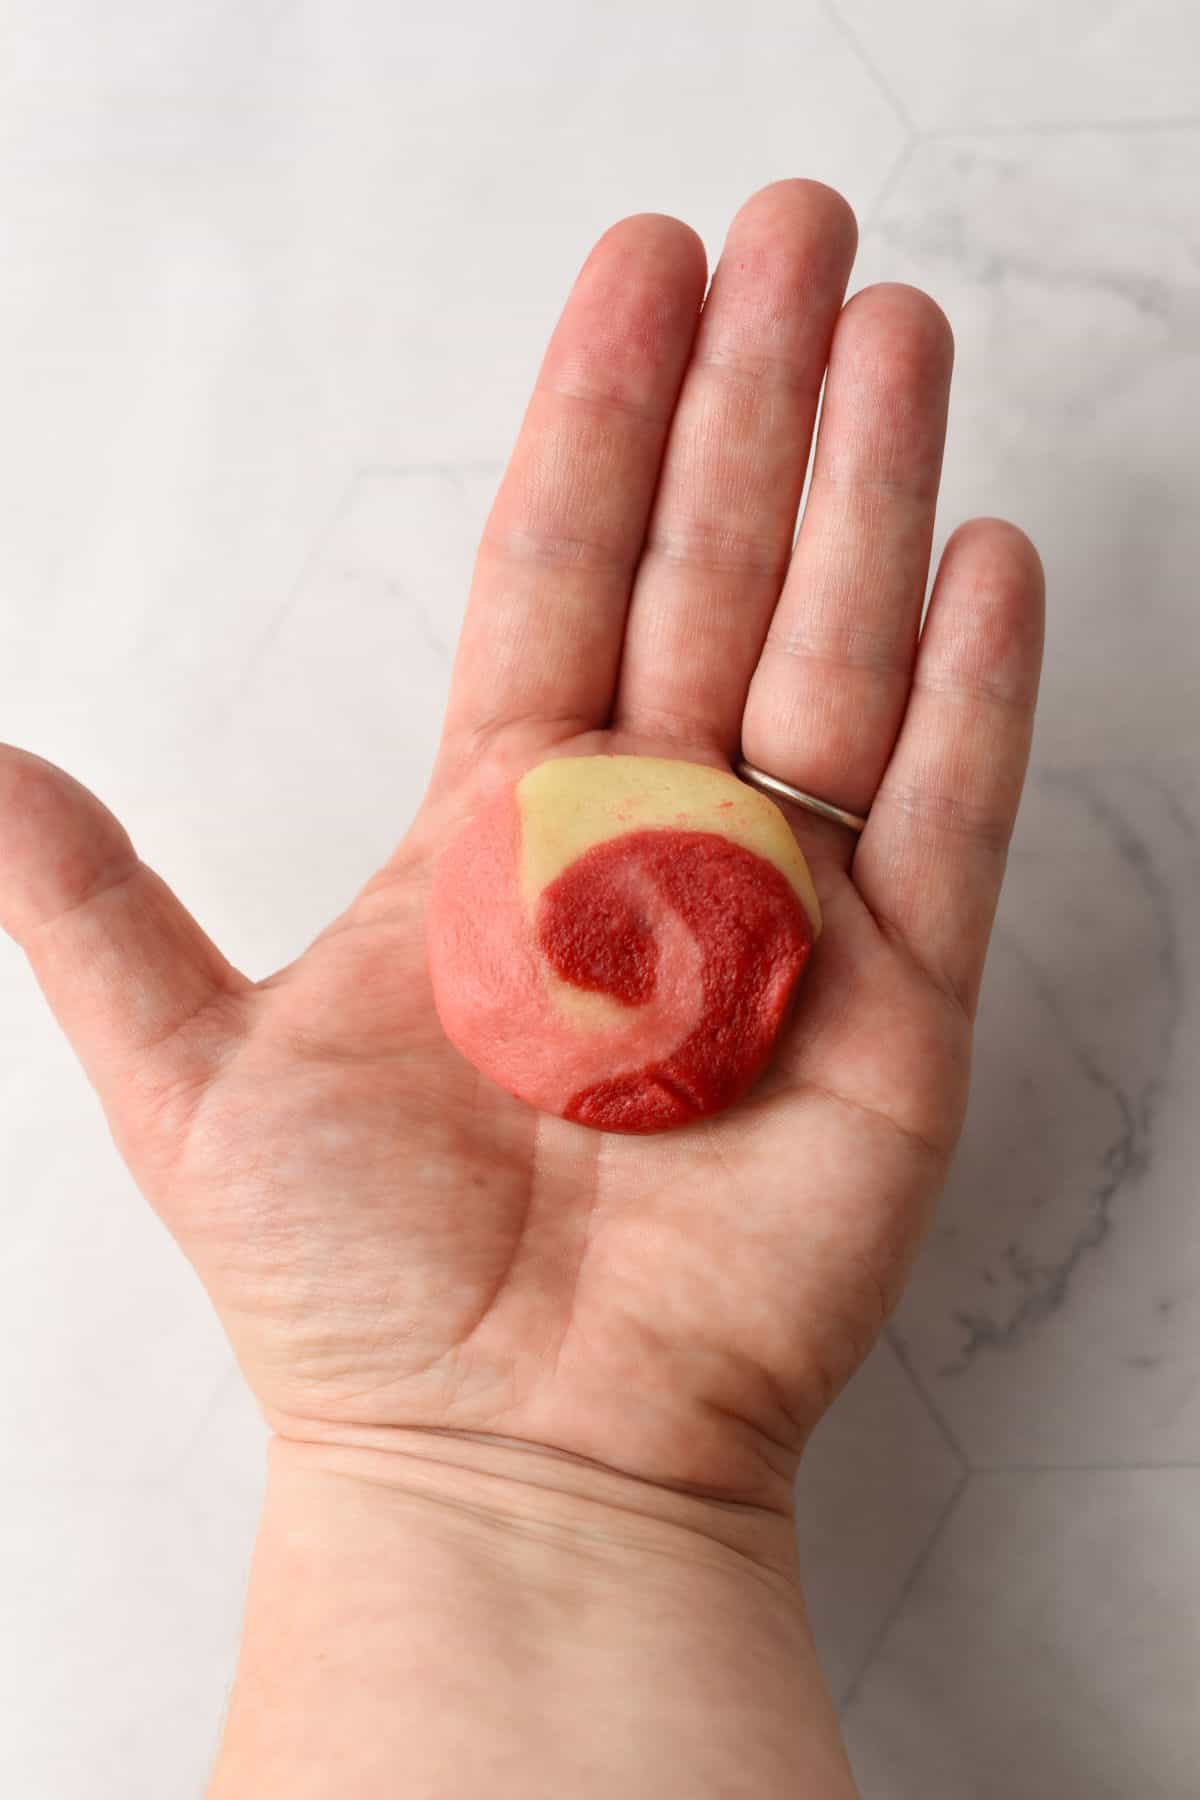
Step 6. Once chilled, scoop the dough into level 1-teaspoon portions. You’ll need three pieces per cookie, one plain, one light pink and one red. I like to scoop all the dough at once, so I know I have the same number of dough balls for each color.
Create the swirl
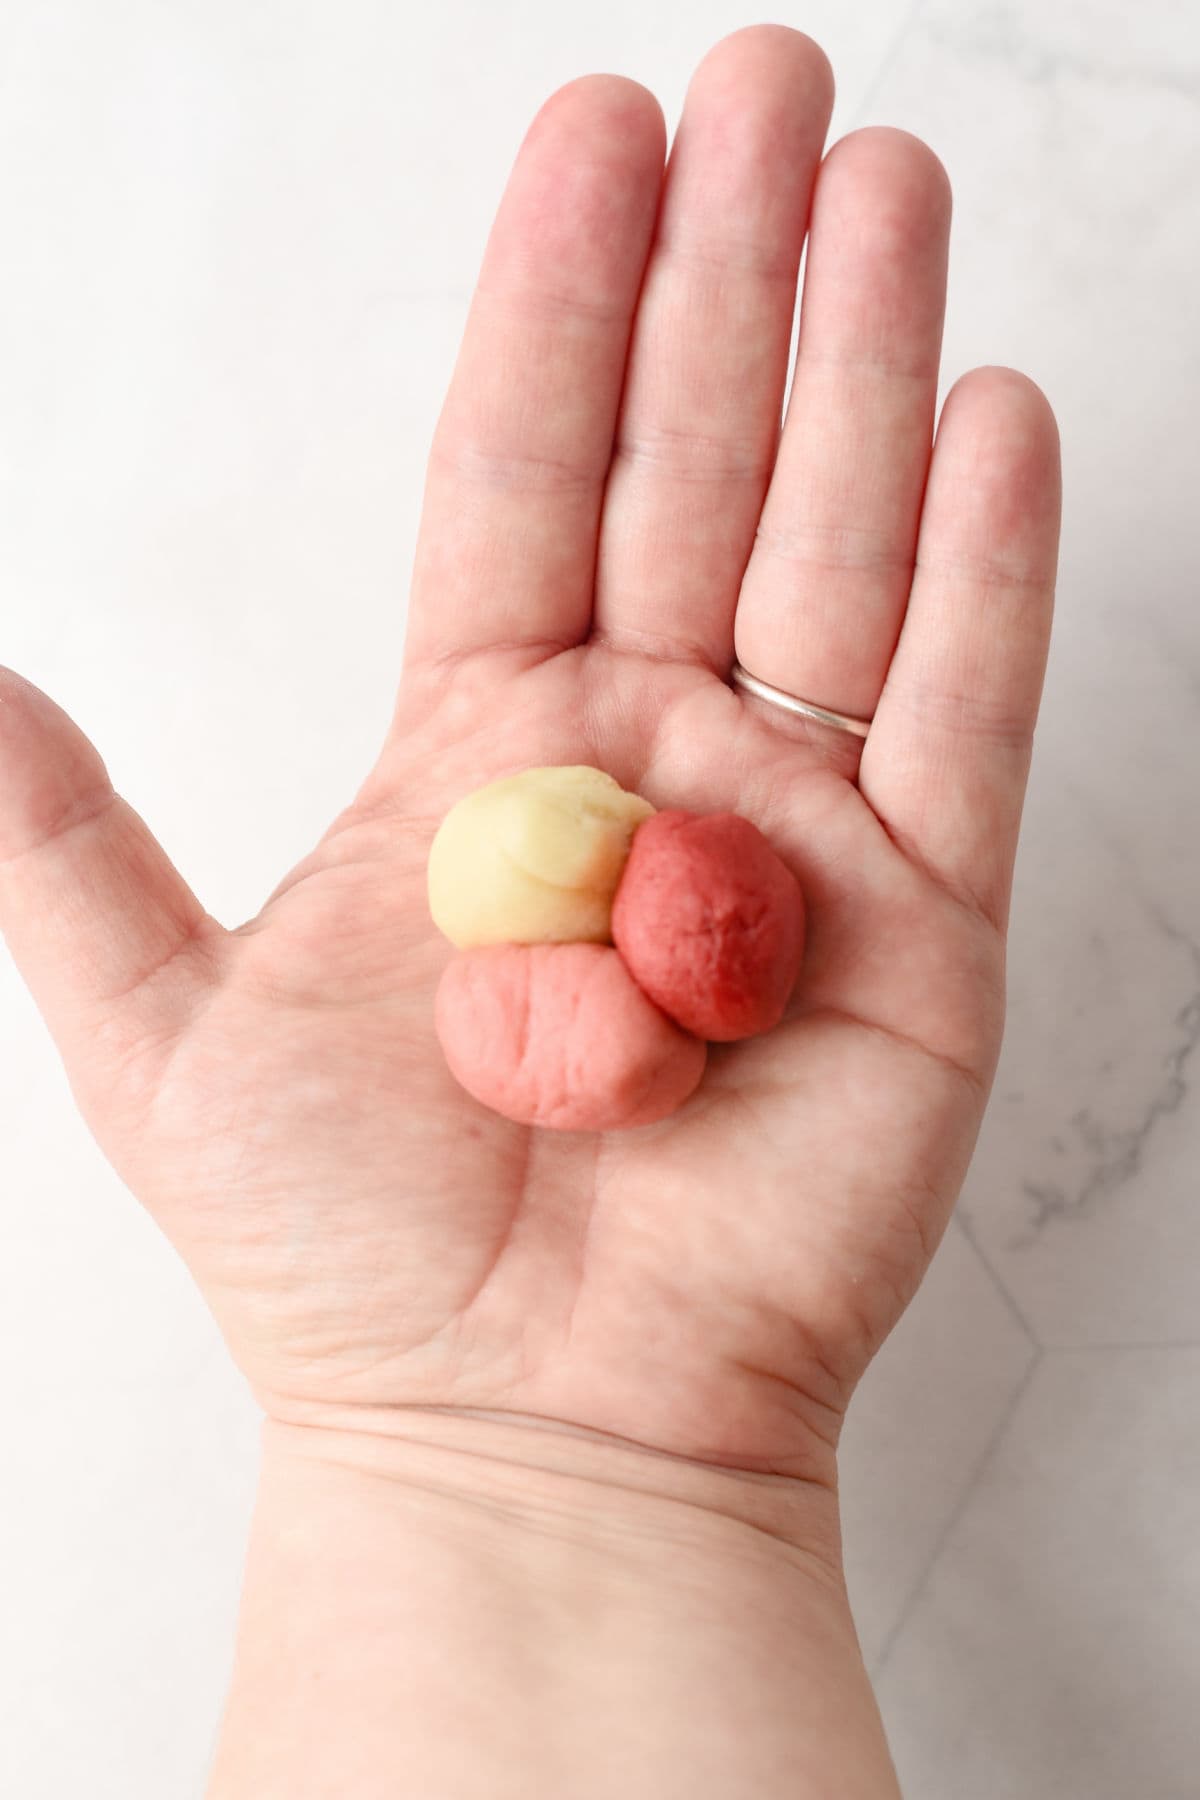
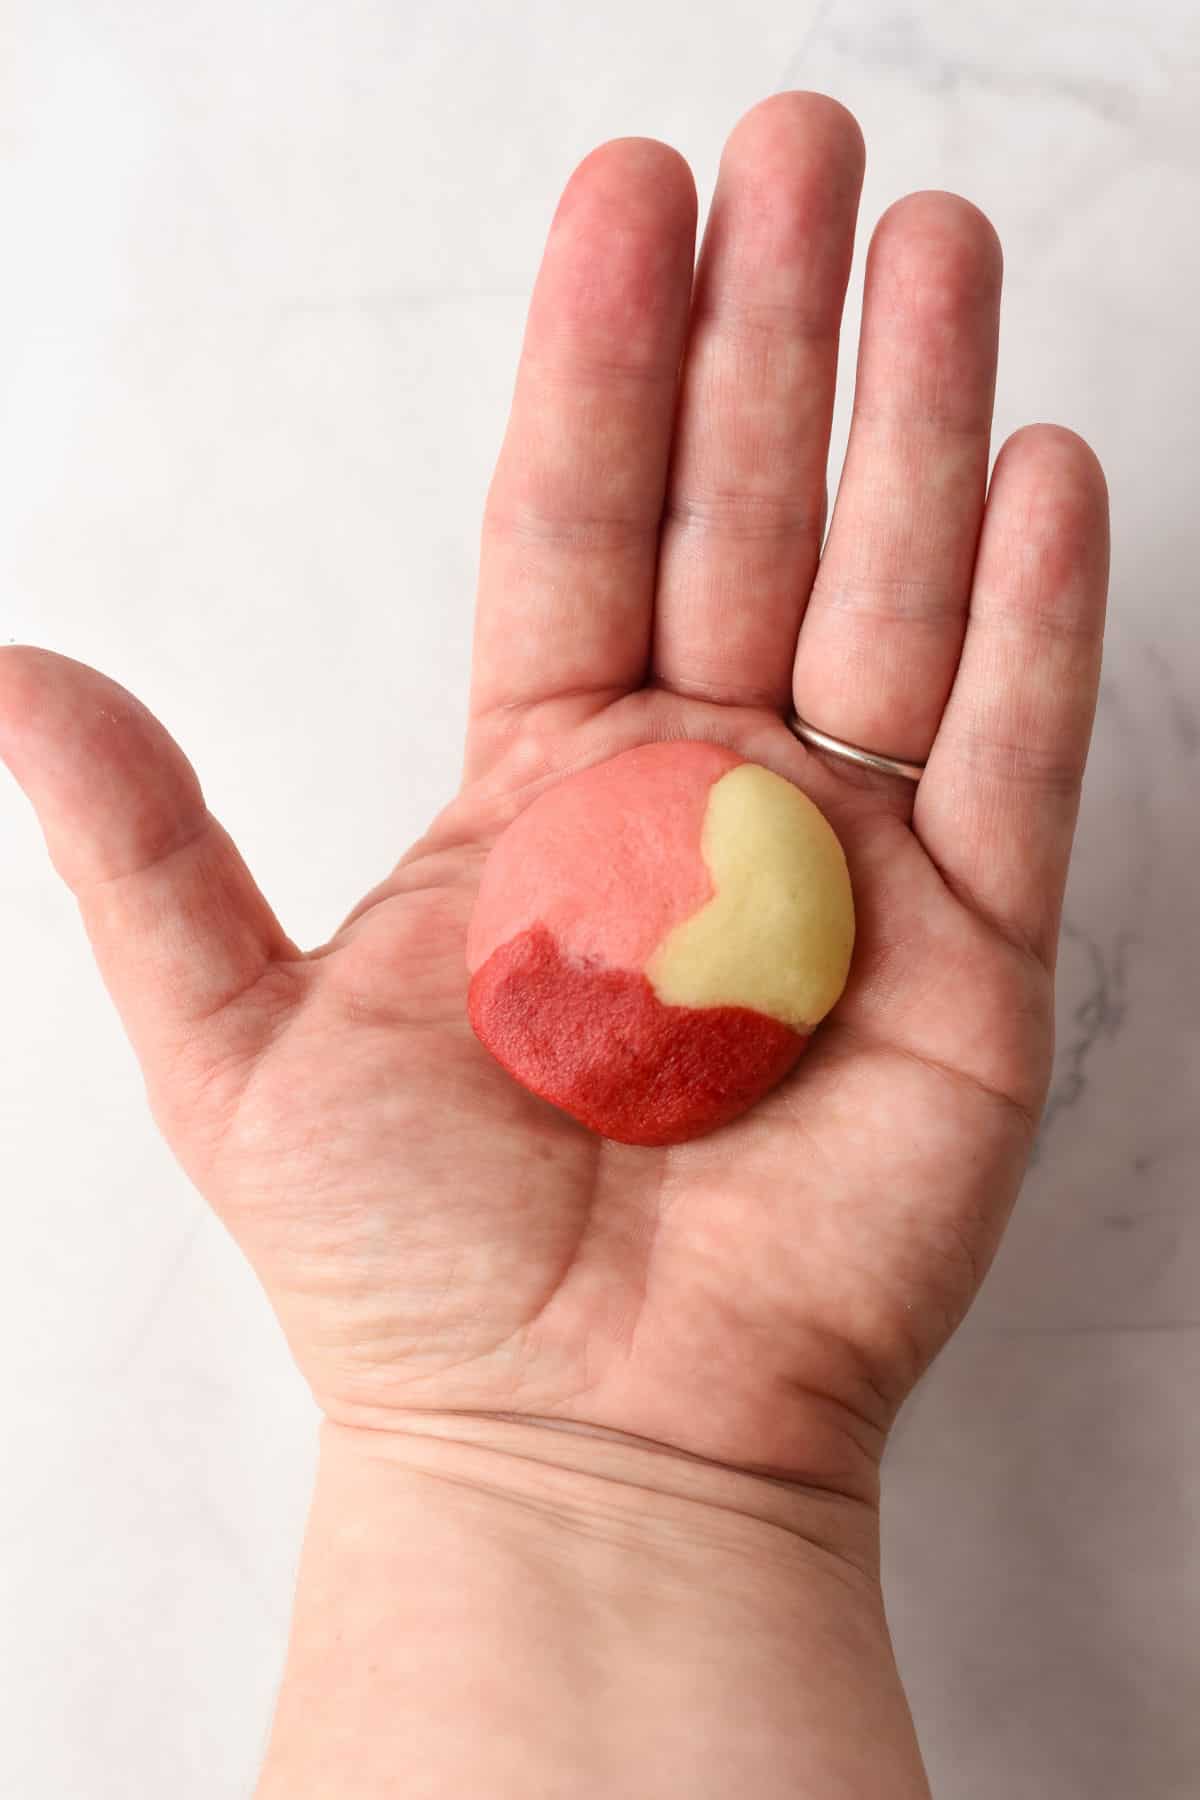
Step 7. Press one dough ball of each color in the palm of your hand, then gently press them together until they stick and form a ball. Place your palm on top and gently roll in a slow circular motion just until the colors start to blend into a swirl. Stop early, or too much rolling will blend the dough into a single color rather than creating a swirl.
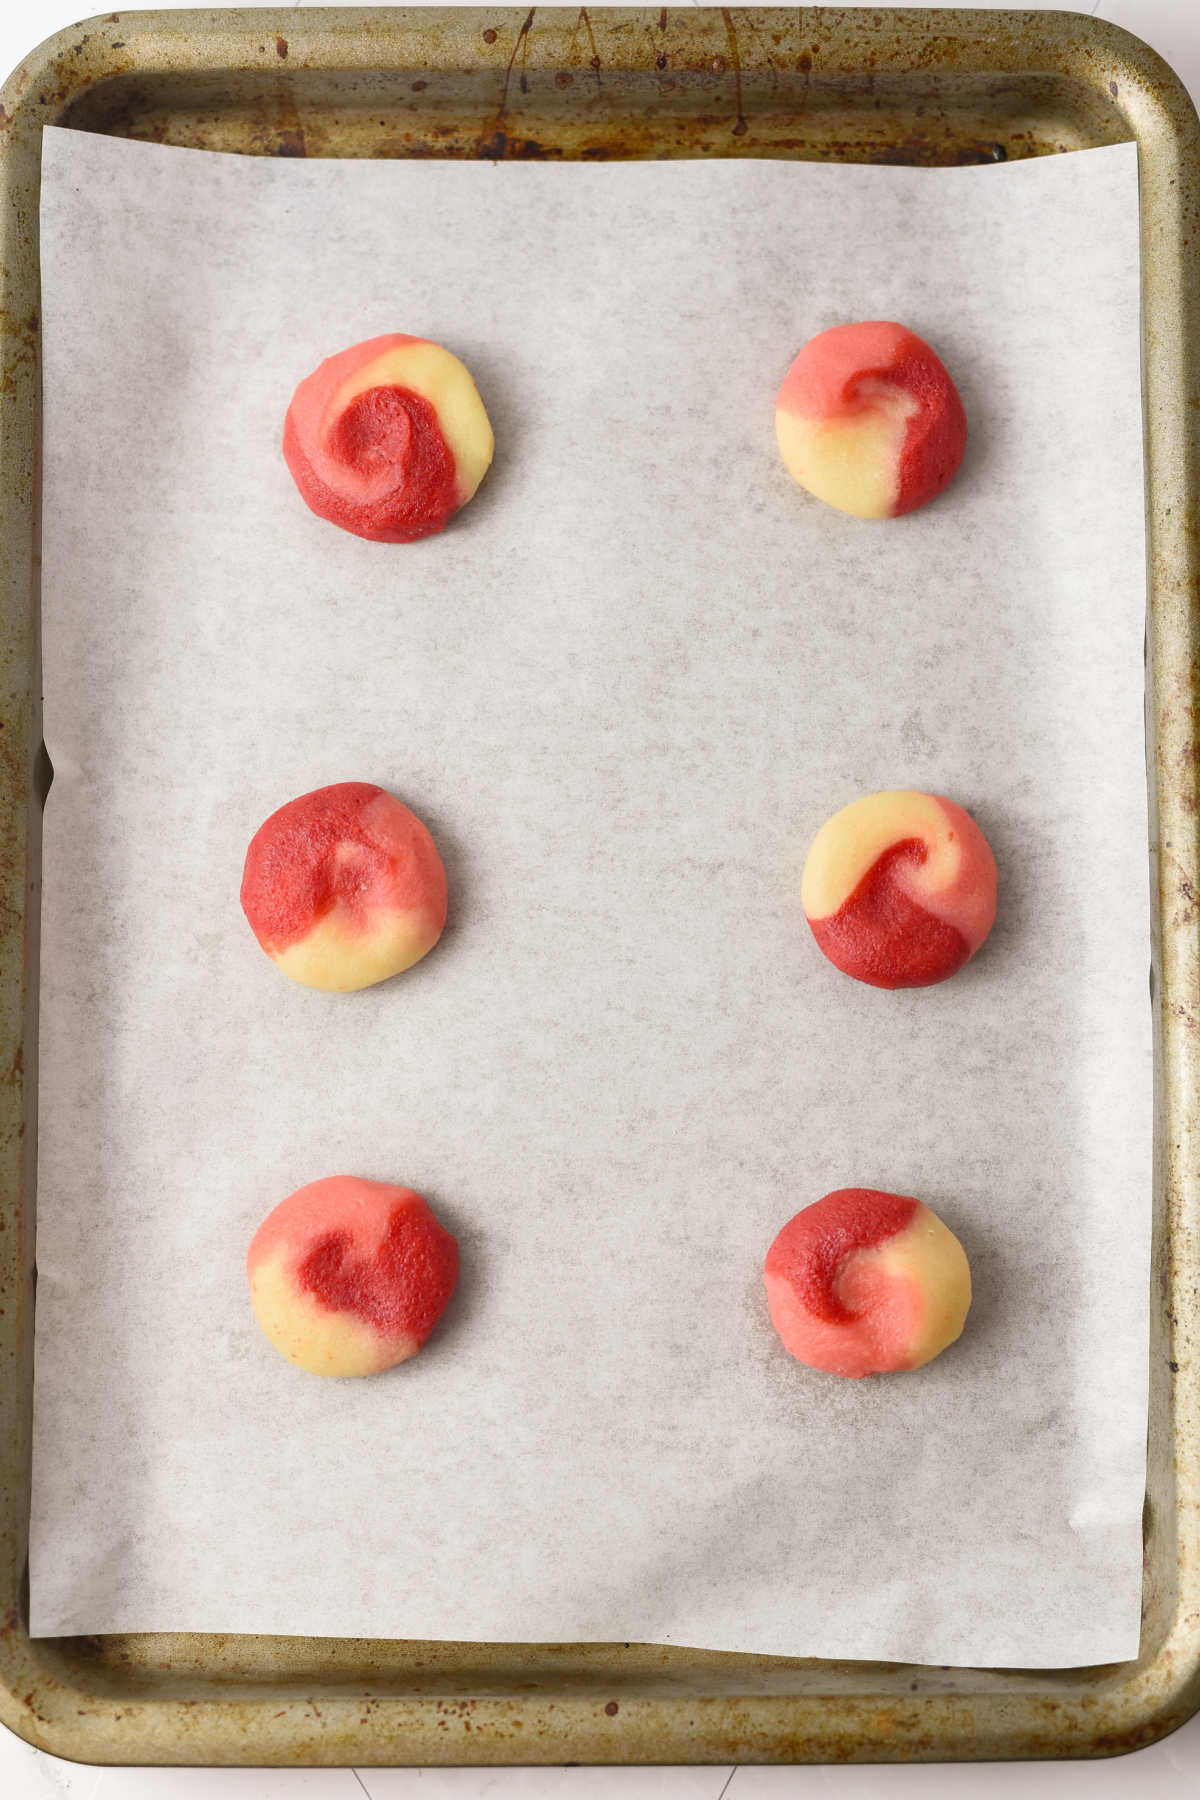
Bake
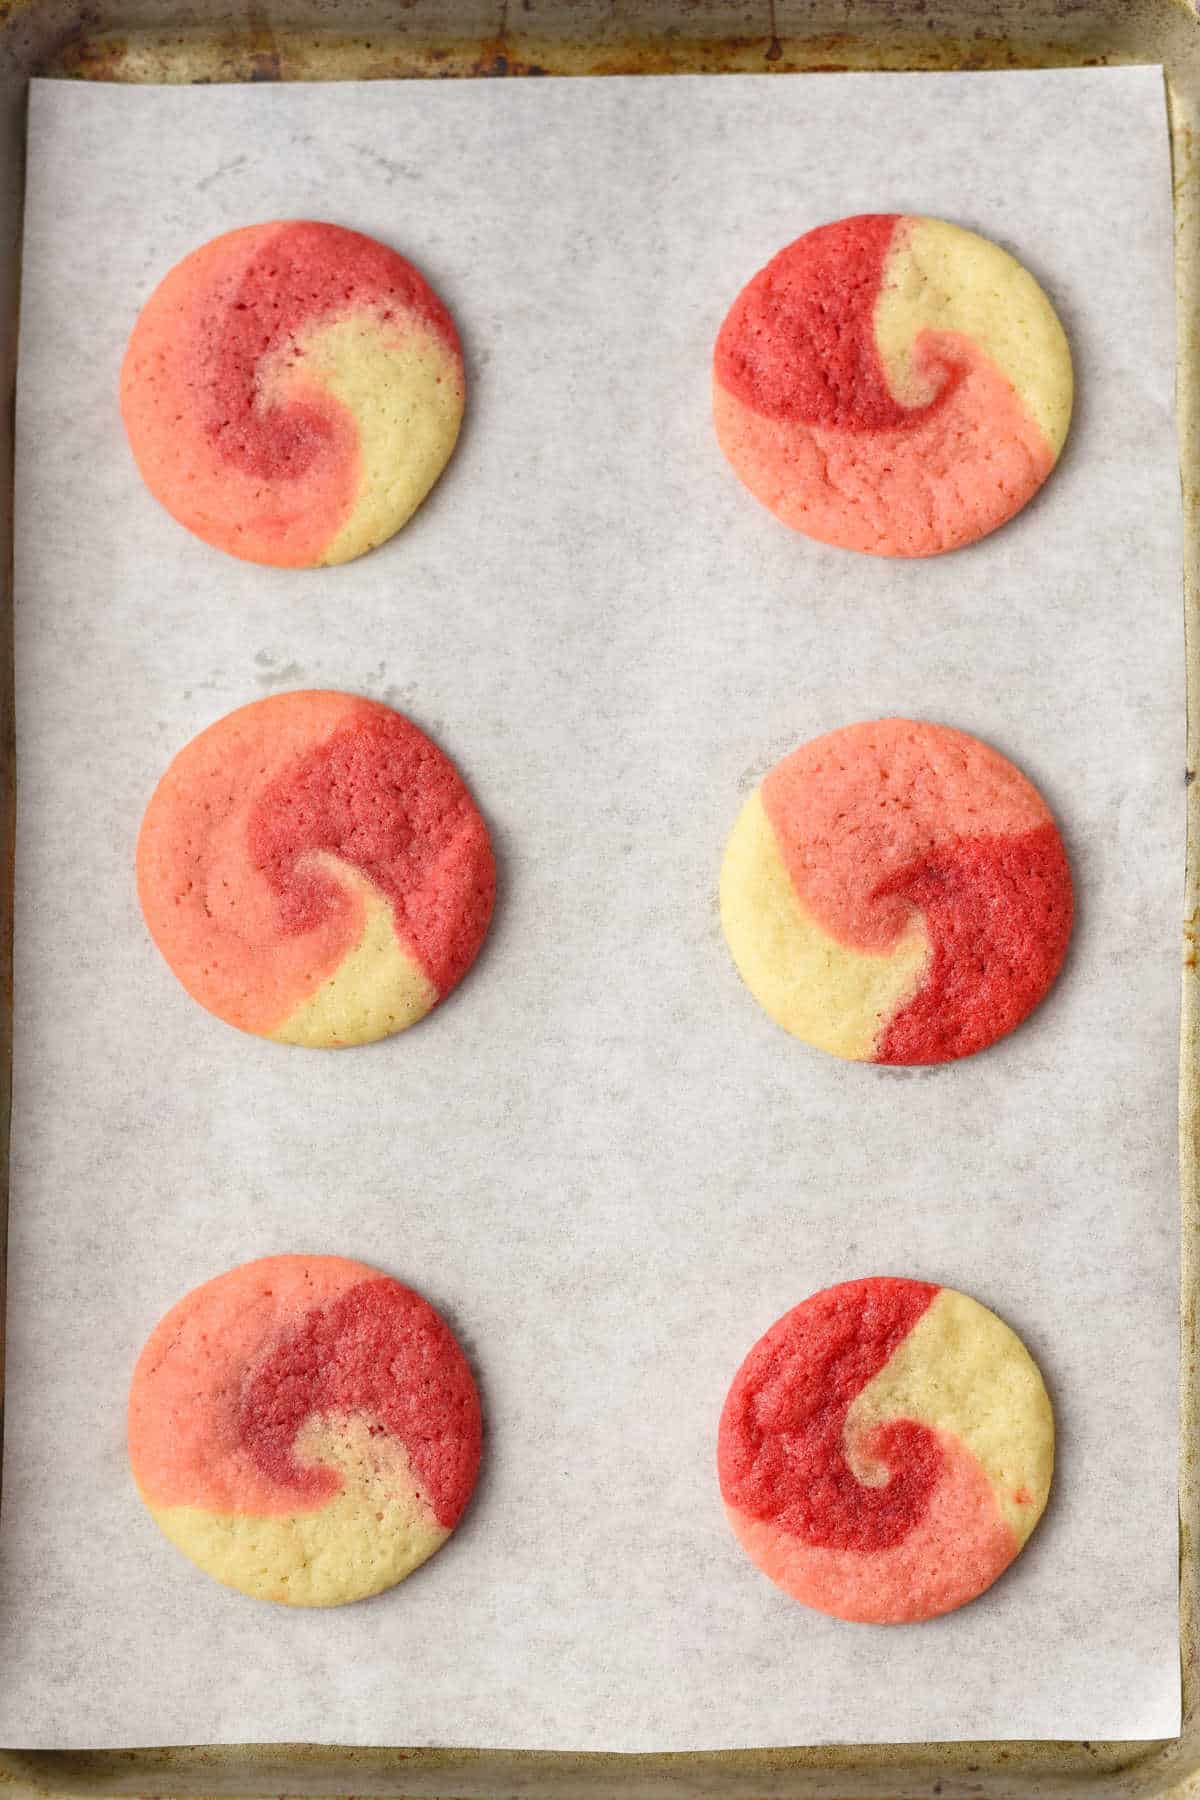
Step 8. Place the cookies 2 to 3 inches apart on a parchment-lined baking sheet. These cookies spread to about 3 inches wide, so don’t overload the pan. Bake at 350°F for 10 to 12 minutes, until the bottoms are lightly browned and the tops look set.
Cookie Shaping Tip
As soon as the cookies come out of the oven, place a larger round cookie cutter around each warm cookie. Gently move the cutter in a small circular motion to nudge the edges into a round shape. Do this right away, since the cookies firm up as they cool. This works like a charm.
Cookie FAQ’s
Yes. Divide the dough and tint it any colors you like. For the clearest swirls, use one plain portion plus two colored portions, and don’t over-roll when swirling.
Yes. Chilling makes the dough easier to handle and helps the cookies keep their shape so they don’t spread too much. If your kitchen is warm, chill longer than 1 hour.
That usually happens if the dough is too warm or you roll the dough ball too long. Chill the dough again if it feels soft, and stop rolling as soon as you see a swirl pattern on the outside.

Subscribe here for more great recipes, and follow One Hot Oven for more tasty sweet and savory recipes! Pinterest | Instagram | Facebook
Recipe
Tried it? Rate ⭐⭐⭐⭐⭐ & comment below; our feedback keeps the oven mitts flying here at One Hot Oven.
Red and Pink Swirl Cookies


Ingredients
- 1 cup unsalted butter
- 1½ cups granulated sugar
- 1 each egg
- 1 each egg yolk
- 1½ teaspoons pure vanilla extract
- 2½ cups AP flour
- ¾ teaspoons baking soda
- ½ teaspoon salt
Instructions
To Make The Dough
- In a large mixing bowl, cream together the butter and sugar until light and fluffy.1 cup unsalted butter, 1½ cups granulated sugar
- Add the egg, egg yolk, and vanilla extract and beat until combined.1 each egg, 1 each egg yolk, 1½ teaspoons pure vanilla extract
- Mix in the baking soda and salt, then add the flour in ½ cup increments until a soft dough forms.¾ teaspoons baking soda, ½ teaspoon salt, 2½ cups AP flour
- Divide the dough into three equal portions, leaving one plain and tinting the other two light pink and one red. Wrap each portion and chill for at least one hour.
How To Shape The Swirl Cookies
- Preheat the oven to 350°F. Line baking sheets with parchment paper, or a silicone baking mat.
- Scoop or measure the dough into level 1-teaspoon portions (level, not heaping). I like to scoop all the dough at once so I can see that I have the same number of dough balls for each color. You’ll need 3 portions per cookie: one plain, one pink, and one red.
- Press one piece of each color together in the palm of your hand, keeping the dough in a ball.
- Place your other palm on top and gently roll in a slow circular motion, just until the dough ball forms a swirl. Don't over-roll, or the colors will blend together.
- Flatten the dough balls slightly and place them 2 to 3 inches apart on the baking sheet. These cookies spread to about 3 inches wide, so bake 6 cookies per standard sheet.
Bake
- Bake for 10 to 12 minutes, until the bottoms are lightly browned and the tops look set. Cool on the baking sheet for 5 minutes, then transfer to a wire rack to cool completely.
Notes
Cookie Tips
- If you want perfectly even color portions, weigh the dough. My batch weighed 1lb 14.8 ounces, so each of the 3 portions was about 10.2 ounces. This keeps you from running out of one color before the others.
- Chilling matters; it helps the cookies hold their shape and keeps the swirls clear. If the dough feels soft or sticky while shaping, pop it back into the fridge for 10 minutes.
- These cookies spread to about 3 inches wide when baked. Using a level 1-teaspoon portion (not heaping) helps control the spreading and keeps the yield consistent.
- Don’t over-swirl the dough. Too much blending results in a single color rather than distinctive swirls.
- Leave 2-3 inches between cookies on the baking sheet, as they may bake together.
- How to fix misshapen cookies if the cookies spread unevenly: Use a large round cookie cutter to gently scoot them into shape while they’re still warm. Place the cutter over the cookie and move it in a small circular motion to round the edges.
As an Amazon Associate I earn from qualifying purchases.
Nutrition
Thank you for stopping by the One Hot Oven blog. Please leave a comment to say hello or tell me what you are baking; I always love hearing from fellow bakers. Do you have any questions or want to chat about the recipe? Please visit my About page for information, and I’ll be happy to help!
Hello there, I’m Jere’
From learning to cook on a farm in Indiana to culinary school in California, my passion for food is never-ending. Turning on my oven to bake something for friends and family is my happy place, and I am glad to be here at One Hot Oven® sharing sweet and savory family-friendly recipes for your cooking and baking inspiration.