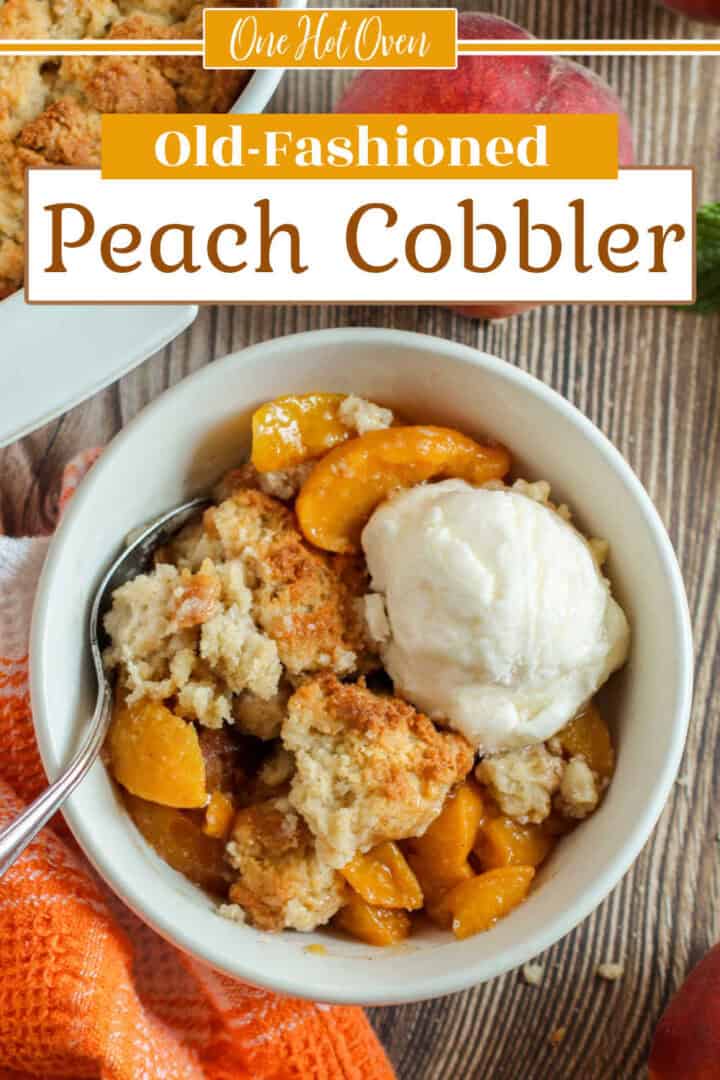
Peach cobbler with frozen peaches means you don’t have to wait for peach season to make this dessert happen. Fresh peaches are great when you can get them, but frozen peaches work beautifully here and honestly make the whole process a little easier. No peeling, no pitting, and no guessing if your peaches are ripe enough.

Want to save this recipe?
Enter your email & I’ll send it to your inbox. Plus, get great new recipes from me every week!
This page may contain affiliate links. Please see my full DISCLOSURE for policy details.
I started making this cobbler because I wanted a peachy dessert in February, and fresh peaches in February taste like nothing. Frozen peaches are picked and frozen at peak ripeness, so the flavor is there when you need it. This peach cobbler is built to work, even with frozen peaches. No guessing, no watery filling, and no waiting for peach season. You get a thick, spoonable filling and a golden biscuit topping that bakes up right every time.
If you freeze your own peaches during the summer, this is exactly the kind of recipe you’re saving them for. My guide on How To Freeze Peaches walks through the whole process, so you always have a bag ready to go.
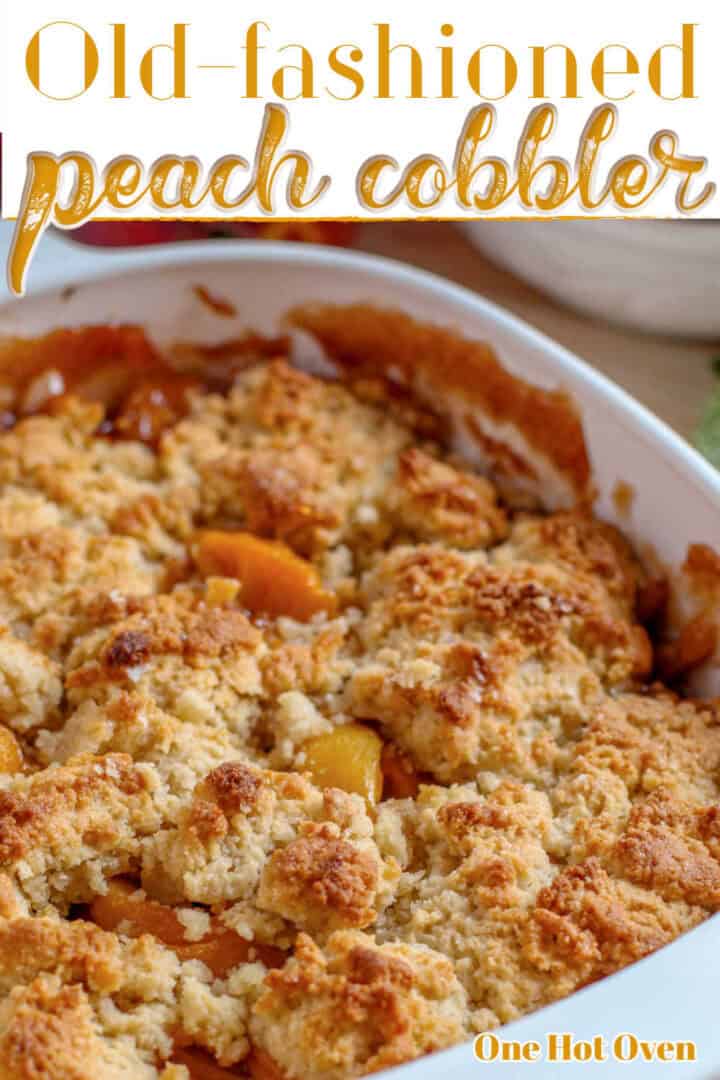
This is one of my favorite ways to use frozen peaches, especially in the middle of winter when I’m dreaming of warm summer days. The filling bakes up thick and bubbly, and the buttery drop biscuit topping turns golden around the edges.
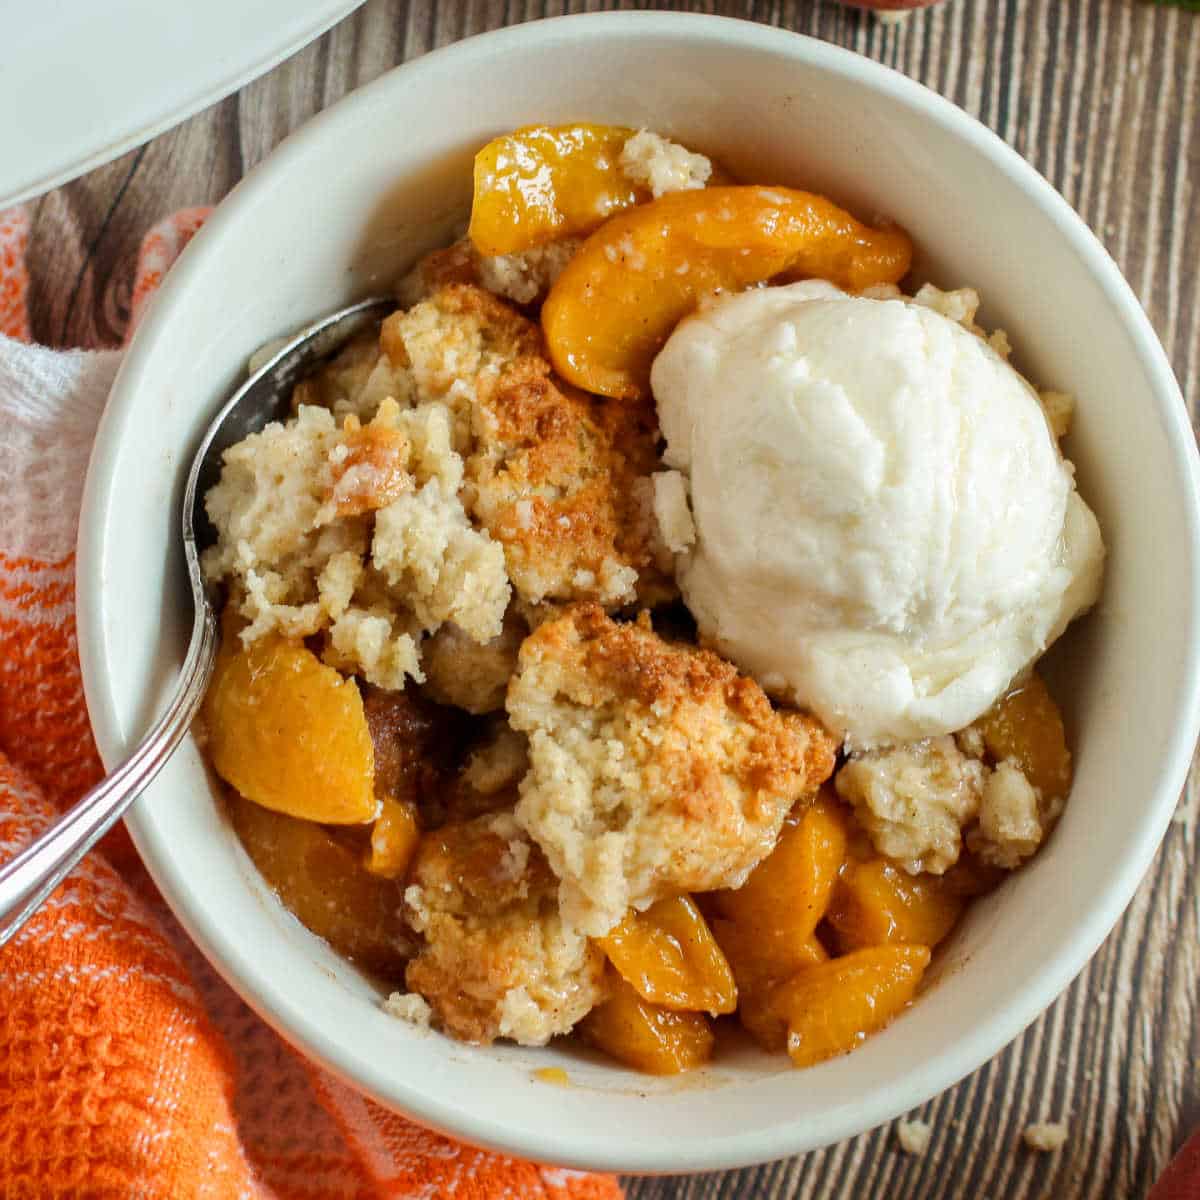
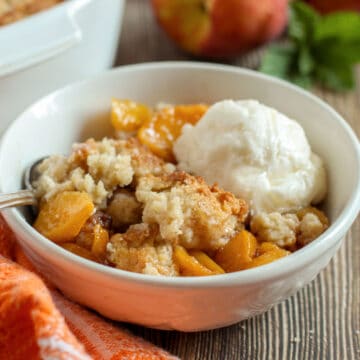
Serve the cobbler warm, plain or with a scoop of vanilla ice cream. It is easy to put together, uses simple ingredients, and gives you all the comfort of peach pie without having to roll out a crust.
When fresh peaches are in season, and I feel like making pastry, my Peach Almond Tart with Vanilla Bean is another favorite. It has a flaky homemade crust, sliced peaches, and a soft almond layer underneath
If you want another easy fruit dessert that uses the same simple approach, my Peach Raspberry Crumb Bars are just as reliable and great for making ahead.

- Type of recipe: Dessert
- Cooking method: Stove-top and oven baking
- Skill level: Easy, with a quick stovetop step before baking
- Flavors & textures: Sweet, cinnamon-spiced peach filling with a buttery, golden biscuit topping
- Best for: Because you’re using frozen peaches, you can make this any month of the year, not just summer
What kind of peach cobbler is this?
- Biscuit topping, not cake like
- Thick filling that sets, not runny
- Rustic with a spooned topping
Ingredients
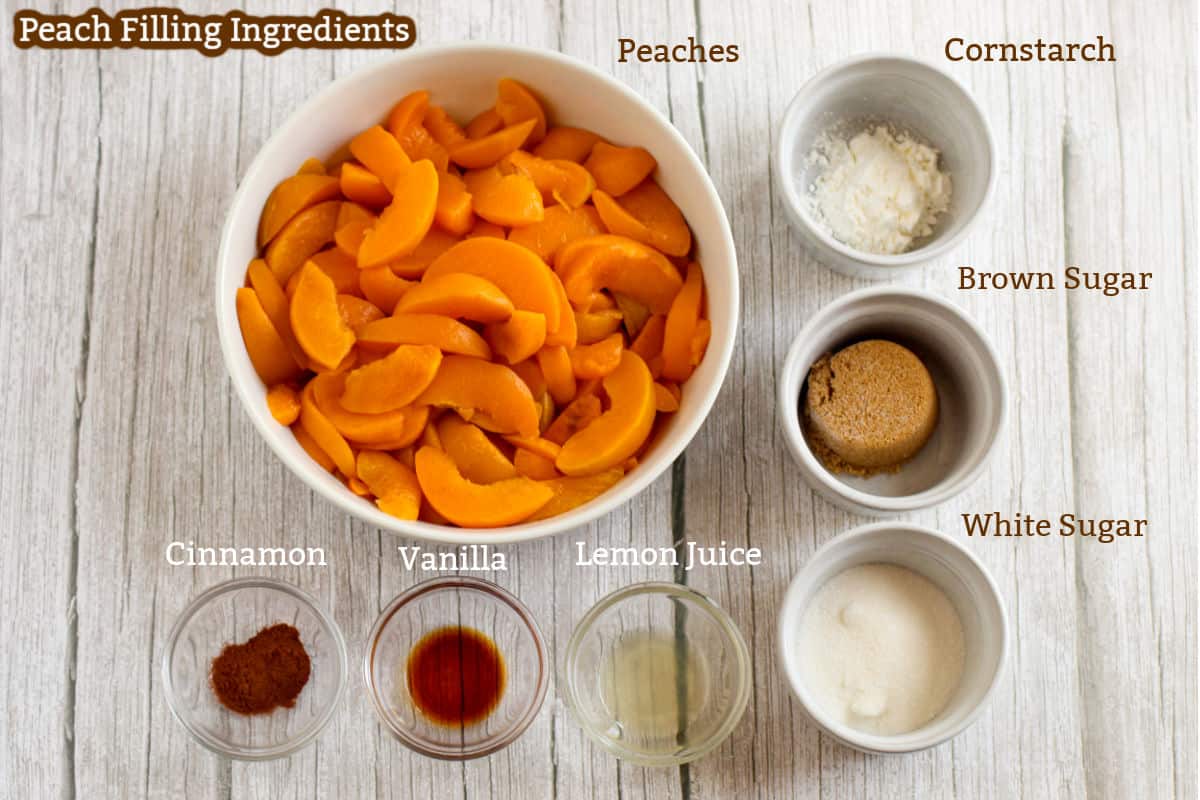
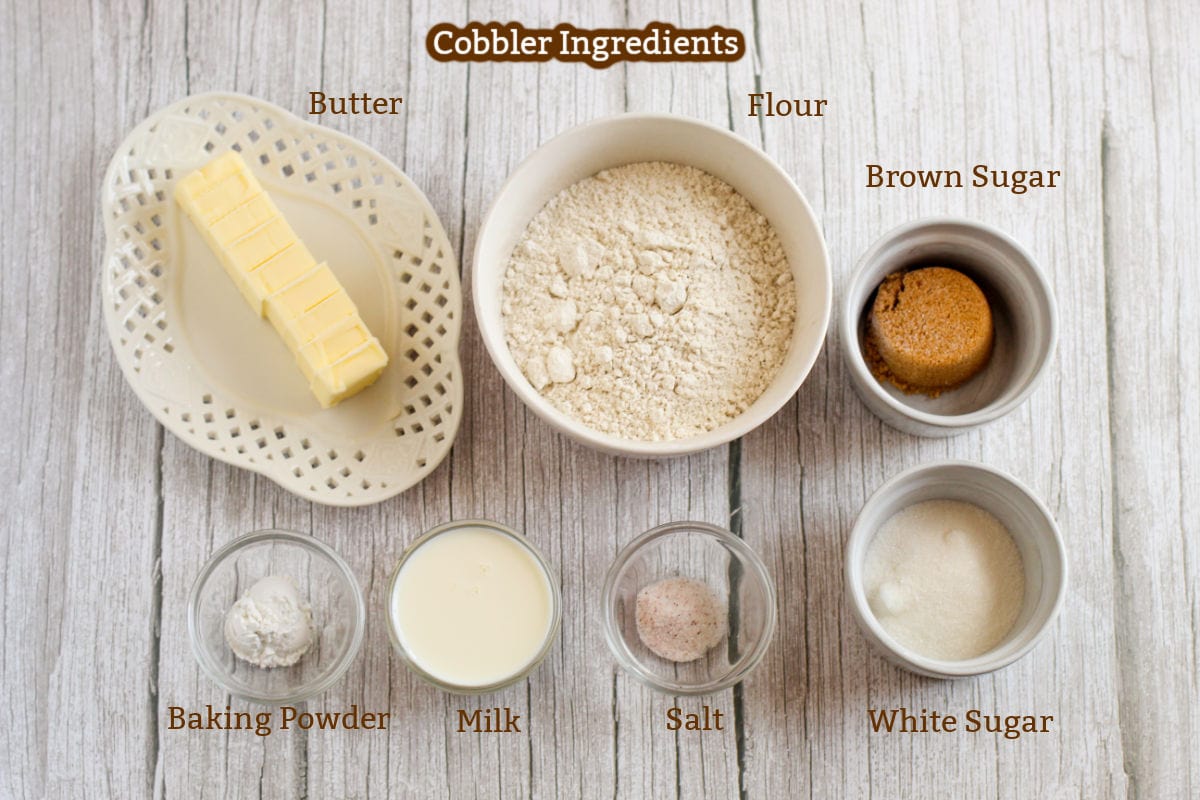
Most of what you need is already in your pantry. Here’s what’s worth knowing before you start:
- Frozen peaches: Use 2 16 oz bags of sliced frozen peaches. These are usually picked and frozen at peak ripeness, so the flavor is great year-round. The most important step is thawing them fully and blotting out as much liquid as possible before you cook them.
- Cornstarch – This thickens the filling to a syrupy consistency. Don’t skip it. Without it, the peaches release too much liquid, leaving the filling thin and watery.
- Cold butter – For the topping, your butter needs to be cold and cubed. Cold butter is what creates those crumbly, flaky bits in the topping. Warm or softened butter won’t give you the same result.
- Both sugars – Using a mix of white and brown sugar in both the filling and the topping adds a little depth of flavor. The brown sugar adds a subtle caramel note that pairs well with the peaches.
- Cold milk – Just like the butter, keep your milk cold. It helps the topping hold together without overworking it.
How To Make Peach Cobbler With Frozen Peaches
This recipe has been tested to keep the filling thick and the topping golden, so you don’t end up with a soggy cobbler.
Thaw and drain the peaches
Step 1. Place the frozen peaches in a colander and run cold water over them until thawed. Then blot them dry with paper towels to remove as much liquid as you can. This step matters; too much moisture is what makes the filling watery
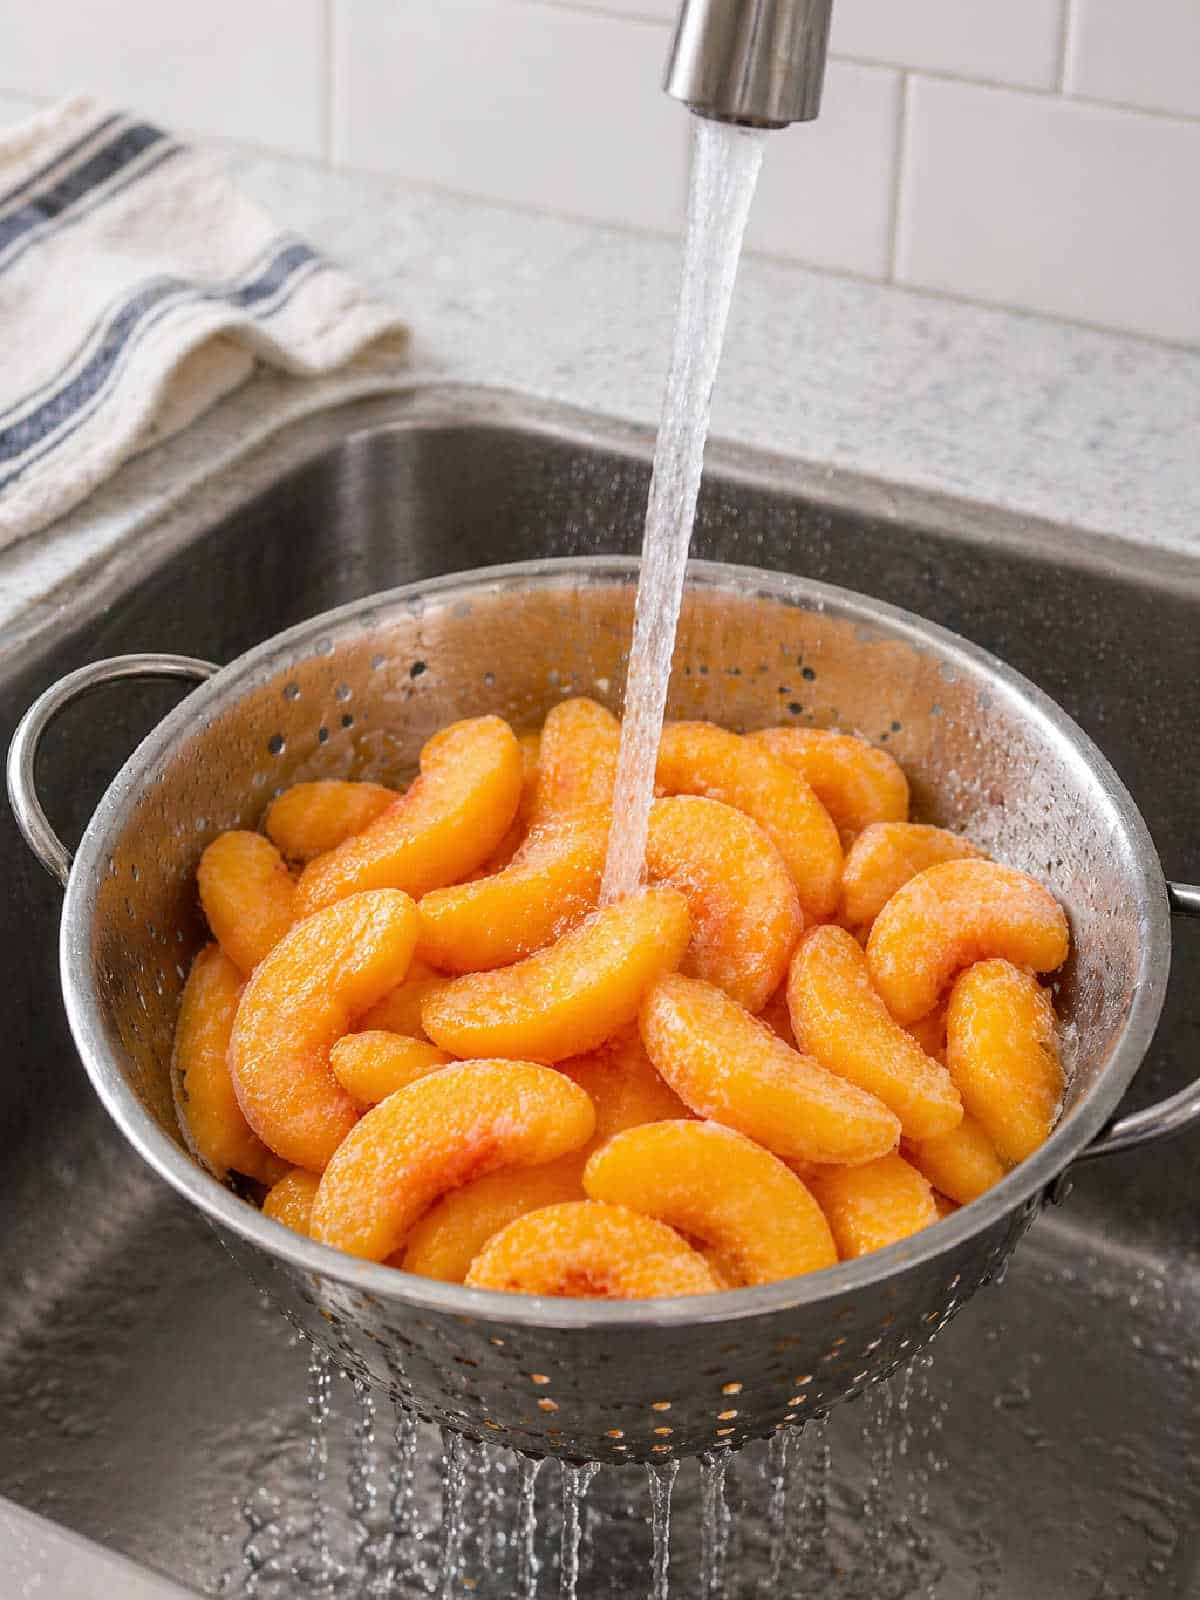
Tip – Don’t skip the blotting step. Excess moisture is what makes the cobbler filling watery, and paper towels do the job well.
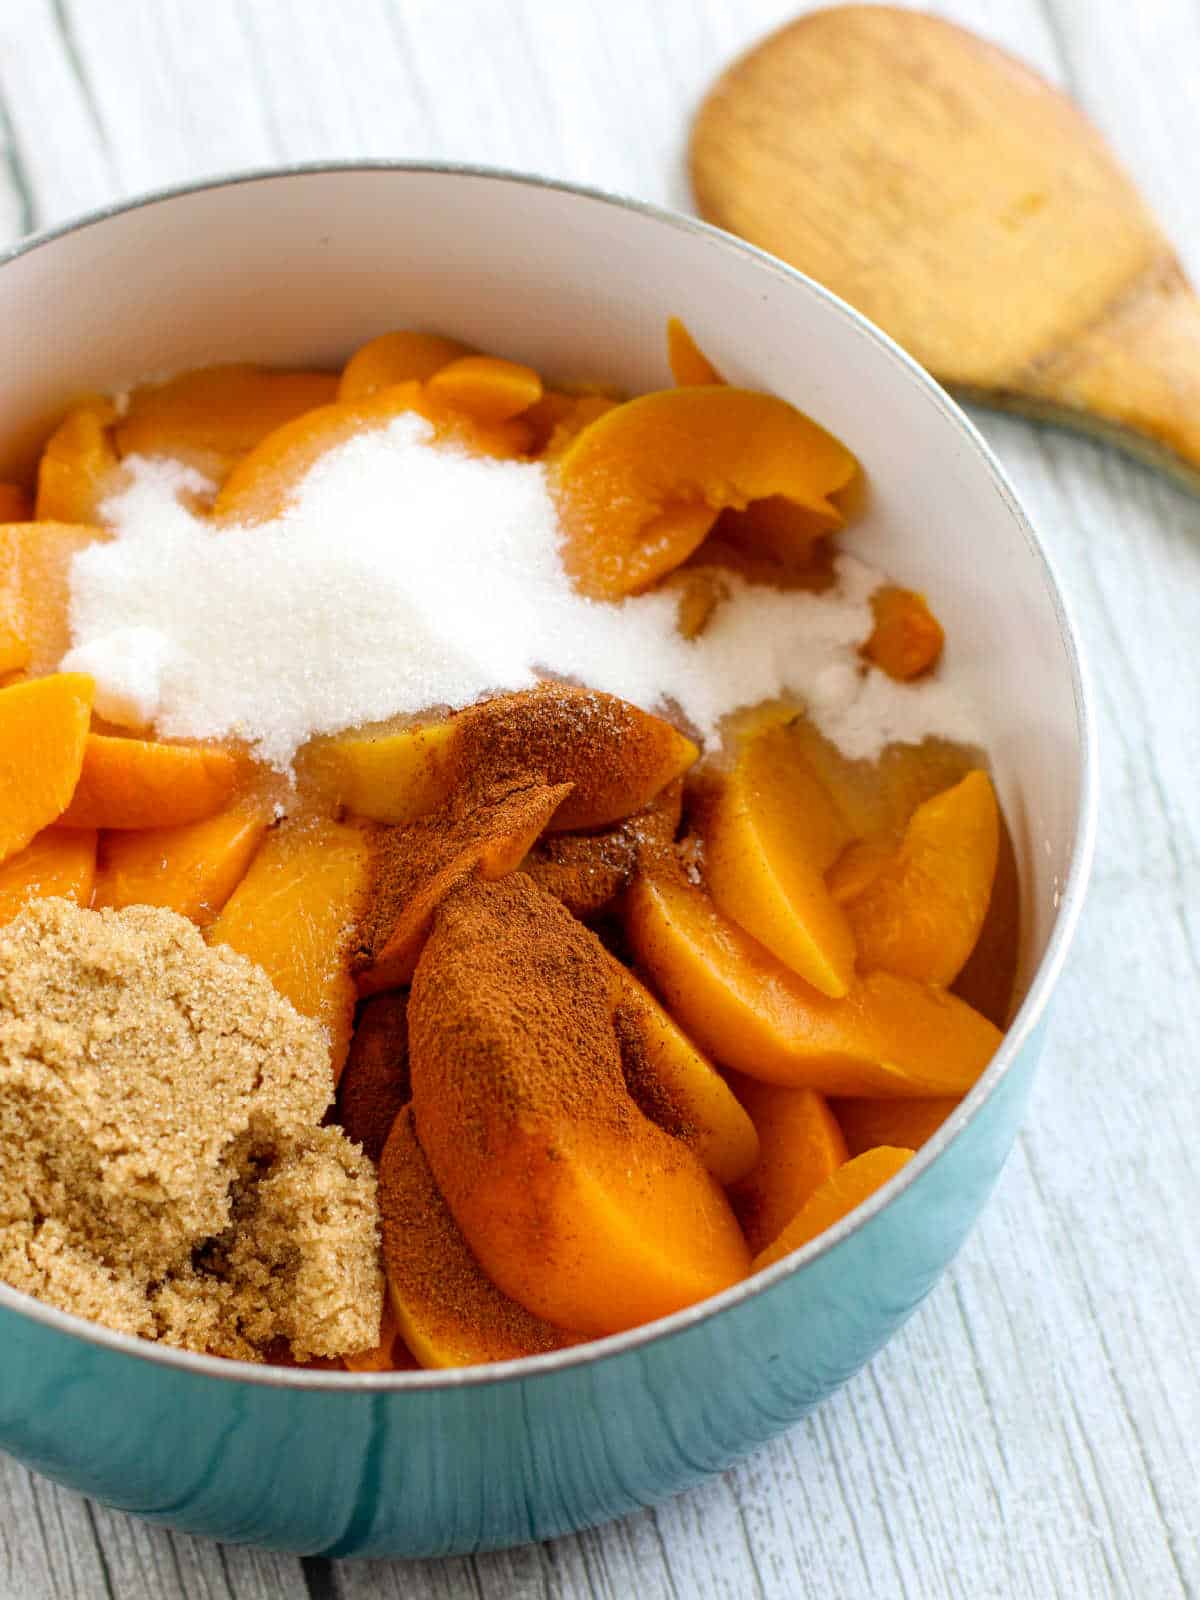
Cook the peach filling
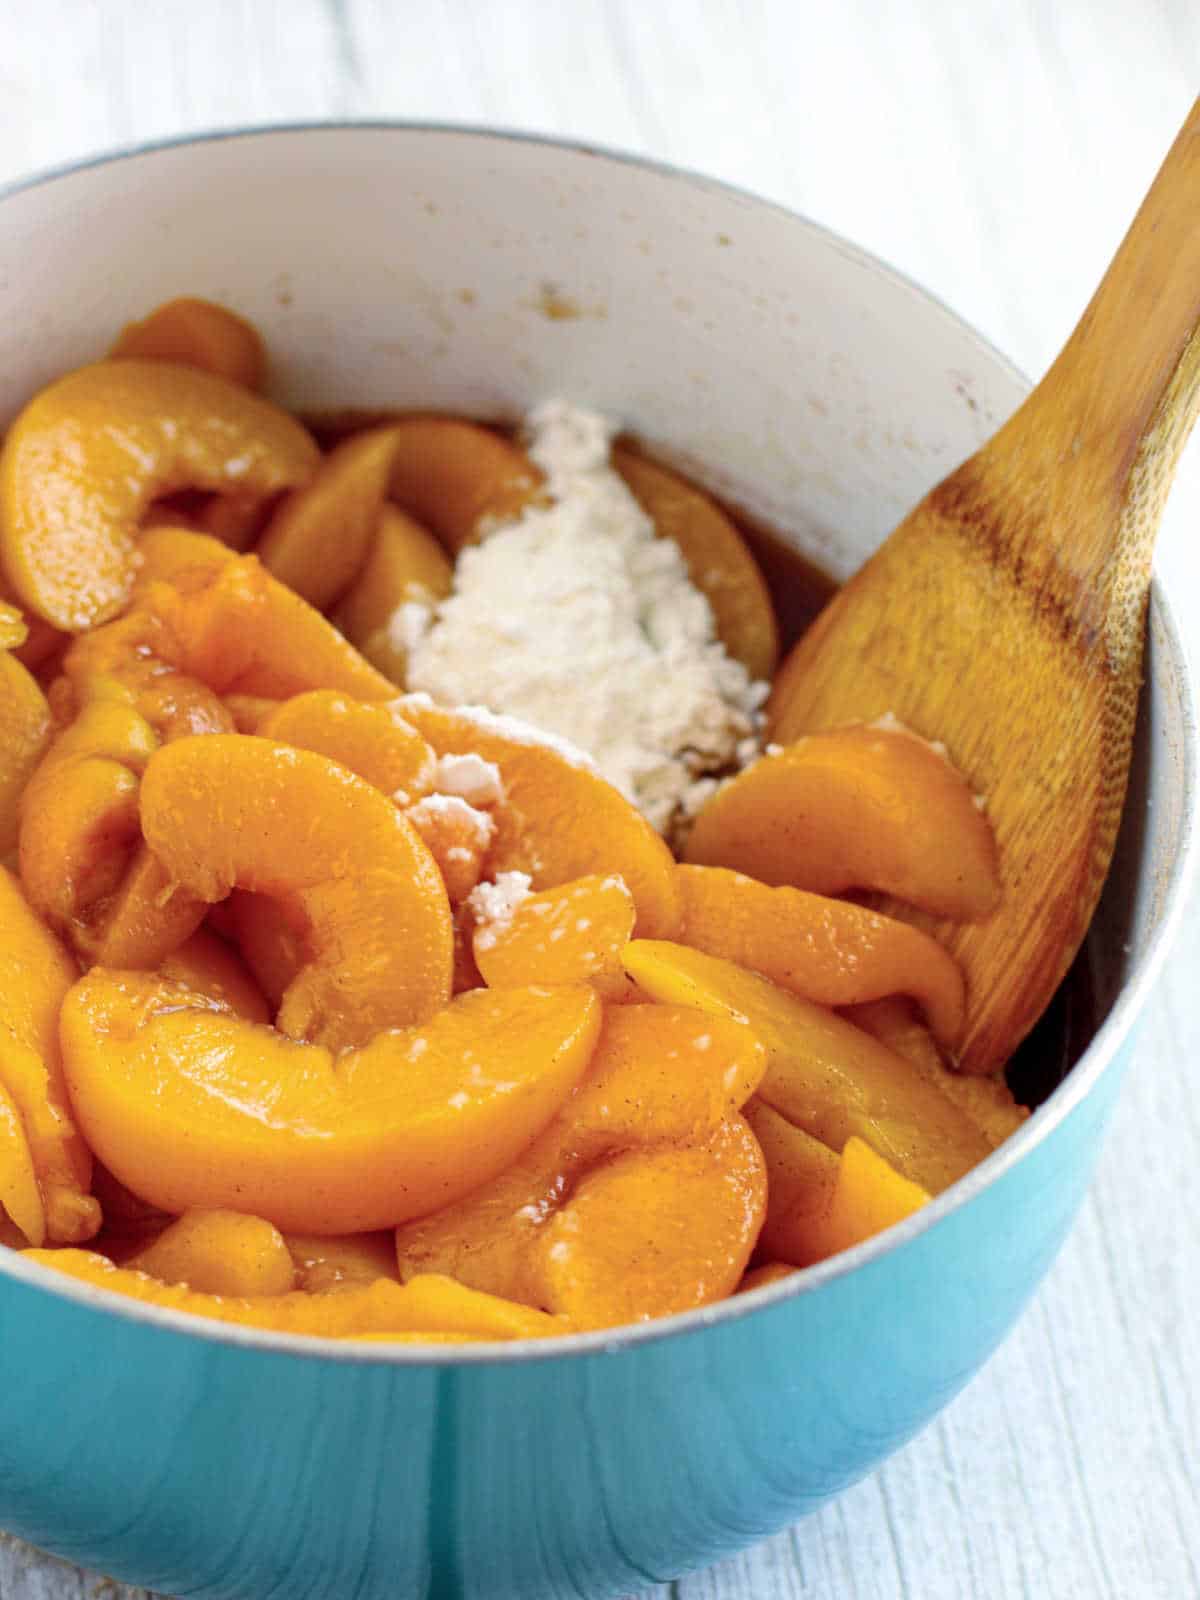
Step 2. Combine the thawed peaches, both sugars, cinnamon, lemon juice, and vanilla in a medium saucepan. Warm over medium heat for 5 to 7 minutes until bubbling.
Step 3. Stir in the cornstarch, then cook for 1 to 2 more minutes until the filling thickens. Pour into your greased 2-quart baking dish.
The first time I made cobbler with frozen peaches without pre-cooking the filling, it had so much liquid pooling at the bottom. This quick stovetop step fixes that entirely.
Make the cobbler topping
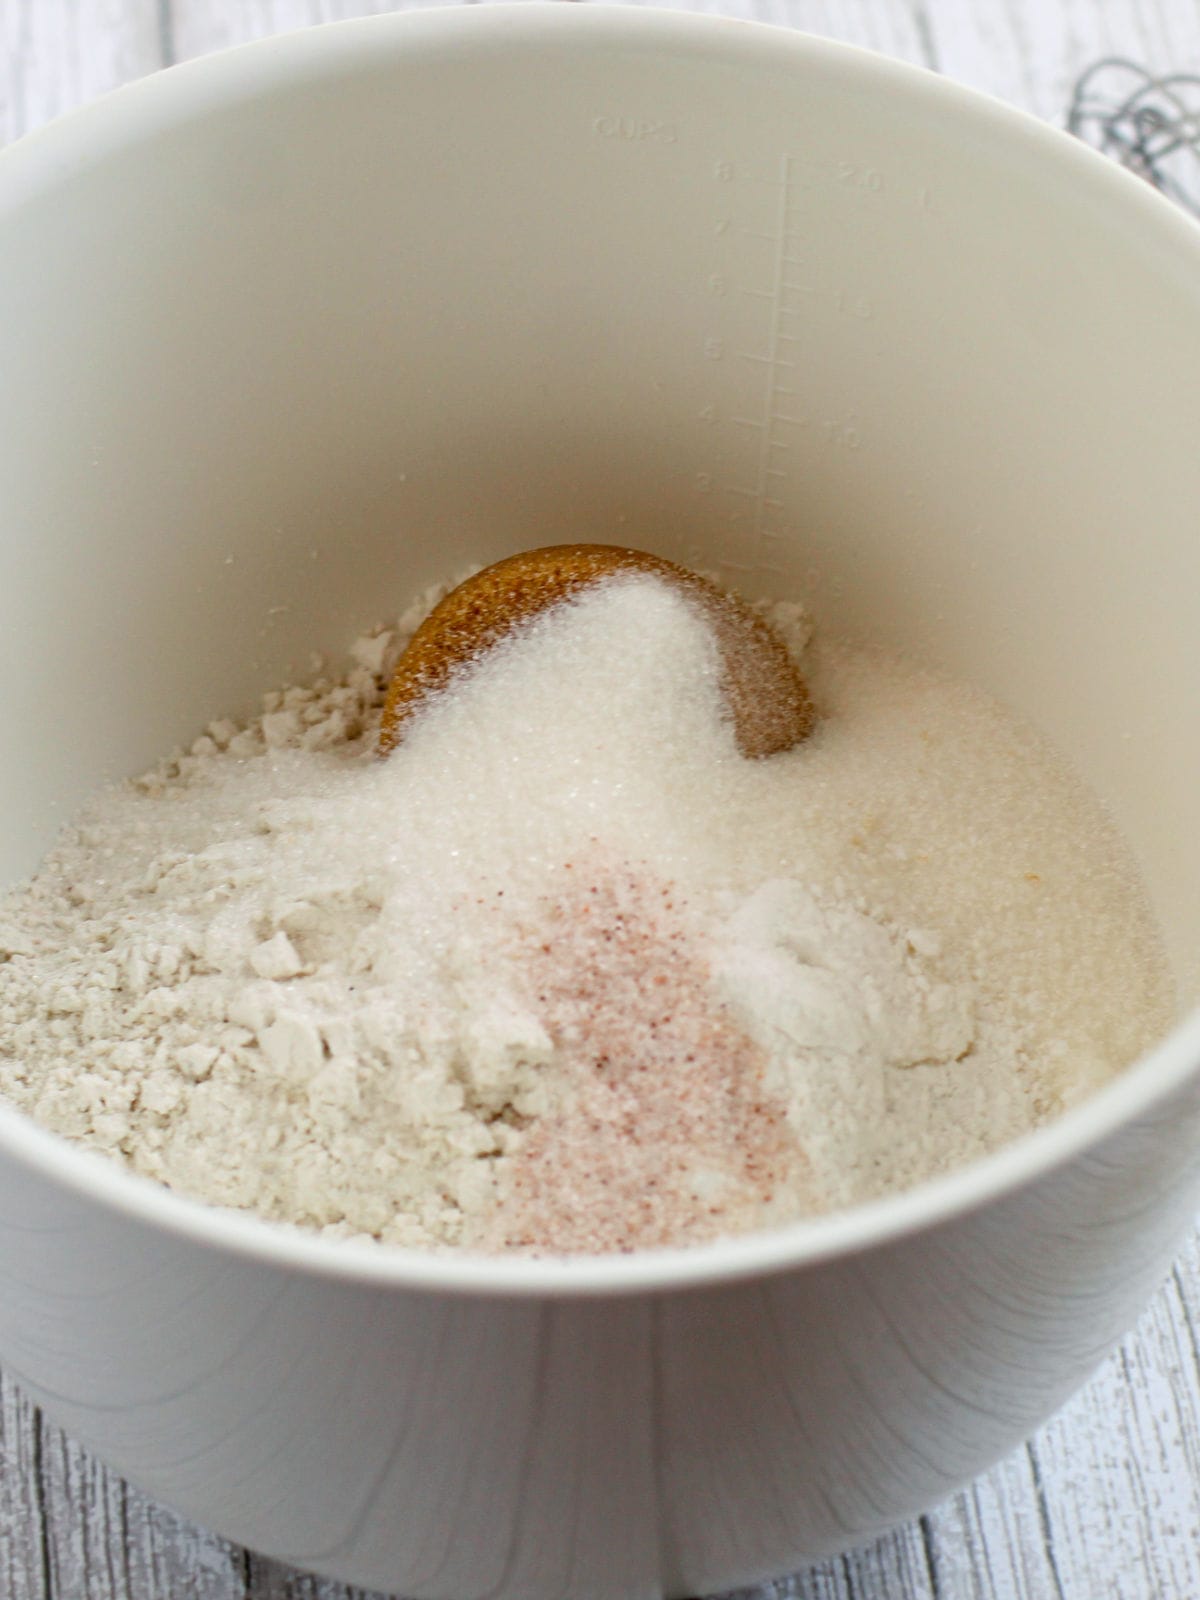
Step 4. Whisk together the flour, both sugars, baking powder, and salt in a large bowl.
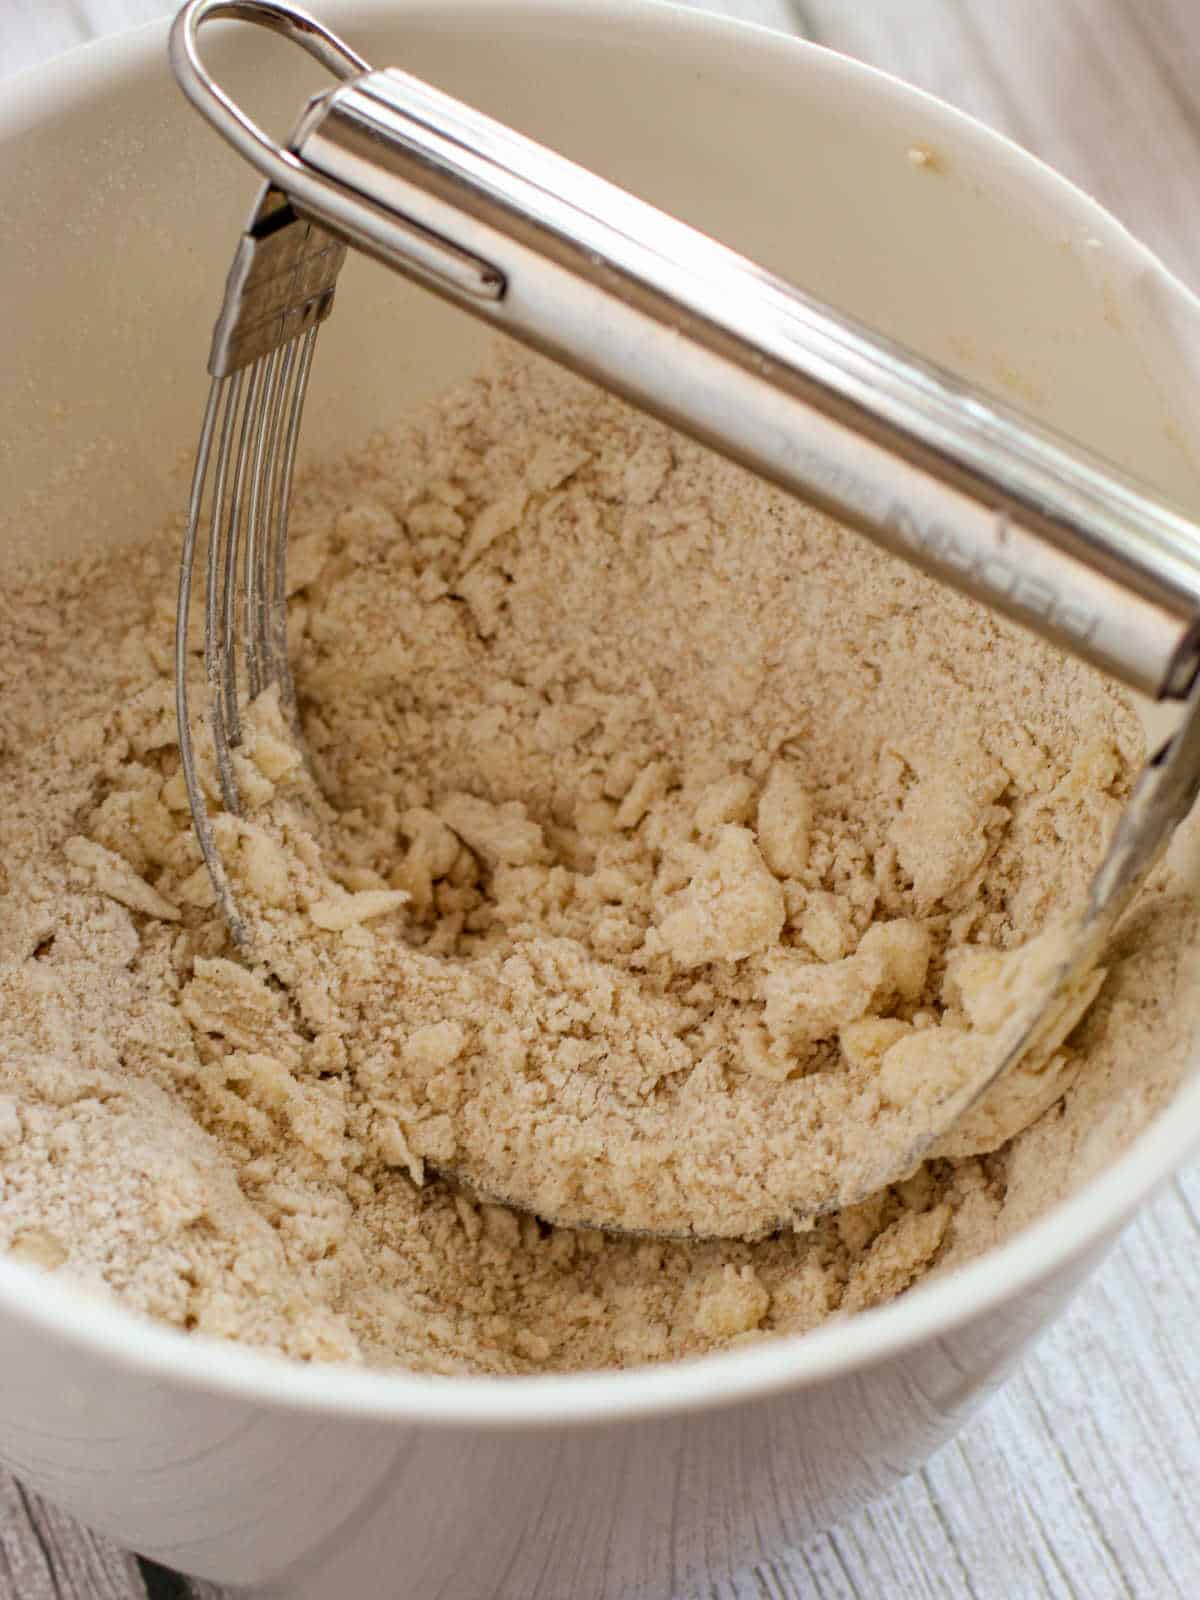
Step 5. Cut in the cold cubed butter using a pastry blender or your fingertips until the mixture looks like coarse crumbs. You want to work quickly here so the butter stays cold.
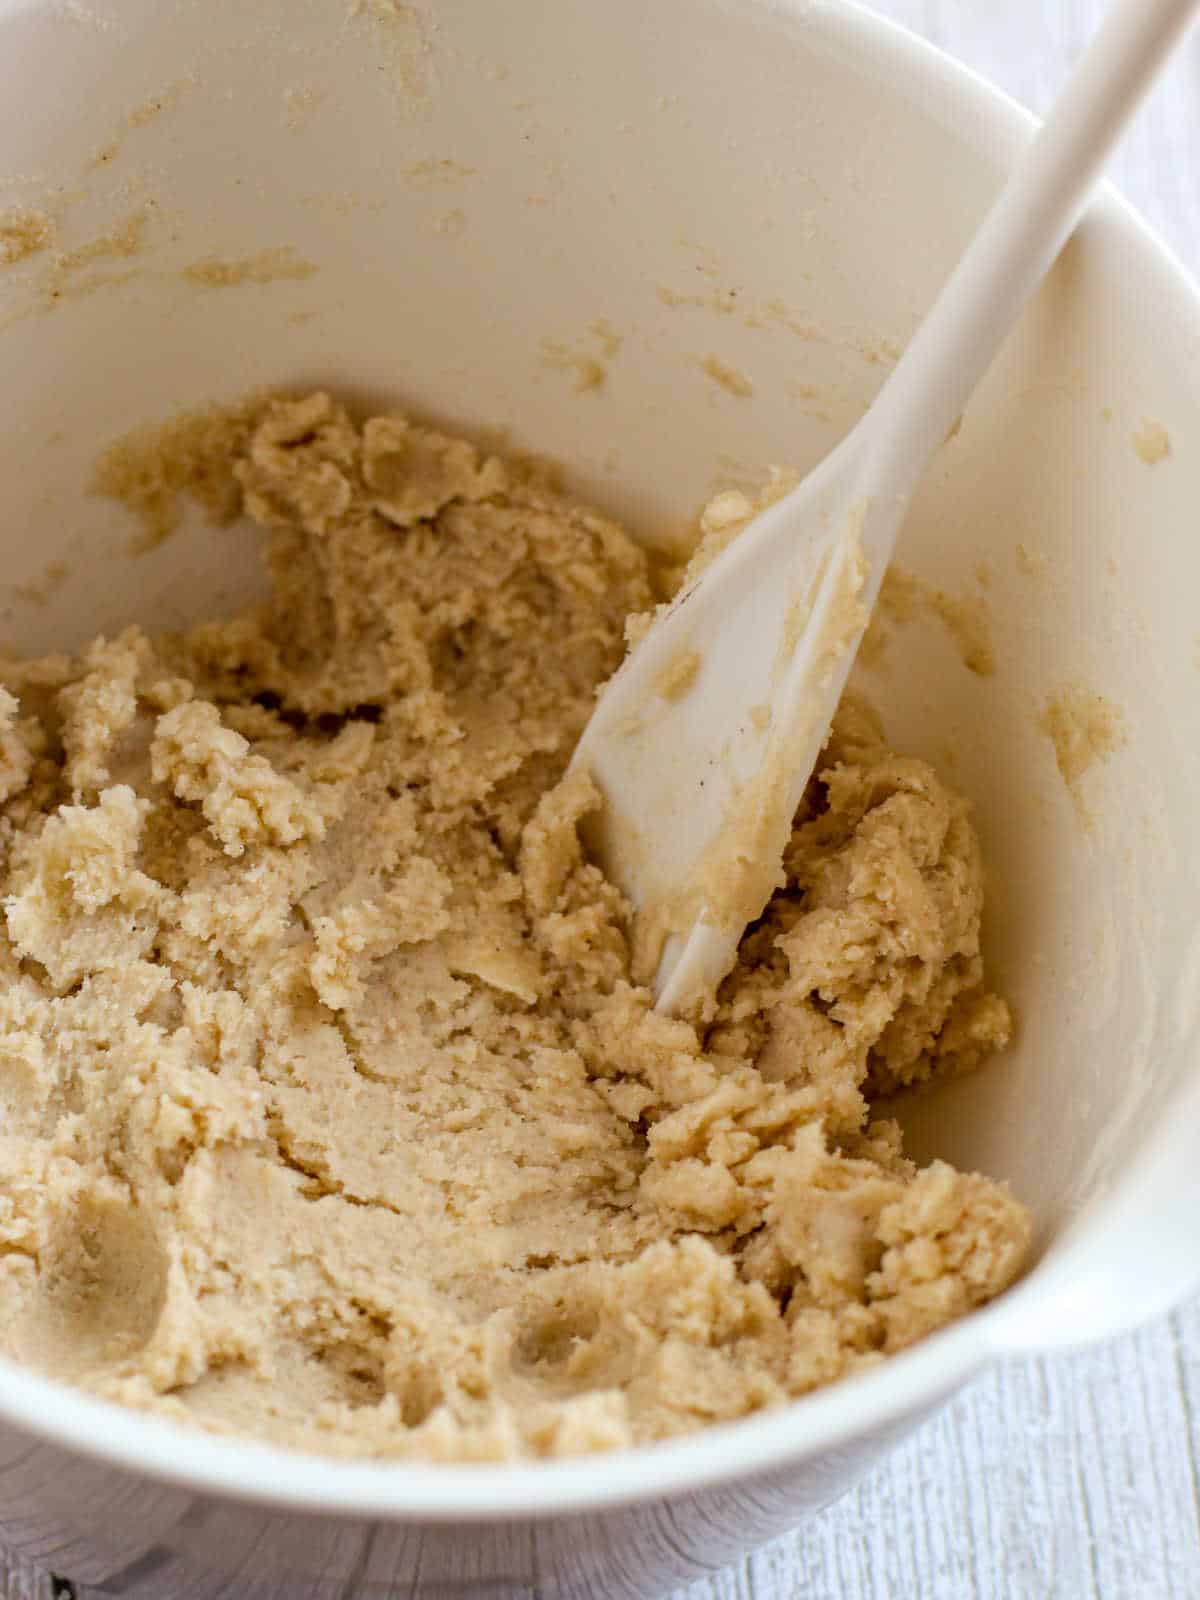
Step 6. Add the cold milk and stir just until combined. Stop when you don’t see any dry flour. Overmixing makes the topping tough instead of tender.
If you like this soft, biscuit-style topping, my Easy Homemade Biscuits use the same cold-butter method and are just as simple to make.
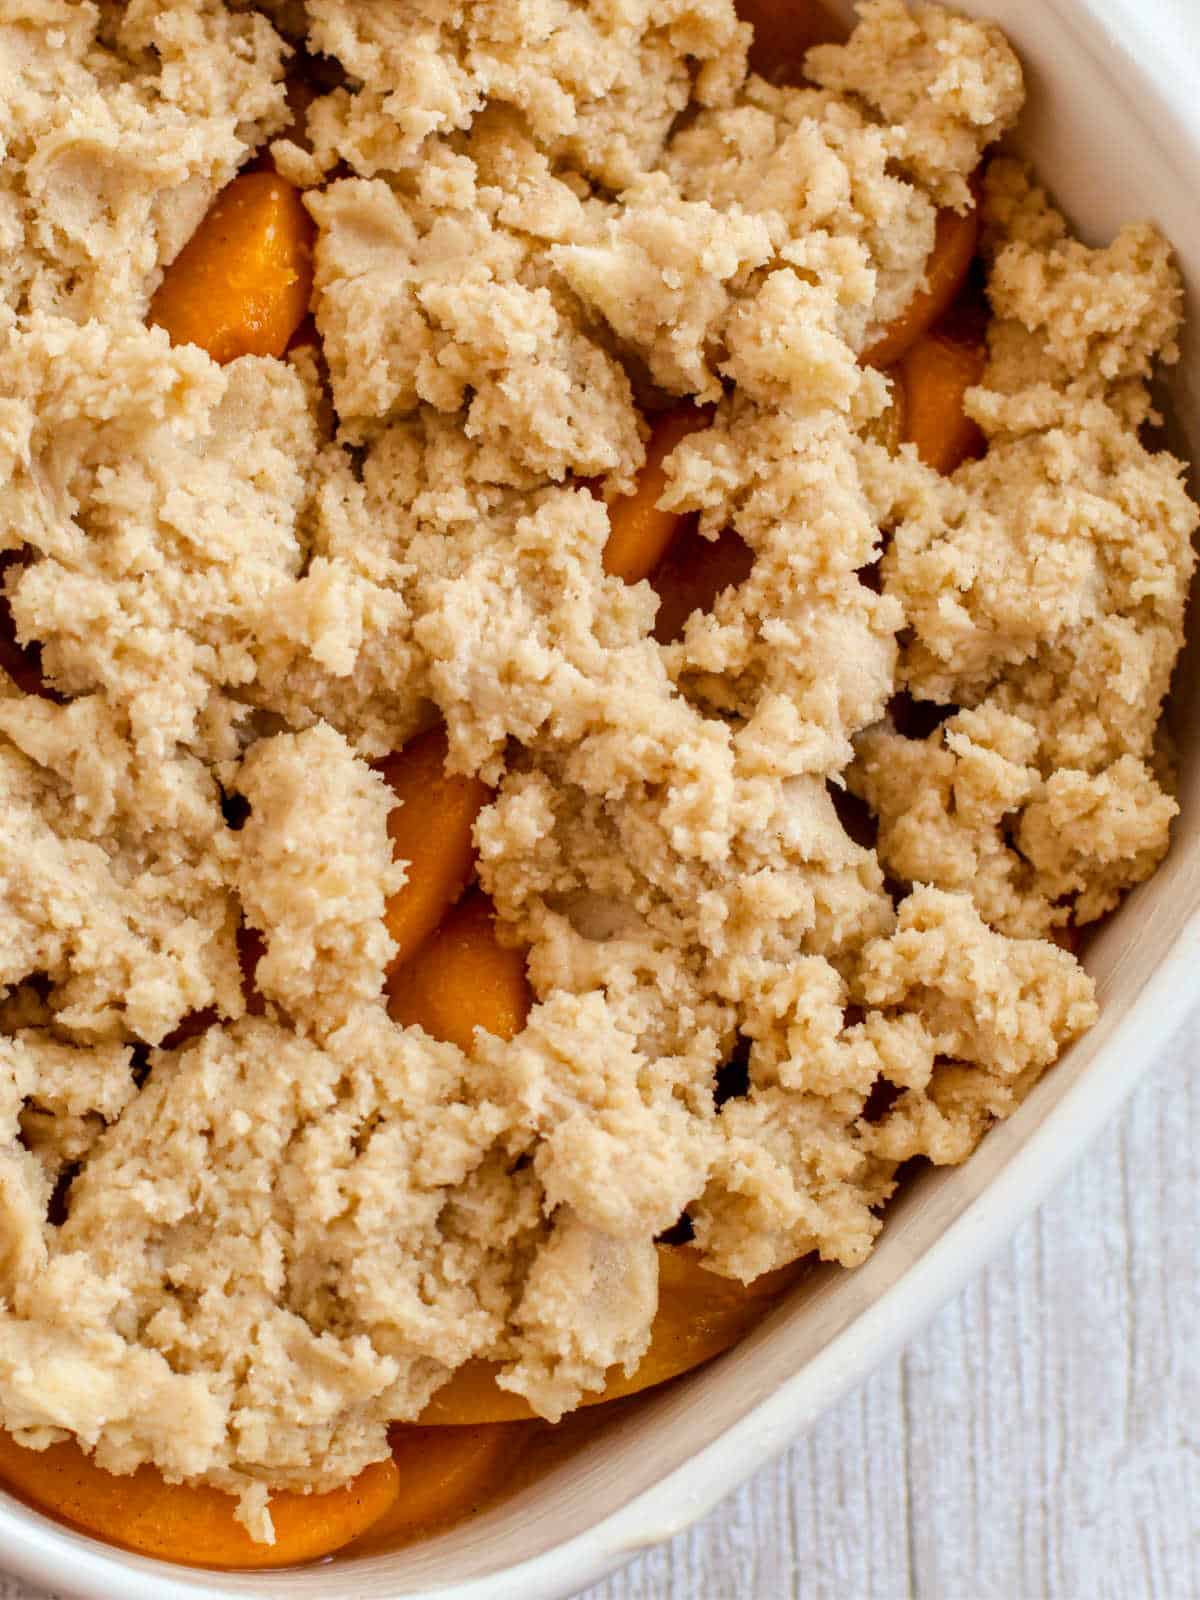
Assemble and bake
Step 7. Drop spoonfuls of the dough over the peach filling. Leave small gaps between the dollops so the fruit can peek through.
Step 8. Bake at 400 degrees F for 35 to 40 minutes until the topping is golden and the filling is bubbling around the edges.
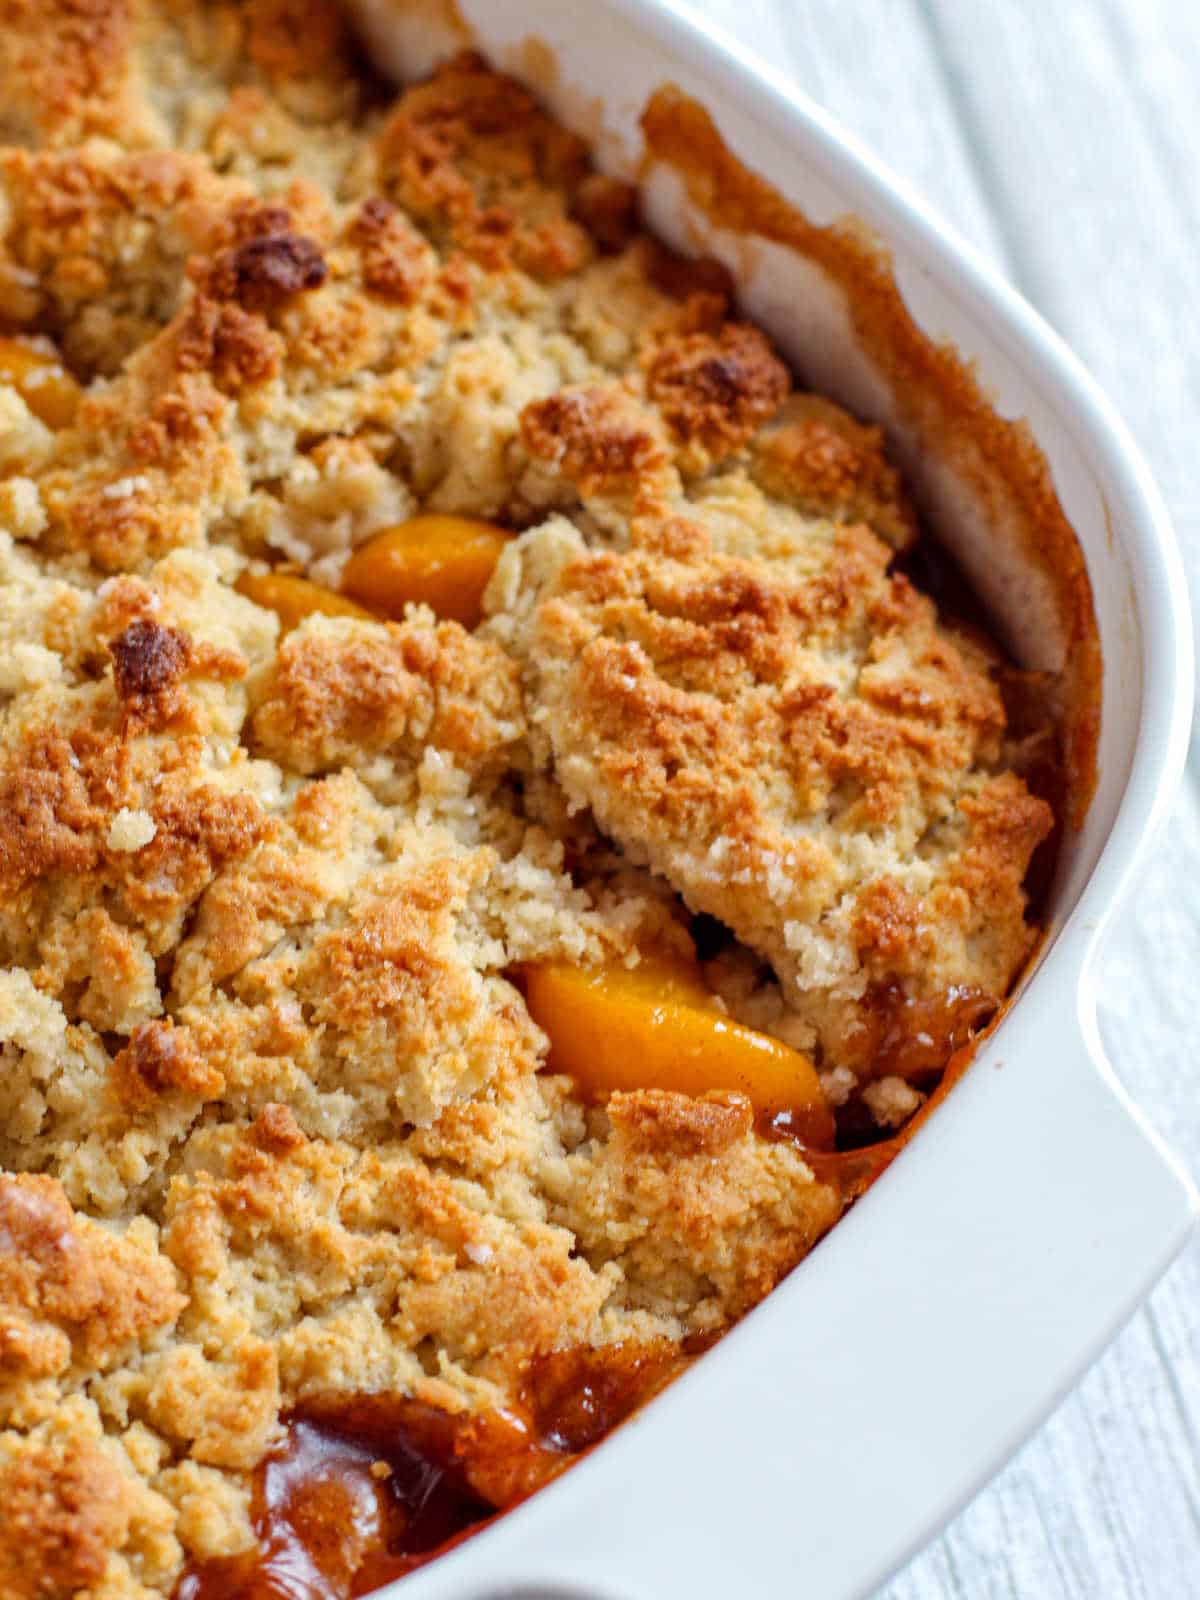
Step 9. Let the cobbler cool for 10 to 15 minutes before serving. The filling will firm up a little as it cools.
Storing Peach Cobbler
Store leftover cobbler in an airtight container in the refrigerator for up to 3 days.
To reheat, place it in a 350-degree oven for 10 to 15 minutes. This brings back the crisp topping in a way the microwave just can’t. If you’re reheating a single serving and need it fast, the microwave works fine, but the topping will be soft.
Freezing is possible, but the topping’s texture changes after thawing. If you want to freeze it, do so before adding the topping, or accept a softer texture once reheated.
Can I Use Fresh or Canned Peaches Instead?
Yes, and both work well. Here’s a quick guide:
Fresh peaches – Use about 5 cups of sliced peaches (6 to 7 peaches). Peeling is optional. If they’re very ripe or juicy, add an extra 1/2 teaspoon of cornstarch to help the filling set properly.
Canned peaches – Use two 15-ounce cans packed in juice, not syrup. Drain well and blot dry. Skip the stovetop step since they’re already soft, and reduce the sugar slightly.
If you’re in the mood for more simple, from-scratch desserts that actually work, take a look at my Dessert Recipes and pick your next bake.
Tips For Success
- Get the peaches as dry as possible – Too much moisture is the main reason cobbler turns out watery. After rinsing and blotting, let them sit on a towel for a few minutes if needed.
- Work fast with the topping – Overmixing makes it tough instead of tender.
- Leave those gaps – This is what keeps the topping from getting soggy. Steam needs somewhere to escape, or it softens the crust instead of browning it.
- Bake until fully golden – If the topping looks pale, it’s not done yet. Doughy spots usually mean it needs more time in the oven.
- Let it rest – Give the cobbler 1 to 15 minutes so the filling thickens instead of running everywhere.
Cobbler FAQ’s
Yes. You can assemble the whole thing, cover it, and refrigerate it for up to 24 hours before baking. You may need to add 5-10 minutes to the baking time since it’s going in cold. The topping won’t be quite as crisp if you assemble ahead, but it still tastes great.
Yes. A handful of raspberries, blueberries, or blackberries mixed in with the peaches is really good. The berries add color and a little tartness, balancing the sweet peaches nicely.
A 2-quart baking dish works best. A standard 8×8 or 9×9 square dish or a similar oval baking dish all work. Avoid anything too deep, or the topping won’t brown evenly.

Subscribe here for more great recipes, and follow One Hot Oven for more tasty sweet and savory recipes! Pinterest | Instagram | Facebook
Tried it? Rate ⭐⭐⭐⭐⭐ & comment below, your feedback keeps the oven mitts flying here at One Hot Oven.
Recipe
Peach Cobbler With Frozen Peaches


Ingredients
Peach Filling
- 32 ounces frozen peachs use 2-16 ounce bags
- ¼ cup white sugar
- ¼ cup brown sugar
- ½ teaspoon pure vanilla extract
- ½ teaspoon cinnamon
- 2 teaspoons lemon juice
- 1 tablespoon cornstarch
Biscuit Topping
- 1½ cups all purpose flour
- ¼ cup white sugar
- ¼ cup brown sugar
- 1½ teaspoons baking powder
- ½ teaspoon salt
- 8 tablespoons unsalted butter cold and cubed
- ⅓ cups whole milk
Instructions
How to make the peach filling
- Preheat oven to 400°F. Lightly grease a 2-quart baking dish and set aside.
- Thaw and drain the peaches: Place frozen peaches in a colander under cold running water to help them thaw quickly. Once thawed, blot dry with paper towels to remove as much excess moisture as possible
- Combine the thawed peaches, ¼ cup white sugar, ¼ cup brown sugar, cinnamon, lemon juice, and vanilla. Warm over medium heat for 5–7 minutes.
- Once bubbling, stir in the cornstarch and cook another 1–2 minutes until thickened. Pour into the greased baking dish.
How to make the cobbler topping
- In a large bowl, whisk together flour, both sugars, baking powder, and salt.
- Cut in the cold butter using a pastry blender or fingertips until the mixture looks crumbly with small butter pieces throughout. Add milk and stir until just combined, don't overmix.
Top and Bake
- Drop spoonfuls of dough over the filling, leaving small gaps so steam can escape while baking.
- Bake for 35–40 minutes, until the topping is deep golden brown and the filling is bubbling around the edges.
Notes
- If using fresh peaches: you’ll need about 5 cups of sliced fruit, which is roughly 6–7 medium peaches. Peeling them is optional, but it creates a smoother texture in the final dessert. There’s no need to thaw or drain anything here—just slice and toss the peaches directly with the sugar, lemon juice, cornstarch, and spices. Unlike frozen peaches, fresh ones don’t need to be pre-baked before adding the topping. One tip: if your peaches are particularly ripe or juicy, consider adding an extra ½ teaspoon of cornstarch to help thicken the filling and avoid excess liquid during baking.
- For canned peaches, use two 15 oz cans packed in juice—not syrup—for the best flavor and texture. Drain them thoroughly and blot with paper towels to remove any excess moisture. Since they’re already soft and sweet, you can skip thawing, peeling, and pre-baking. Just toss them gently with the other filling ingredients and proceed as directed. Because canned peaches are softer and sweeter than fresh or frozen, you may want to slightly reduce the added sugars in the filling.
- Cornstarch is key for creating that rich, syrupy filling—don’t skip it! Without it, the peaches may release too much liquid and result in a watery cobbler.
- If using very juicy fresh or canned fruit, consider increasing cornstarch by ½ teaspoon.
- Mix in a handful of raspberries, blackberries, or blueberries with the peaches for a summer fruit blend.
- Store leftovers in the fridge for up to 3 days. Reheat in the oven at 350°F for 10–15 minutes for the best texture.
As an Amazon Associate I earn from qualifying purchases.
Nutrition
Thank you for stopping by the One Hot Oven blog. Please leave a comment to say Hello, or just let me know what you are baking these days. I always love hearing from fellow bakers. Have any questions or just want to chat about the recipe? Please visit my about page for information, and I’ll be happy to help!
About Jere’
From learning to cook on a farm in Indiana to culinary school in California, my passion for food is never-ending. Turning on my oven to bake something for friends and family is my happy place, and I am glad to be here at One Hot Oven sharing both sweet and savory family-friendly recipes for your cooking and baking inspiration.